

ESO: Necromancer Class Overview
The Necromancer in The Elder Scrolls Online turns death into a combat resource. Its class skills summon temporary undead, create or use corpses, control space with bones, and restore allies. The class can be built for damage, tanking, or healing, but the three native skill lines are toolkits rather than fixed roles. A damage build can use Bone Tyrant defenses; a healer can use Grave Lord damage and corpse generation. This overview explains what each line does and how to build around the corpse mechanic without relying on old fixed tooltip numbers.
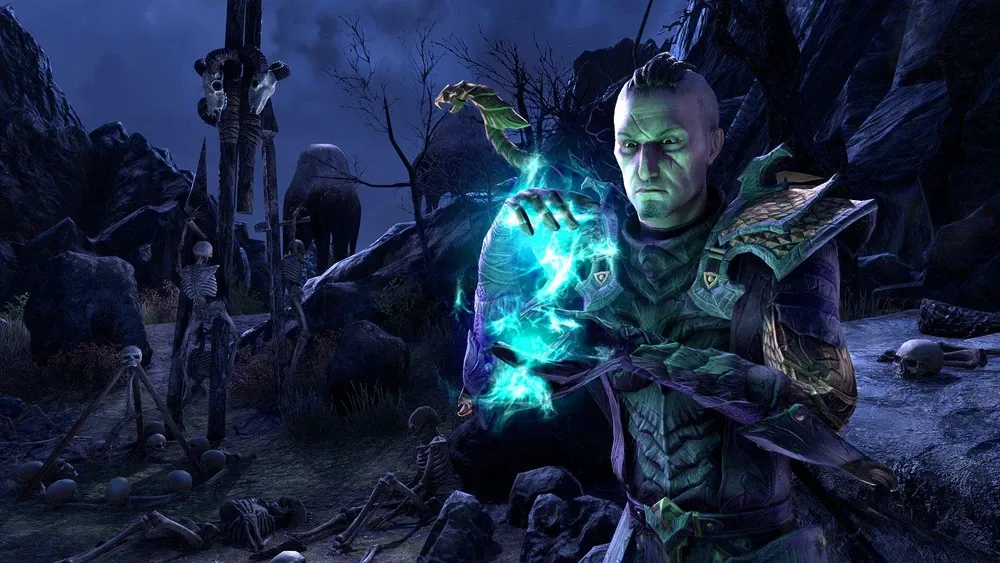
ESO Necromancer Overview
Grave Lord supplies offensive skills, undead summons, and the Colossus ultimate. Bone Tyrant supplies armor, control, self-healing, and the Bone Goliath transformation. Living Death supplies healing, cleansing, a healing spirit, and an ultimate that can resurrect allies. Corpses connect these lines: some skills create a usable corpse, while others consume one to gain an extra effect. Read the current in-game tooltip when choosing a morph, because costs, durations, and damage values change with combat updates.
The Necromancer class is available through the Elsweyr Chapter or the Necromancer Class upgrade in the Crown Store, according to ESO's class page. You can also encounter Necromancer skill lines through the subclassing system if your account meets its requirements. If you keep the Necromancer's native class lines instead of replacing one through subclassing, Class Mastery offers a different route for additional passives. That choice matters when comparing older builds, which predate these systems.
Some Necromancer abilities are marked as criminal acts. Read the tooltip and avoid using those skills around guards and civilians if you do not intend to incur a bounty. This is a practical class limitation, not a reason to avoid the class in combat content.
Strengths and Tradeoffs
| Strength | What to manage |
|---|---|
| Damage and group utility through Boneyard and Colossus | Place area effects where enemies will remain, not where they have already moved. |
| Defensive tools through Bone Armor, Death Scythe, and Bone Totem | Keep defensive effects active and react to encounter mechanics rather than relying on one skill. |
| Healing and emergency resurrection through Living Death | Watch group position and corpse availability; a corpse-consuming morph needs a usable corpse nearby. |
| Synergy between temporary summons and corpse spenders | Plan the sequence: generate a corpse, then spend it where its bonus matters. |
| Freedom to combine class, weapon, guild, and subclass skill lines | Check current unlock rules, skill points, and Class Mastery tradeoffs before copying a build. |
The main learning curve is timing. A corpse is a temporary resource at a location, not a passive inventory stack. You may need to move, wait for a summon to end, or cast a generator before a spender can receive its bonus. In mobile fights, a useful ability with no corpse setup may outperform a stronger theoretical combination that never lands. Practice the sequence on ordinary enemies before taking it into a trial or a PvP fight.
Necromancer Skill Lines and Abilities
The lists below focus on the function of current skills and their morphs. They deliberately omit static cost, range, rank, duration, and damage tables. Those values depend on updates and character modifiers, and the old article's numbers already disagreed with current tooltips. Use the Skills screen for the exact figures on your character. The line name and ability name are more useful starting points for deciding whether the skill belongs on your bar.
Grave Lord: Damage and Corpse Generation
Grave Lord is the offensive line. It combines direct attacks, damage over time, temporary summons, and an ultimate that helps a group attack a target. It is more than a generic “DPS line”: some choices generate corpses for the rest of your kit, while Boneyard offers a synergy other players can activate. The distinction between a base skill and its morph matters, especially for the Sacrificial Bones branch.
A simple learning pattern is to establish a corpse source, place Boneyard on enemies that will stay in the area, and then spend the corpse when the enhanced effect will hit. You can fill remaining bar slots with weapon or other class skills that cover your rotation and survival needs. Do not copy old values for Colossus's vulnerability effect; its magnitude and duration have changed since this article's first version.
| Skill or morph | What it offers | When to consider it |
|---|---|---|
| Flame Skull | A ranged skull attack; its repeated cast has an extra effect and can create a corpse. | A straightforward class attack while learning the line. |
| Ricochet Skull | A Flame Skull morph whose empowered cast can bounce to nearby enemies. | When targets cluster and you want the skull to reach more than one. |
| Venom Skull | A Stamina-oriented skull morph that deals Poison Damage and counts other Necromancer casts toward its sequence. | When your bar uses Stamina and multiple class abilities. |
| Sacrificial Bones | Summons a skeleton that empowers your necromantic abilities and can leave a corpse in combat. | When your rotation needs a damage buff and a corpse source. |
| Blighted Blastbones | A morph that sends a skeleton toward an enemy to explode and apply a disease-based effect. | When you prefer direct pressure instead of the self-sacrifice morph. |
| Grave Lord's Sacrifice | A longer-lasting self-buff morph of Sacrificial Bones with an interaction for Flame Skull. | When you want the self-buff branch and use Flame Skull. |
| Boneyard | A ground area that damages enemies and can consume a corpse for more effect; an ally can activate Grave Robber. | For group damage and a place to spend a nearby corpse. |
| Avid Boneyard | A Boneyard morph that allows you to activate your own Grave Robber synergy. | For solo play or a build that wants control over the synergy. |
| Unnerving Boneyard | A Boneyard morph that applies defensive debuffs to enemies in its area. | For a group that benefits from the debuff and can keep targets inside. |
| Skeletal Mage | A temporary ranged summon that attacks enemies and can leave a corpse. | For sustained pressure and a predictable corpse source. |
| Skeletal Archer | A Stamina-oriented morph of the Skeletal Mage summon. | For a Stamina build that wants a temporary summon. |
| Skeletal Arcanist | A morph that spreads the summon’s attack to nearby enemies. | For packs of enemies rather than one isolated target. |
| Shocking Siphon | Uses a corpse to damage enemies near a tether. | When you can place a corpse along a useful damage path. |
| Detonating Siphon | A damage-focused Siphon morph with an additional end effect. | When your combat plan rewards keeping enemies near the tether. |
| Mystic Siphon | A Siphon morph with resource recovery. | When sustain is the limiting factor for your bar. |
| Frozen Colossus | Calls down a Colossus that damages an area and applies Major Vulnerability. | For coordinated group damage windows. |
| Glacial Colossus | A Colossus morph that adds control to its final strike. | When the final hit and group control are valuable. |
| Pestilent Colossus | A Disease Damage morph of the Colossus. | When your build and encounter favor its damage profile. |
Important morph distinction: Sacrificial Bones is the current base skill listed in the Grave Lord line; Blighted Blastbones and Grave Lord's Sacrifice are different paths. The old article mentioned Blastbones in a few passive descriptions without explaining this choice. Inspect the branch before building a rotation around one specific morph. Also check the current passive descriptions for Death Knell, Dismember, Reusable Parts, and Rapid Rot instead of applying the old article's percentage values to a new build.
Bone Tyrant: Defense and Control
Bone Tyrant gives Necromancers ways to protect themselves, hold space, and turn corpses into recovery or ultimate generation. It is often associated with tanks, yet many solo and damage builds value Bone Armor or Death Scythe. The line's skills do not by themselves define your group role: a tank still needs the right taunt, positioning, and encounter knowledge, while a damage dealer still needs a complete damage rotation.
Its defensive tools work at different moments. Bone Armor belongs in your regular maintenance, while Death Scythe is a response to nearby enemies. Bitter Harvest spends corpses after they are available; Bone Totem and Grave Grasp influence enemy movement and allied positioning. A defensive plan that includes only armor can fail if you have no answer to sustained pressure or crowd control.
| Skill or morph | What it offers | When to consider it |
|---|---|---|
| Bone Goliath Transformation | Temporarily transforms you into a large undead form with additional Health. | For a defensive emergency or a build planned around the transformation. |
| Pummeling Goliath | A Goliath morph with an offensive Bash interaction. | When your build is designed around close-range Bash attacks. |
| Ravenous Goliath | A Goliath morph that damages nearby enemies and heals you while transformed. | When you want the transformation to pressure nearby targets. |
| Death Scythe | A close-range sweep that heals you based on enemies hit. | For self-healing while fighting nearby targets. |
| Hungry Scythe | A Scythe morph that adds healing over time. | For a steadier healing pattern after the initial hit. |
| Ruinous Scythe | A Stamina morph that changes the damage type and applies an additional combat effect. | For a Stamina-oriented close-range setup. |
| Bone Armor | Grants defensive Resolve effects and interacts with corpse use while fighting. | For a general defensive slot on a Necromancer bar. |
| Beckoning Armor | An armor morph that draws ranged attackers toward you and can taunt them. | For a tank who wants to bring scattered ranged enemies closer. |
| Summoner's Armor | An armor morph that reduces the cost of Necromancer summon skills while active. | For a build that repeatedly uses those summons. |
| Bitter Harvest | Consumes nearby corpses for healing and ultimate generation. | When a fight creates reliable corpses around you. |
| Deaden Pain | A Bitter Harvest morph with an additional protection effect during its healing. | For a defensive corpse-spending choice. |
| Necrotic Potency | A Bitter Harvest morph focused on gaining more ultimate from corpses. | When ultimate generation matters more than the other morph effect. |
| Bone Totem | Places a protective totem and disrupts nearby enemies. | For a group fighting in an area it can hold. |
| Agony Totem | A totem morph with a synergy for allies. | When group members can use that synergy. |
| Remote Totem | A totem morph that can be placed away from the caster. | When positioning a totem at range solves the encounter. |
| Grave Grasp | Sends skeletal claws through an area to hinder enemies. | For controlling a path or interrupting enemy movement. |
| Empowering Grasp | A Grasp morph that also supports allies in its area. | When both crowd control and allied support are useful. |
For a tank, keep your taunt and survival plan separate from the class fantasy. Beckoning Armor can help pull certain ranged enemies, but it does not remove the need to manage priority targets. For solo play, the Scythe branch can provide healing while you continue to deal damage. In PvP, opponents can move out of your ground effects, so evaluate whether your control skills fit the pace of the fight before assigning a bar slot.
Living Death: Healing and Resurrection
Living Death contains both immediate and sustained healing. It also includes a cleanse and an ultimate for bringing downed allies back. This makes the line useful to healers, but some tools help solo and tank builds as well. Its corpse-consuming morphs reward planning: a heal that consumes a corpse may deliver an extra effect, but only if the corpse is in the right place when you cast.
Compare the base skills with their morphs instead of assuming that a larger tooltip number is always better. Blood Sacrifice may reach another target when it consumes a corpse. Resistant Flesh adds resistance to the target. Enduring Undeath emphasizes a longer area heal, while Renewing Undeath adds a cleanse. The choice depends on what your group lacks, not on a universal “best healer” ranking.
| Skill or morph | What it offers | When to consider it |
|---|---|---|
| Reanimate | Resurrects downed allies in an area. | For an emergency group recovery when several allies are down. |
| Animate Blastbones | A Reanimate morph that can use other corpses to summon Blighted Blastbones. | When corpse availability makes the additional summon useful. |
| Renewing Animation | A Reanimate morph that restores resources for allies it resurrects. | When recovered teammates need resources to re-enter the fight. |
| Render Flesh | Heals you or an ally and applies a temporary healing penalty to the caster. | For a direct heal when the tradeoff is acceptable. |
| Blood Sacrifice | A Render Flesh morph that can consume a corpse to heal a second target. | When multiple allies need immediate attention and a corpse is nearby. |
| Resistant Flesh | A Render Flesh morph that grants the healed target defensive resistance. | When the recipient needs support against further hits. |
| Expunge | Removes harmful effects from the caster. | When self-cleansing is more useful than another heal. |
| Expunge and Modify | A cleanse morph that also restores resources when effects are removed. | When the fight applies removable effects often. |
| Hexproof | A cleanse morph that can remove more negative effects. | When multiple harmful effects are the main problem. |
| Life amid Death | Heals an area and can consume a corpse for continued healing. | For group healing in a place allies can occupy. |
| Enduring Undeath | A Life amid Death morph that uses corpses to extend its healing. | When the group can stay in the healing area. |
| Renewing Undeath | A Life amid Death morph that adds a cleanse when it consumes a corpse. | When allies need both healing and effect removal. |
| Spirit Mender | Summons a temporary spirit that heals you or an ally and can leave a corpse. | For recurring healing and a corpse source. |
| Intensive Mender | A shorter-lived spirit that heals more intensely and reaches nearby allies. | For a short healing window. |
| Spirit Guardian | A spirit morph that redirects some incoming damage from you. | When personal survival is a priority. |
| Restoring Tether | Channels healing through a corpse to you and allies along its path. | When a corpse and group position make the tether useful. |
Do not treat Reanimate as a substitute for ordinary healing. Its greatest value comes after allies have fallen; maintaining healing and avoiding preventable damage comes first. Likewise, Spirit Mender is temporary. Track its duration and the corpse it leaves rather than assuming it is a permanent pet.
How the Corpse Loop Works
Create: A summon or certain Grave Lord skills can leave a corpse during combat. Ordinary defeated enemies can also provide corpses. Watch where that corpse appears: a corpse across the room may be useless to a skill with a local target or tether path.
Spend: Boneyard can consume a corpse to strengthen its area effect. Bone Tyrant can spend corpses through Bitter Harvest and its morphs. Living Death has healing morphs that gain an extra function from a corpse. These are different uses of the same battlefield resource; if one consumes the only corpse, another ability may need a new source.
Adapt: In a stationary boss fight, plan where to place your summons and Boneyard. In fast-moving encounters, use skills that still work without a corpse and reserve corpse spenders for moments when you can actually benefit. This is why a copied static rotation often feels awkward on a new encounter: the corpse location and enemy movement have changed.
Check the tooltip: The current Grave Lord list includes Sacrificial Bones and its morphs, while the original article summarized a different Blastbones setup. Recent ESO updates also changed class and combat systems. Review your selected morphs after returning to the game, and compare a build guide against the live skill descriptions before spending resources on gear.
Build Directions for PvE and PvP
Damage Dealer
Start with Grave Lord as the offensive core. Choose whether the Sacrificial Bones branch should buff your class damage or send a damaging skeleton toward a target. Keep an area skill such as Boneyard for groups of enemies, and select a corpse generator so its enhanced effect is available when needed. Add a defensive skill if melee range or incoming damage makes a full offense bar unreliable. Weapon skills can fill gaps in single-target pressure, ranged reach, or sustain.
For a group boss, ask what the group already supplies. Colossus can contribute Major Vulnerability, but overlapping identical debuffs reduces the value of repeating it without coordination. In an encounter with constant movement, a theoretically stronger stationary area effect may do less work than a simpler attack you can land. Compare your actual combat performance rather than only a tooltip snapshot.
Tank
Bone Armor and its morphs are a natural defensive starting point. Add a source of healing or recovery that you can use while managing enemies. Beckoning Armor has a specific role in drawing ranged targets closer, and Bone Totem or Grave Grasp can help control an area. Keep the game's taunt requirements and boss mechanics at the center of the build; the Necromancer's class identity does not automatically make every enemy focus you.
A tank can use corpses left by summons or fallen enemies for Bitter Harvest and related effects. The value of this plan changes with encounter adds and positioning. When a boss offers few corpses, build a way to generate your own or choose a survival option that does not depend on a corpse. Consider how much time you can spend casting support skills while maintaining taunt and blocking heavy attacks.
Healer
Living Death supplies a direct heal, area healing, cleansing, and a healing spirit. Pick the morphs that solve your group's needs. A mobile group may not stand in a long area heal; a fight with frequent removable effects may make cleansing more valuable. Spirit Mender helps with ongoing healing while you use other skills, and Reanimate is an emergency ultimate rather than your normal healing plan.
Keep corpse access in mind when relying on a morph's extra healing or cleanse. A healing build still needs resource management and awareness of the other support tools available from weapons, guild lines, or subclass choices. If you subclass, read the system's restrictions and confirm how replacing a native class line affects your skill and Class Mastery options.
Solo and PvP
Solo play rewards a balanced bar: enough damage to finish fights, a heal you can use immediately, and a defensive tool for mistakes. Death Scythe and Bone Armor can be useful alongside Grave Lord pressure. In PvP, do not assume opponents will stand inside Boneyard or Totem. Position control skills where they restrict a route, and keep an alternative for targets who move away.
Necromancer abilities labeled as criminal acts matter most in towns and populated areas, not in the middle of a dungeon. Be aware of them when moving between combat and vendors. For actual PvP strength or best-in-slot gear, verify a current build for your ruleset; patches and subclassing have changed the comparison enough that a fixed older gear list would mislead readers.
Gear and Skill Choices
There is no universal Necromancer armor type or set named “Death Shroud” built into the class. Gear comes from ESO's general equipment and set systems. Choose it for your role, resource use, content, and current patch rather than from the class name. Damage builds should consider whether their attacks are primarily single-target or area based and whether sustain forces them to interrupt the rotation. Tanks should evaluate survival and group support. Healers should evaluate recovery, healing uptime, and the support effects their group already has.
When comparing items, test the whole setup. A damage set may look strong on a stationary target but contribute less during a movement-heavy fight. A tank set is only useful if you can survive the mechanics that matter. A healer set should complement, rather than duplicate, the group's other support effects. These principles remain useful when an individual set is rebalanced; exact rankings require a current build and the live game.
Skill points are another constraint. You do not need every morph listed above to play the class well. Choose a role first, buy the abilities needed for that role, and add alternatives when you encounter a problem the current bar cannot solve. The current Skills menu tells you the actual unlocks and costs for your character, which the older table of fixed ranks could not do reliably after updates.
Class Mastery and Subclassing
ESO now lets eligible characters use skill lines from other classes through subclassing. A Necromancer can keep native lines or replace a line to gain tools from another class, subject to the game's restrictions. The support guide explains the unlock quest and the skill-line rules. This expands build possibilities, but it also means a build labeled “Necromancer” may use abilities that were not available to older versions of the class.
Class Mastery is a separate system for characters who retain their native class skill lines. ESO's live Update 50 notes state that swapping out a native class line through subclassing removes active Class Mastery purchases until the character returns to native lines. Compare the benefits of a subclass line with the passives you would give up. You do not need to choose a “meta” setup to understand the class; start with the native lines, learn their corpse interactions, then decide whether another line solves a specific gap.
FAQ
Can an ESO Necromancer be a tank, healer, or damage dealer?
Yes. Grave Lord, Bone Tyrant, and Living Death provide tools for each role, and ESO also has weapon, guild, and subclass lines. Build for the group role you intend to perform rather than assuming one class line completes the role by itself.
Does every Necromancer skill require a corpse?
No. Some skills create corpses, some receive a bonus when consuming one, and others function without corpses. Read the chosen morph's tooltip to see which kind of interaction it has.
Is Blastbones still a Necromancer skill?
The current Grave Lord line lists Sacrificial Bones with the Blighted Blastbones and Grave Lord's Sacrifice morphs. Those morphs have different purposes. An older guide that simply says “cast Blastbones” may be referring to a different version or branch.
Can Necromancer abilities cause a bounty?
Some are marked as criminal acts. Check the tooltip before casting them near civilians or guards.
Should I copy the old ability-cost table?
No. The old table mixed outdated values and omitted changes to the class. Use the current in-game tooltip for costs, range, duration, and damage, then choose skills by function and role.
How does Class Mastery affect subclassing?
Class Mastery rewards keeping native class lines. If you replace a native line through subclassing, ESO's live notes say the active Class Mastery passives are unlearned until you return to all native lines.
Conclusion
Necromancer is at its best when you understand what your skills do with corpses: which actions create one, which consume one, and when positioning makes the interaction worthwhile. Start with the three native lines, choose a role, and use the current tooltip to check exact values. Build around the encounters you play rather than a frozen table from an older patch. Readers who want to explore related services can visit The Elder Scrolls Online page.
