

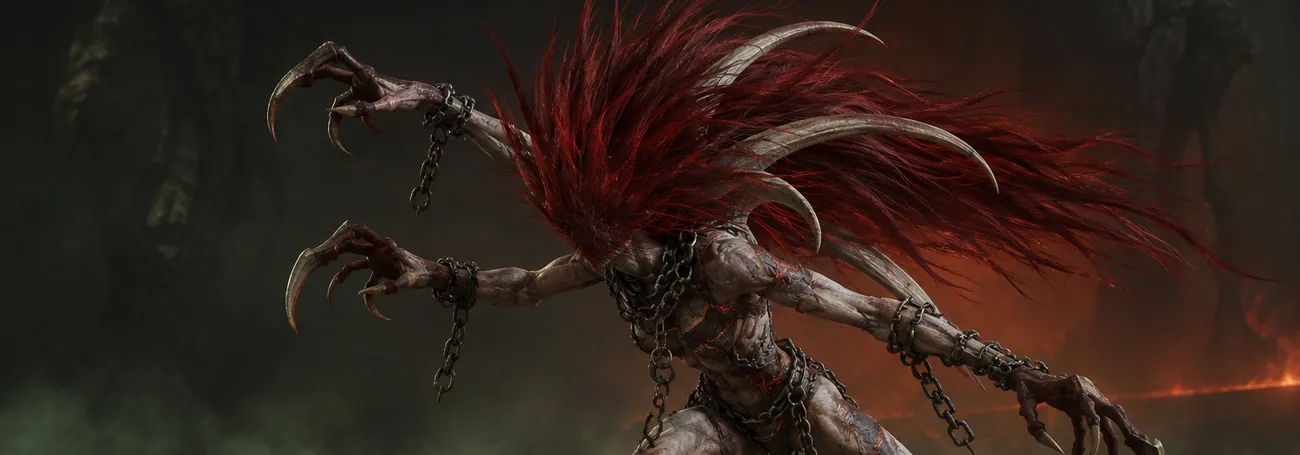
Diablo 4 Andariel Guide: Location, Key, Fight and Loot
Andariel, the Maiden of Anguish, waits at the end of Hanged Man's Hall in Kehjistan. Set Torment I or higher, pick the lair icon on the map and teleport straight there. The fight at her altar is free, and her Hoard drops Uniques for every class with a chance at Mythics, so she is one of the bosses you can farm again and again in Diablo 4.
This guide covers that repeatable boss; the story fight from the campaign is a different encounter. You'll find out how to reach her, which key you need and when, what she throws at you and how to aim your farm at the item you want.
Hover over or tap an item name to see its tooltip. The cards show value ranges from the game data, so your own roll can differ.
Andariel at a glance
- Where: Hanged Man's Hall in Kehjistan. Teleport straight to it from the map.
- Difficulty: Torment I or higher.
- The fight: free to start at the altar.
- The loot: after the kill a Hoard appears. Opening it costs 1 Greater Lair Key, and every player opens their own.
- Why farm her: a fixed pool of 23 Uniques, two or three per class, plus the for everyone.
Where to find Andariel
Andariel is a Greater Lair Boss, the middle of the three Lair Boss tiers, between the Initiate bosses and the top-tier fights. Her lair is Hanged Man's Hall in Kehjistan, the desert region of Sanctuary.
- Set Torment I or higher. Lair Bosses don't open on lower difficulties.
- Open the map and find the lair icon; Lair Bosses have their own marker. Pick Hanged Man's Hall and teleport there.
- Read the tooltip on the map. It names the boss and shows which key her Hoard takes and how many of those keys you carry.
- Clear your way to the altar at the end of the hall and use it. Andariel shows up and the fight starts.
You don't need summoning materials. The altar starts the fight for free, any number of times, and the key only matters once she's dead.
Which key you need and where to get it
When Andariel dies, a Hoard appears in the arena. That chest holds the real rewards, and it is personal: you open your own Hoard with your own key. In a group, a friend's key does nothing for you, so everyone brings one.
| Item | Where it comes from | What it does |
|---|---|---|
| Greater Lair Key | The Hoards of the Initiate Lair Bosses: Varshan, Grigoire, Lord Zir, Beast in the Ice and Urivar | Opens one Andariel Hoard. Duriel, The Butcher and Harbinger of Hatred take the same key. |
| Lair Key | Everyday endgame: War Plans, Helltide chests, World Bosses, Legion Events and Whisper Caches | Opens the Hoard of an Initiate Lair Boss, which in turn drops Greater Lair Keys |
| Pincushioned Doll | Andariel herself, as her Boss Trophy | Not a key. Players report that 5 dolls in the Horadric Cube give a random Unique from her pool. |
The dependable route is a chain: Lair Keys from your usual activities, then Initiate bosses, then Andariel. Some guides also list Greater Lair Keys dropping straight from Helltide, World Bosses or the Kurast Undercity, but they don't agree on which key tier drops where. Check what your own rewards contain before you plan a long session around them.
The Pincushioned Doll recipe is a player finding we haven't tested, and the Horadric Cube needs the Lord of Hatred expansion. You can farm Andariel without either.
How the Andariel fight goes
Andariel attacks with poison, fire, lightning and shadow, so bring resistances against all four. Her arena fills up with overlapping hazards fast. Blizzard doesn't publish a boss manual, so this table follows what players and guide writers describe:
| Hazard | How you spot it | What to do |
|---|---|---|
| Dash | She lunges forward in a straight line | Step to the side or dodge through it |
| Poison projectiles | A fan of green shots in front of her | Move out of the arc. A hit keeps poisoning you for a while. |
| Lightning balls | Small sparks drifting across the floor | Easy to walk around, just don't ignore them during a busy phase |
| Seals and marks on the ground | Glowing red circles under your feet | Never fight inside one. They hit very hard. |
| Effigies of Anguish | Andariel vanishes and pillars with a shield around them appear | Walk into each shield and break the pillar inside |
| Rotating beams | Beams sweep across the arena while the pillars stand, and fire statues at the edge join in the second half | Watch which way they turn and move with them, keeping clear room ahead of you |

Her disappearing acts
Andariel leaves the fight more than once. Each time, the Effigies of Anguish rise around the arena inside protective barriers. Walk into a barrier and destroy the pillar while a beam sweeps through the middle. On her second exit the floor also gets blood marks, so watch your step while you break the pillars.
Later in the fight, statues on the edge of the platform start firing beams of fire toward the center, and those turn too. With beams, marks and projectiles all at once, this is the busiest part, so don't chase damage through it. A few seconds without hitting her cost far less than a death.
Early hits make the end harder
Players found that hits from her mechanics stack up and make you take more damage from her later. Nobody has published exact numbers for it. Dodge cleanly from the start, because every sloppy early hit makes the end of the fight harder.
Use the stagger window
Like other Lair Bosses, Andariel has a stagger bar. Fill it and she is staggered for a short moment, which is the time to fire your biggest skills. Strong builds can also push through some of her phases faster with raw damage, but don't count on skipping mechanics until your character really does that much damage.
Before you pull her
- Resistances: all elements, not just poison. Elixirs help if your gear is still short.
- Movement: keep a dash, teleport or leap free for the moment beams and projectiles overlap.
- Single-target damage: she is one big target, so pick skills that hit one enemy hard.
- Learn first, pay later: the fight is free. Try her on a lower Torment, then move up once the pattern feels easy.
What Andariel drops
Andariel has her own Unique pool. Her Hoard targets that list, while extra Unique drops can also come from the general pool. The higher your Torment, the better the item quality. Most community loot tables for Season 15 list this pool:
| Class | Uniques from Andariel |
|---|---|
| All classes |  (helm) |
| Barbarian |  (two-handed axe)  (two-handed mace)  (amulet) |
| Druid |  (chest)  (pants)  (ring) |
| Necromancer |  (shield)  (pants)  (amulet) |
| Paladin |  (gloves)  (ring) |
| Rogue |  (helm)  (boots)  (boots) |
| Sorcerer |  (mace)  (ring)  (amulet) |
| Spiritborn |  (chest)  (gloves) |
| Warlock |  (two-handed sword)  (two-handed mace)  (amulet) |
OP.GG, Icy Veins and Vitablo list all 23 items here; D4Guides leaves out and .
The is the one every class can use: it pulls enemies together and makes them take more damage when you try to stun, freeze or otherwise lock them down. Barbarians come for and its damage bonus after Steel Grasp. Sorcerers chasing a Pyromancy build want , and Necromancers running Bone Storm want the .
Mythic Uniques from Andariel
Since Season 15, a Mythic from Andariel's Hoard also comes from her own pool instead of the whole Mythic list. On top of her pool she drops ordinary random loot, and that side loot can still roll any Mythic. Blizzard also raised the Mythic drop rate for Greater Lair Bosses a little.
Blizzard hasn't published which Mythics sit in her pool or the odds per kill, so plan your farm around her Uniques and count any Mythic as a bonus. carries her name, but that alone doesn't make it a sure drop from her.
Farm smarter
- Pick your target first. Check that the item is in her pool above. If it isn't, another boss is the better farm.
- Count your keys before you go. The map tooltip shows how many Greater Lair Keys you carry. Each kill you want to loot costs one.
- Fast kills beat high Torment. A Torment where you never die gives more Hoards per hour than one where every third try fails.
- Group up with keys. In a party everyone needs their own key, but kills go faster, so you open more Hoards per hour.
- Keep the dolls. Pincushioned Dolls stack up while you farm, and the Cube recipe gives them a use once you have Lord of Hatred.
Quick plan for an Andariel farm
- Collect Lair Keys from War Plans, Helltide, World Bosses and Legion Events, then turn them into Greater Lair Keys at the Initiate bosses.
- Check your build for resistances against all elements, a free movement skill and strong single-target damage.
- Teleport to Hanged Man's Hall from the map, on a Torment you clear without deaths.
- Dodge from the first second, break the Effigies inside their shields and move with the beams.
- Open your Hoard with one Greater Lair Key and read every Unique.
- Use the altar again while your keys last, and step up a Torment once the kills feel easy.
Conclusion
Once you know her, Andariel is an easy farm. The fight costs nothing, one Greater Lair Key opens your Hoard, and her pool tells you which Uniques you're rolling for. Learn the Effigy phases on a low Torment and keep running Initiate bosses so you always have Greater Lair Keys for her.
Short on time or keys? Our Diablo 4 Boss Runs include Andariel.
FAQ
In Hanged Man's Hall in Kehjistan. Once you know the lair, open the map, pick its icon and teleport there. The altar at the end of the hall starts the fight.
Use the altar at the end of Hanged Man's Hall on Torment I or higher. Starting the fight costs nothing and you can repeat it as often as you like. You only spend a key on the Hoard after she dies.
One Greater Lair Key opens your Hoard after the kill. In a group every player needs their own key, because each player opens a personal Hoard.
The reliable source is the Hoard of an Initiate Lair Boss: Varshan, Grigoire, Lord Zir, Beast in the Ice or Urivar. Those Hoards take a regular Lair Key, which you get from War Plans, Helltide, World Bosses, Legion Events and Whisper Caches.
Uniques from her own pool: the Godslayer Crown for every class and two or three class items each, for example Drognan's Anguish for Sorcerers and Lidless Wall for Necromancers. Higher Torment gives better item quality.
She can. Since Season 15 a Mythic from her Hoard comes from her own pool, and her random side loot can still roll any Mythic. Blizzard hasn't published which Mythics are in her pool or the odds, so no kill guarantees one.
They are Andariel's Boss Trophy, not a key. Players report that 5 dolls in the Horadric Cube give a random Unique from her pool. We haven't tested it, and the Cube needs the Lord of Hatred expansion.
Yes. The fight goes faster with friends, but every player opens their own Hoard with their own Greater Lair Key.
When you attempt to Incapacitate an enemy, you mark them and all surrounding enemies, pulling them in and dealing [7.5% - 10%][x] increased damage to them.
The item's unique power; other affixes are not shown.
Enemies hit by Steel Grasp take [45% - 60%][x] increased damage from you for 9 seconds.
Barbarian only
The item's unique power; other affixes are not shown.
Upheaval gains the Iron Burst Variant for free and deals [60% - 75%][x] increased damage.
Barbarian only
The item's unique power; other affixes are not shown.
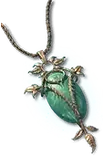
Berserking's damage bonus is increased by [+56.7% - +73.3%]. While not Healthy, you are always Berserk.
Barbarian only
The item's unique power; other affixes are not shown.
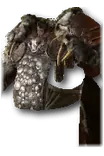
For 2 seconds after Casting Trample, you may Cast Trample again without incurring the Cooldown. Trample additionally deals [150% - 200%][x] bonus damage.
Druid only
The item's unique power; other affixes are not shown.
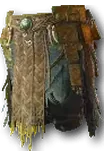
Your Wolf Companions are infused with the power of the storm, dealing [80% - 100%][x] increased Lightning damage and gaining the Storm Howl ability.
Druid only
The item's unique power; other affixes are not shown.
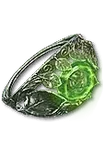
Casting or Channeling a Human Skill has a 15% chance to trigger an additional equipped non-Ultimate Human Skill. Human Skills deal [40% - 50%][x] bonus damage.
Druid only
The item's unique power; other affixes are not shown.
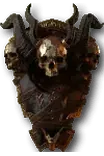
Lucky Hit: While you have an active Bone Storm, hitting an enemy has up to a [35% - 45%] chance to spawn a Bone Storm around their location.
Each Sacrifice bonus increases this chance by 25% and allows you to spawn 1 additional Bone Storm. Each active Bone Storm grants 30%[x] Critical Strike Damage, up to 150%[x].
Necromancer only
The item's unique power; other affixes are not shown.
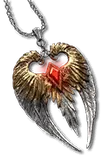
Blight also shoots 4 smaller piercing projectiles, each dealing [60% - 70%] of Blight's defiled area damage.
Necromancer only
The item's unique power; other affixes are not shown.
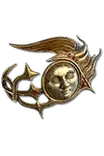
Arbiter's Evade triggers a random equipped non-Channeled Core Skill for every 2 meters traveled.
Core Skills deal [5% - 15%][x] increased damage during Arbiter's Evade and for 4 seconds after.
Paladin only
The item's unique power; other affixes are not shown.
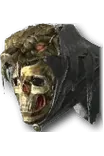
Flurry gains the Transporter Variant for free. You can now overexert yourself while Casting Flurry, spending 3% life when you don't have enough Energy. Spending life to Cast Flurry increases its damage by [60% - 75%][x] and your Attack Speed by 50% for 5 seconds.
Rogue only
The item's unique power; other affixes are not shown.
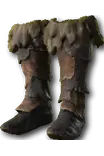
When you Cast a non-Channeled Ultimate Skill, it Consumes all of your Energy and deals [0.6% - 0.75%][x] increased damage per Energy Consumed.
Using a Cooldown restores 25 Energy.
Rogue only
The item's unique power; other affixes are not shown.
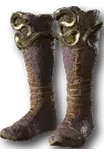
Mobility Skills are always Shadow Imbued with [45% - 60%][x] increased potency.
Lucky Hit: Damaging an Elite or Boss with a Mobility Skill has up to a [45% - 60%] chance to instantly trigger a free Shadow Imbuement explosion.
Rogue only
The item's unique power; other affixes are not shown.
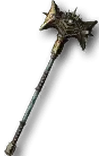
For each Defensive Skill not on your Action Bar, you deal [15% - 25%][x] increased damage and gain its associated Enchantment effect.
Sorcerer only
The item's unique power; other affixes are not shown.
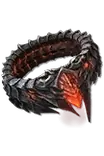
Casting Pyromancy Skills Burns you for 5% of your Maximum Life over 10 seconds. You inflict [200% - 250%][x] increased Burning damage based on how much of your Life is Burning.
Sorcerer only
The item's unique power; other affixes are not shown.
Crackling Energy's discharge rate is increased by your Attack Speed, it's damage is increased by [66.7% - 80%][x], and each hit has a 25% chance to reduce a random Cooldown by 1 second.
Sorcerer only
The item's unique power; other affixes are not shown.
Spending Vigor Heals you for [7% - 10%] of your Maximum Life.
Every second, your active Cooldowns each drain 10% Maximum Life from you to reduce their durations by 2 seconds.
Spiritborn only
The item's unique power; other affixes are not shown.
Direct damage is distributed as Poisoning over the next 10 seconds and reduced by [10% - 15%].
Lucky Hit: Direct damage has up to a 25% chance based on your Poisoned Life percentage to infect an enemy with Touch of Death.
Spiritborn only
The item's unique power; other affixes are not shown.
Hitting enemies with a Core Skill increases the damage they take from you by [15% - 20%][x] per Skill, up to [45% - 60%][x]. Archfiend Demonform Skill Variants are Core Skills and cost Wrath.
Warlock only
The item's unique power; other affixes are not shown.
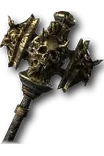
You can now equip all Ultimate Skills and gain 15 Ranks in them. Hitting enemies with Non-Ultimate Skills builds up your Ultimate Skill damage by [0.9% - 1.3%][x], up to [85% - 125%][x]. After starting Ultimate Skills the damage bonus is reset once all have ended.
Warlock only
The item's unique power; other affixes are not shown.
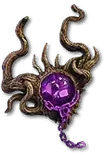
Your Abyss Skills deal [6% - 8%][x] increased damage for each stack of Shadowform. This bonus is increased by 100% while you have Stealth.
Warlock only
The item's unique power; other affixes are not shown.
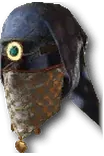
Lucky Hit: Up to a 20% chance to trigger a poison nova that deals 40% of the damage dealt over 5 seconds to enemies in the area.
The item's unique power; other affixes are not shown.
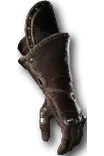
Holy Light's passive now deals [390 - 450] Fire Damage every second in a small area around you. Each time an enemy dies within this aura, it increases its damage by 15%[x] and burn area by 10%[+] for 20 seconds, up to 10 times.
Activating Holy Light Aura refreshes this duration.
Paladin only
The item's unique power; other affixes are not shown. Damage numbers grow with your weapon damage.
Blood Wave now forms a wave on each side of you. Both waves converge at your feet, Pulling In all surrounding enemies and exploding for [375 - 450] damage.
Necromancer only
The item's unique power; other affixes are not shown. Damage numbers grow with your weapon damage.