
ESO Sanity's Edge Trial Guide - Location, Tactics & Rewards
In the interesting and big world of The Elder Scrolls Online, there's a new tough Trial called Sanity's Edge. It came out in June 2023 along with the Necrom: Shadow over Morrowind chapter, and it's a bit like solving a puzzle while fighting bad guys. That exists within the tortured psyche of Warlock Vanton.
The story centers around a character named Warlock Vanton. He used to be a loyal member of the Mages Guild, but now he's under the control of a malevolent power named Ansuul. This power has warped his mind, driving him to use his strong abilities to create chaos in the real world, blurring the line between reality and fantasy.
This guide will give you all the details about the powerful bosses you'll have to defeat, the enemies you'll face, armor sets, achievements, rewards and the complex rules of the challenge. While it provides some helpful strategies, don't forget that trying out new approaches can also be a smart move. Every group tackling this challenge will find their own unique solutions.
Becoming a master of Sanity's Edge can be tough, and not everyone has the time or patience for it. That's where MmonsteR Boost Service comes in. We offer a shortcut to success in The Elder Scrolls Online. No more wasting time on tough bosses or inexperienced groups. We offer a fast and secure process with our ESO experts.
ESO Sanity's Edge Trial Boost
Embarking on the Path: Navigating to the Trial's Sanity's Edge
How can you find the Sanity's Edge Trial? It's a part of the Necrom chapter and is found in the southern part of the Telvanni Peninsula. This exciting trial is waiting for brave adventurers like you. There are two main ways to reach it: you can walk there on foot or use fast teleportation.
When you step into this unknown area, you're not just going on a physical journey. You're also diving into the exciting story of the Necrom chapter. Whether you choose to walk and enjoy the view or teleport quickly, the journey to Sanity's Edge will bring you interesting discoveries and tough challenges. It's a place that's as fascinating as the story it's a part of.
As your brave group gathers around Warlock Vanton, a portal to the trial's strange world appears. Through this portal, you'll go into places that are not just real, but also inside someone's mind. When you touch Vanton's thoughts, you'll find yourself in a twisted version of Alinor – a spooky version of the beautiful city in Summerset.
The strange journey begins as you walk through the distorted streets, like a ghostly version of the city you know. Lots of challenges are in your way, like echoes of Vanton's worries. Defeating them leads to the heart of his twisted mind.
Every enemy shows a piece of Vanton's thoughts, and each step forward tells you more about his pain. In the darkness of these strange streets, your strength will be tested. Your victory will show how well you can handle this trial, and it'll also reveal the weird story in Warlock Vanton's broken mind.

Getting Ready for the Big Challenge: How Getting Your Group Ready
As you prepare your group of 12 people to take on the tough Trial Sanity's Edge challenge, it's super important to have the right mix of players. Think of it like forming a well-coordinated team with specific roles: two strong tanks, two watchful healers, and a group of eight powerful damage-dealers.
When you face bosses in this challenge, you need to be flexible. If you're a damage-dealer, it's a good idea to have shields or abilities that help you heal yourself. Otherwise, it will be difficult.
The battlefield is always changing, so both tanks and damage-dealers need to be skilled to handle the waves of enemies that come during fights with the first and final bosses. It's a smart move to have players who can attack from a distance and stop dangerous attacks – this is super useful during the big showdown at the end.
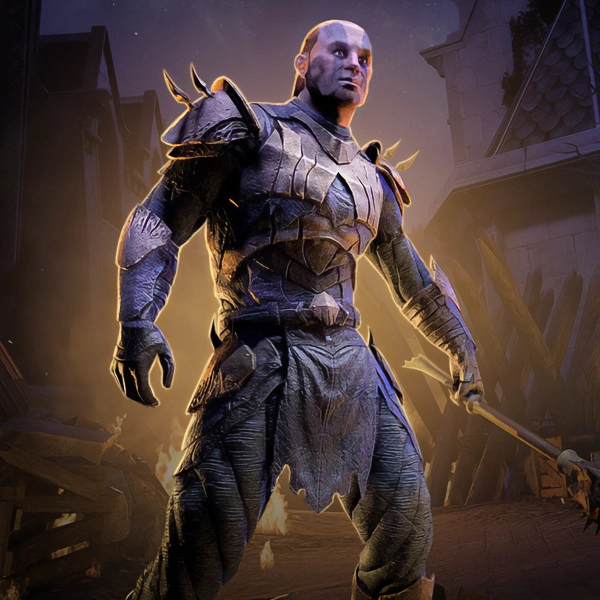
The way you build your group is a mix of old and new. The introduction of Sanity's Edge means you have more options for how you put your group together. While the strong Z'en Dragonknight and the mysterious Elemental Catalyst Crown are still good choices, now you can try different things.
You can customize your approach with specific gear setups and special mythic items. Also you can learn more about mythic items in our article - Mythic Items Guide.
Remember, the choices you make in building your group will have a big impact on how you do in the challenge.
What Enemies Await You in Sanity's Edge?
As you go deeper into Elden Hollow, you'll meet all sorts of creatures, some ordinary and others extraordinary. From peaceful goats to elite foes guarding Ansuul, Elden Hollow's residents will test you.
Let's take a closer look:
Goat: These calm animals graze peacefully, unaware of the chaos around them. They're not a direct threat, but their presence adds an eerie touch to the madness.
- Contramagis Militia Scout: These scouts keep an eye out for intruders, serving as the militia's eyes and ears.
- Contramagis Militia Infantry: Militia foot soldiers are armed and ready to defend their territory.
- Dynamagis Icecaster: These spellcasters are masters of frost, freezing their enemies with icy magic.
- Dynamagis Inferno: Fire is their ally, and they use it to devastating effect.
- Horror: Nightmarish creatures that embody fear itself, terrifying those who face them.
- Contramagis Militia Butcher: Between boss fights, you'll face these tough dual-wielding fighters. These relentless warriors each have about 3.9 million health, so they're no pushovers.
- Contramagis Militia Enforcer: These sharpshooters, with about 2.5 million health, are elusive and deadly.
- Fetid Flesh: A gruesome monster made of rotting flesh, a truly terrifying sight.
- Gryphon: Majestic yet deadly, these creatures should not be underestimated.
- Paranoxia: These see-through crimson creatures have about 2.6 million health and give off an eerie vibe.
- Dynamagis Voidmaster: Experts in void magic, they use dark arts to harm the unprepared.
- Ansuul's Butcher: Personal enforcers of Ansuul herself, these elites serve her unquestioningly.
- Ansuul's Enforcer: Loyal protectors of their tormentor, dedicated to guarding her.
- Ansuul's Gryphon: A formidable companion of Ansuul, fighting by her side
- Ansuul's Summoner: The one who calls dark forces, bringing forth more horrors.
- Ansuul's Voidmaster: Void magic masters aiding Ansuul's dark plans.
- Ansuul's Wamasu: As you explore the dark tunnels on your way to face tough bosses, you'll run into the Wamasu, strange lizard-like creatures with a whopping 3.6 million health. Faithful and lethal, wamasu protect Ansuul's realm.
- Wamasu: Powerful reptilian creatures with a shocking attack for those who cross their path. When the fight starts, the Wamasu shows off its special move - the Charge. It's like a lightning bolt from the sky, rushing forward super fast and powerful. If you're unlucky enough to be in its way, you'll feel more than just a zap of electricity.
- Spiral Descender - Spiral Shalk: In the midst of your epic adventures in the Elder Scrolls Online, you've likely encountered your fair share of menacing foes. Yet, the Spiral Shalks bring a unique blend of fiery mayhem to the battleground, making them stand out even among Tamriel's most fearsome creatures. The Spiral Shalks come equipped with two primary means of attack.
- Exarchanic Yaseyla - Contramagis Wamasu: A dreaded boss summon, presenting a tough challenge. Get ready to confront the Contramagis Wamasu, a powerful creature with a whopping 7.7 million health in veteran mode and a staggering 13.4 million health in hard mode. Enhanced and mighty wamasu summoned for their destructive power.
- Ansuul the Tormenter - Essence Manifestation: One cool thing about Ansuul is that she can summon a spooky ghost called Essence Manifestation. Picture a ghostly knight appearing out of thin air. This ghostly knight thing shows Ansuul's power over your mind and emotions.
- Ansuul the Tormenter - Memory Fragment: In the ethereal battleground of Sanity's Edge, something truly remarkable awaits those who dare to confront Ansuul the Tormentor. It's a dive into the fragmented memories of Warlock Vanton, brought to life as the eerie Memory Fragments.
Spiral Descender: Enigmatic and ethereal mini-bosses, hiding valuable secrets and strong abilities.
- Exarchanic Yaseyla: A formidable opponent with mysterious motives, the battle against Yaseyla promises intensity and intrigue.
- Archwizard Twelvane and Chimera: At the heart of Elden Hollow, you'll confront the enigmatic Archwizard Twelvane and her creation, the deadly Chimera. This battle tests your intelligence and strategy.
- Ansuul the Tormentor: In Sanity's Edge, a spooky place, there's a super scary boss called Ansuul the Tormentor. She's a Gloam Knight with a mysterious past, trying to escape from a Dreamstone prison. Your mission is to enter Warlock Vanton's dream world, find her, and stop her.
Get ready because this Trial is full of danger at every turn, and the enemy you'll encounter are as deadly as they are diverse.
Revealing the Mysterious Armor Sets
When you step into the mysterious world of Sanity's Edge, you'll discover a bunch of gear sets – each one packed with power and potential. These sets, there are four of them, show off how strong and determined you are. They're awesome not just because they're strong, but also because you can adjust them to your needs.
These sets have a cool twist: there's a regular version and a perfect version, like a harder challenge inside the challenge. The regular one is for those who want a good challenge they can beat. The perfect one is for the really brave and skilled players who want the toughest challenge.
These gear sets aren't just things you wear – they're like keys to mastering the tricky battles in Sanity's Edge. They make you stronger and help you plan your fights better. They give you an advantage that comes from the experiences of many players. You can pick the normal sets or try the super-hard ones – your choice will have an impact in the trial.
In the shadows of these special gear sets, you'll see your skills getting better. The regular and super-perfect versions show your progress, like climbing a ladder of skill just like in the trial.
In the maze of gear choices in the Sanity’s Edge challenge, there's one set that's all about being smart in battles – Ansuul's Torment.
Imagine wearing the Ansuul's Torment cloak – it gives you a special bonus. Your chance to make a critical hit gets a boost, like having 657 extra chances to hit hard. But the special thing comes when you have three pieces of this set. You get a "Minor Slayer" power, a small but strong boost that makes your attacks do 5% more damage against enemies in Dungeons, Trials, and Arenas. It's like your weapon knows exactly how to hurt them.
Now, the four-piece bonus is where your attacks get super strong. You get a big 1487 boost to how much damage you can do to enemies' defenses. This makes it easier for your hits to hurt them a lot. And then comes the most exciting part – the five-piece bonus. Your damage against all monsters gets a 7% boost. This is a big deal because it makes you much stronger against all kinds of enemies.
But there's even more. Imagine the rush you feel when you interrupt an enemy, and suddenly you become super powerful. For 10 seconds, that 7% bonus becomes a huge 14%, making you hit really hard. Ansuul's Torment pushes you to change how the battle goes, making a powerful impact.
In the ever-changing world of strategy, Ansuul's Torment shows how being precise, strong, and clever comes together.
In the crazy world of battles, there's a calm and peaceful spot called the Peace and Serenity set. While many armor sets are about fighting hard, this one draws strength from the quiet moments between fights.
Bonus with 657 Critical Chance. It's like a hint of power, a way to use your weapons super accurately. But the real magic happens with the three-piece bonus. You get Minor Slayer, a power that makes your hits stronger, dealing 5% more damage to tough enemies in Dungeons, Trials, and Arenas. It's like showing your enemies who's boss.
But the real heart of Peace and Serenity is in the four-piece bonus. You get a nice boost of 129 Weapon and Spell Damage, making you really powerful and your abilities super strong. And then, the best part – the five-piece bonus, a mix of power and calmness.
When you stand still, you become a storm of destruction. A big 465 boost in Weapon and Spell Damage surrounds you. It's like the world itself is helping you hit harder. But when you move, a different kind of power comes. You get 203 more Health, Magicka, and Stamina Recovery.
In the middle of fights, Peace and Serenity it's like a way to meditate, showing how to stay calm even when things are crazy. It's like a warrior's skill in finding calm and using power smoothly, just like breathing.
In the wild dance of battle, Perfected Ansuul's Torment is like the highest note that cuts through the chaos. This special set, made strong through tough challenges, has many bonuses that make you way better against enemies.
First, you get a small bonus with the two pieces – 657 more Critical Chance for your attacks. It's like getting better at hitting hard. But the real power comes with three pieces – you get Minor Slayer. This makes your damage against Dungeon, Trial, and Arena Monsters always 5% stronger.
When you add the fourth bonus, you get 1487 Offensive Penetration. This is a special moment in the fight where you hit really accurately and your attacks go through defenses easily.
But the best part is the fifth bonus – it's like the big ending of a show. You get even more Critical Chance, adding up to 657. This makes you do critical hits more often. You also deal 7% more damage to monsters, hitting them harder.
And then comes the special part – the extra thing within the big ending. When you interrupt an enemy, you get a surge of power. This makes your damage against monsters go up by another 7% for a short but strong 10 seconds. It's like a burst of strength that matches the rhythm of the fight.
In the middle of battles, Perfected Ansuul's Torment timing your moves, hitting really hard, and making the most of important moments – all together in a powerful way.
In the world of war, Perfected Peace and Serenity is like a mix of being strong and getting refreshed. This set, showing how power and healing work together, gives you cool effects that make you better in fights.
First, you get something cool with two pieces – you have 657 more chances to make a critical hit. But the best part comes with the three-piece bonus – you have Minor Slayer all the time. This means you do 5% more damage to Dungeon, Trial, and Arena Monsters always. It's like your hits get a boost that makes them hit even harder.
Now, when you get to four pieces, you get a big boost of 129 Weapon and Spell Damage. This is like a big moment in the song where everything gets stronger – your weapons and magic attacks become more powerful.
And then the five-piece bonus. You get another boost of 129 Weapon and Spell Damage, making your attacks even stronger. But the real magic comes in when you move or stand still. When you stand strong, you get a big 465 boost in Weapon and Spell Damage – showing how tough you are.
When you move, you get more Health, Magicka, and Stamina Recovery – like getting energy to keep fighting.
Right at its heart, you get something cool with two pieces – 1487 extra Armor. This is like your first shield that takes the hits, making you really tough and protected from enemies.
But the best thing is the three-piece bonus – you always have Minor Aegis. In the world of battles, this is like a guardian that helps you. It makes you take 5% less damage from Dungeon, Trial, and Arena Monsters. It's like a hidden shield that's always there to protect you, even when things get really hard.
As you keep fighting, the four-piece bonus shows up – you get 1206 extra Maximum Health. This is like a surge of energy that makes you healthier, giving you the power to take big hits and keep going.
And then the five-piece bonus. When your health goes below half, and your Stamina is also below half, something amazing happens. You get full Health, Magicka, and Stamina for a strong 10 seconds.
You also get Major Protection and Major Aegis, like a big shield that keeps you safe. But if your Stamina stays above half, you become a Beacon of Hope. For 20 seconds, your buffs become even stronger, giving you a big shield with Major Aegis that makes you super protected, even in the chaos of battle.
The Perfected Test of Resolve a story of being strong and winning even when it's hard. It's like being a fighter who faces challenges and comes out stronger, turning hard times into a reason to fight even harder.
In the world of battles, where every hit can decide if you win or lose, Perfected Transformative Hope shines like a light of comfort and strength.
Right at its heart, you get something really cool with two pieces – your healing gets stronger by 4%. This is like a burst of power that heals wounds better, making your friends tougher and ready to fight.
But the most important part is the three-piece bonus – you always have Minor Aegis. In the middle of all the fighting, this is like a shield that helps you. It makes you take 5% less damage from Dungeon, Trial, and Arena Monsters.
As you keep fighting, the four-piece bonus shows up – you get 129 more Magicka Recovery. This is like a special energy that flows through you, giving you the power to keep healing even when things are really intense
And then, the best thing the five-piece bonus. It's like a flame of hope that lights up when things are tough. When you heal yourself or a friend who has less than half Health, a Spark of Hope comes up for a quick 3 seconds. If your friend gets back to more than 90% Health during this time, something amazing happens.
You and your friend get Major Heroism, like a surge of power that makes you better in fights. This lasts for 15 seconds.
In the heat of battle, where swords clash and spells fly, Test of Resolve shines as a symbol of strength and determination. This set is more it's a reminder that you can not only survive but thrive in the chaos of combat.
With two pieces, you get a big boost of 1487 Armor. This is like having a strong shield that protects you from the hits of enemies. It is able to stand strong against their attacks.
But the most important part is the three-piece bonus you always have Minor Aegis. When you're fighting tough Dungeon, Trial, and Arena Monsters, this is like a shield that keeps you safe. It helps you take 5% less damage.
As you keep fighting, the four-piece bonus shows up—you get 1206 extra Maximum Health. This is like a big boost of energy that makes you tougher, giving you the strength to keep going even when things get really intense.
And then the five-piece bonus, a challenge that turns into victory. When you have less than half Health in the middle of the battle and your Stamina is also below half, something amazing happens. You get back full Health, Magicka, and Stamina, like a rebirth that makes you strong again. You also get Major Protection and Major Aegis for 10 seconds—like a shield that keeps you safe from harm.
But if your Stamina stays above half, you become a Beacon of Hope—a strong force that shines for 20 seconds. Your Major and Minor Buffs become even better, with Major Aegis protecting you for 10 seconds. This shows your strong spirit, how you become a source of strength for your friends in tough times.
Amid the chaos of battle, where injuries and fatigue threaten, Transformative Hope shines like a guiding light—a signal that shows the way to healing. With two pieces, you get a healing boost and your Healing Done increases by 4%.
But the heart of Transformative Hope lies in the three-piece bonus protection against harm. You always have Minor Aegis, which reduces damage taken from Dungeon, Trial, and Arena Monsters by 5%.
The four-piece bonus gives you more resources 129 Magicka Recovery. This is like having extra energy to fuel your healing magic, making sure you have the strength to keep mending wounds without running out of power.
The best part of Transformative Hope is the five-piece bonus testament to the transformative power of healing. In the middle of a battle, when you or an ally is hurt, you become a source of hope. Your healing touch creates a Spark of Hope in them for 3 seconds a light that brings back their spirit.
And it's not just a brief moment of relief. When the effect ends, if they're above 90% Health, something amazing happens. You and your ally get a boost of Major Heroism for 15 seconds. It's a burst of energy that lets you act more often, giving you the strength to push forward with more determination.
This wonderful transformation can happen every 20 seconds for each person you heal.
Boss Battle Strategies in Sanity's Edge: A Guide
In the heart of Tamriel's epic adventures lies the ultimate challenge - Boss Battles. These formidable foes are the pinnacle of any gaming experience in The Elder Scrolls Online. To conquer them, you need more than just brute force: you need strategy, finesse, and a dash of courage. So, let's delve into the art of mastering boss battles.
Exarchanic Yaselya: Mastering Boss 1 Strategies
Exarchanic Yaselya enters the battle with a fierce dislike for mages, wielding dual swords that prove her ferocity. But her hostility extends to anyone who aids spellcasters. With knives, bombs, chains, and even the fearsome wamasu at her disposal, Yaselya is an unstoppable force.
Fighting Exarchanic Yaselya is like a changing melody, with different phases matching her health levels. As her health drops, her tactics change, introducing new challenges and foes.
Yaselya is a strategic fighter who uses her skills wisely. Her approach relies on priority, adjusting her moves with careful planning. She often starts with a powerful Chain Pull to control the battlefield. Knife Blast is another favorite opening move, releasing a storm of blades at her enemies.
Attacks:
- Slash: A basic taunting attack that causes bleeding and slows movement with Hamstrung.
- Chain Pull: Chains grab three targets, causing bleeding and pulling them in, or they can break free.
- Fire Bomb: Yaselya hurls bombs that explode with fire. Avoid the area to escape Ignite's burning flames.
- Frost Bomb: Freezing bombs stick to healers and tanks, causing icy explosions and trapping victims.
- Hamstrung Strike: Armor-shredding attack with a slow effect.
- Knife Blast: Yaselya throws knives in all directions, causing bleeding to those hit.
- Vengeful Strike: A powerful blow causing Hemorrhage and various debuffs based on the outcome.
Yaselya's battle is a mix of strategy and swordplay. Adaptation is key as the fight changes rapidly. Will you overcome her grudge and win? Or will you fall victim to her vengeance? The battlefield is set, and your bravery and skill are needed.
In the hectic battlefield of Sanity's Edge, staying alive and winning the fight requires smart moves.
Here are some simple strategies:
- Tanks and Where They Stand: How you use your tanks matters a lot. One way is to have one tank fight the boss and another handle the wamasu. Keep the wamasu far from the boss to reduce damage or close for more damage. Another way is to position the tank in the center for damage to both boss and adds. Move the boss away when fire bombs are coming, then back to the center. This is tough and needs precise timing. Some tanks even manage both boss and wamasu, but it's risky.
- Portal Teams for Survival: Create two teams for portals, each with 4 DPS members. The first team goes into portals when the boss is at 60% health, and the second team at 35%. This helps manage the Agony debuff and is good for the Positive Visualization achievement.
- Pick Your Targets Wisely: Focus on the right enemies. Archers should be first because they can kill in one shot. Then deal with the wamasu, as their charges are dangerous. Balancing damage between the boss and other enemies can be tricky, so be careful.
- Watch Out for Archers: Archers are really dangerous. Have one player, like a tank or DPS, draw archers in for the group to attack. Remember that interrupt archers first to prevent them from being drawn in.
Welcome back, brave adventurers, to the tough world of Hard Mode boss battles in The Elder Scrolls Online. You've already beaten the regular veteran mode, but now it's time to tackle Hard Mode, which introduces a deadly element called Shrapnel. Let's explore some strategies to help you not only survive but thrive in this challenging mode.
Shrapnel is the big game-changer here. It's like a ticking time bomb just waiting to explode. When it does, it inflicts massive damage to anyone nearby. Dealing with this explosive challenge requires precision and perfect timing.
The boss's health is at 60%, and Shrapnel is about to strike. Your team must work together flawlessly, dealing damage while making sure not to push the boss's health too far. It's a delicate dance of destruction.
Here's a crucial rule for Hard Mode - make sure you complete the portals at 60% of the boss's health before you push the boss down to 55%. Timing plays a vital role in this delicate balance between offense and defense.
In the heat of battle, as the boss's health approaches 60%, your team knows it's time to enter the portal. You go in, finish your mission, and return just in time to face the upcoming Shrapnel.
Archwizard Twelvane and the Chimera: Mastering Boss 2 Strategies
The Archwizard Twelvane and the Chimera encounter is like a mix of magic, smart moves, and teamwork. Right at the center of all this mystery is Archwizard Twelvane, the powerful mage who once asked for your help with Warlock Vanton.
But now, she's standing in your way, like she's on the side of dark forces. Twelvane has created a strong creature called the chimera to help the Mages Guild. The battle with her happens in three different parts, each with its own challenges and secrets to figure out. Let's figure it out!
In the first phase, you face Archwizard Twelvane herself. She can fight with magic and in close combat, which makes her tricky. Her abilities include fire, ice, and lightning attacks.
- Melee Attacks: Twelvane can hit you with her staff, and it can be powerful.
- Blizzard: She creates icy waves that can hurt you and slow you down.
- Circle of Immolation: This fiery ring damages anyone close to her.
- Coruscating Field: Twelvane summons lightning circles that target you. More appear as the fight goes on.
- Entropic Flare: This attack involves a violet flare from her staff that can hurt a lot.
- Firestorm Simulacrum: She summons fiery copies that cast Firestorm, launching fireballs.
- Ice Cage: Twelvane makes ice rings that hurt and slow you if you cross them.
- Lightning Rod Slam: She does a powerful spinning attack with lightning AOEs around group members.
- Racing Flames: Streams of fire shoot out from her staff.
- Shadeway: Rarely, she may use this ability, damaging a player over time and maybe passing it to another player.
After defeating Twelvane, things get interesting. Each player gets marked with a constellation. You must go to the right stone pad with your constellation to access chambers. Inside, you face aspects of Twelvane, each with a different elemental theme—fire, ice, or lightning. These aspects can't be killed and cast spells against you. You need to survive and solve puzzles unique to each room.
The puzzles involve crystal pedestals, with the number of crystals depending on the difficulty. Crystals rise in a sequence and must be shattered in the same order. Players must act quickly. Success returns you to the main chamber.
With Twelvane's aspects beaten and the puzzle solved, you face the chimera itself. It gets power from the lion, gryphon, and wamasu, each with its phase.
- Lion Phase: Fire attacks, including fiery breath and ground fire AoEs. Solve puzzles to survive.
- Gryphon Phase: Icy winds and freezing spells. Keep moving to stay warm and help frozen allies.
- Wamasu Phase: Thunder and lightning, with electrified storms. Stay in the right place to avoid shocking surprises.
In the heart of the Elden Hollow, a place where the line between reality and magic blurs, adventurers face off against the Ascendant Animals. These magical creatures are like living embodiments of elemental power, and they guard the secrets of the Elden Hollow. They're a real test for anyone daring to take them on.
Gryphon - The Soaring Scourge
The Gryphon is a tough opponent with 3.89 million health in regular veteran mode and a massive 7.76 million health in hard mode. It has some powerful attacks:
- Eviscerate: The Gryphon rears up and then comes down with a big claw attack in a cone shape. This move can be super deadly, especially if you're not a tank. You've got to dodge or shield against it.
- Peck: This is a basic attack aimed at whoever the Gryphon is mad at. It's a reminder that even a super strong enemy can still use simple moves to hurt you.
- Talon Slice: Another basic attack focused on the target it's mad at. It shows how aggressive the Gryphon can be.
- Wind Lance: The Gryphon goes up into the air for a bit and then releases small whirlwind attacks in front of it. Swiftly dodge the swirling air attacks to stay safe.
Lion - The Majestic Monarch
The Ascendant Lion is also really tough, with 3.89 million health in regular veteran mode and a big 7.76 million health in hard mode. It's all about power and leadership:
- Claw: A basic attack aimed at whoever it's mad at. It might also slow down the victim for 5 seconds, making it harder for them to escape danger.
- Double Strike: The Lion's heavy attack, showing off its strength. It stands up on its hind legs and hits the target with both front paws, causing a lot of damage.
- Pride's Call: The Lion roars and calls two fire lions to help it. These fiery friends use claw and rend attacks but deal fire damage instead of physical. In regular veteran mode, the fire lions have 287,000 health, and in hard mode, they're tougher with 575,000 health.
- Rend: Just like the Claw attack, it targets whoever it's mad at and might slow them down for 5 seconds.
Wamasu - The Thunderous Tyrant
The Wamasu is a real powerhouse with 3.89 million health in regular veteran mode and an impressive 7.76 million health in hard mode. It's all about thunder and lightning:
- Bite: A basic attack aimed at whoever it's mad at, showing its primal fierceness.
- Impending Storm: The Wamasu stands up on its hind legs and signals a storm. When it comes down, it creates eight small lightning attacks that spread out slowly in all directions. These lightning zones can hurt a lot, so you need to be in the right place and be quick.
- Repulsion Shock: The Wamasu breathes out a cone of lightning in front of it for three seconds. This shocking attack has a 15-second cooldown, so there are times when you can fight back.
- Shed Lightning: The Wamasu hits the ground and sends lightning through everyone within 50 meters. Each person gets hit twice, and it can be really painful and disorienting.
Winning means understanding the rhythm of the battle and working well with your fellow adventurers to unlock the secrets hidden in this mystical place.
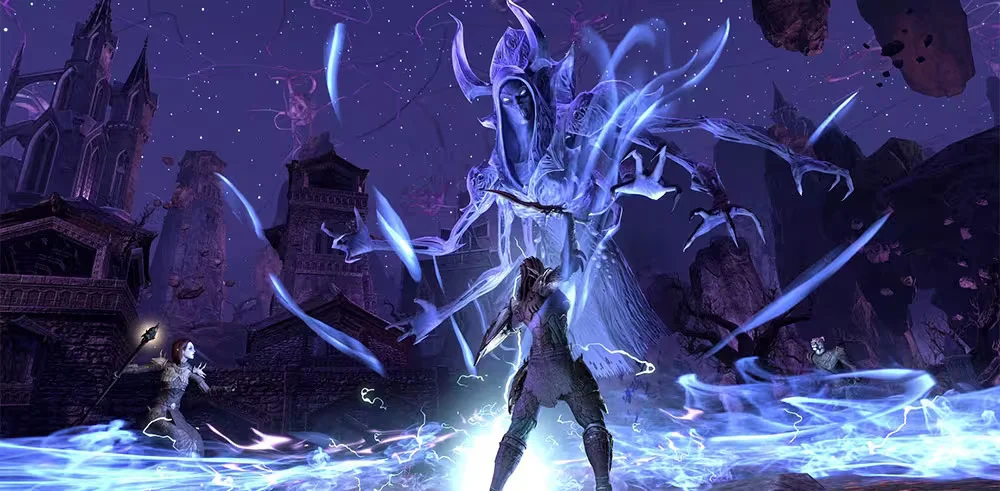
Ansuul The Tormentor: Mastering Boss 3 Strategies
Our adventurers approach the heart of Elden Hollow, where they confront a challenging foe, Ansuul the Tormentor. Ansuul wields unique powers, including manipulation of memories and emotions, leading to challenging mazes and intense battles as they strive to free Vanton and prepare for the final showdown.
Ansuul is good at messing with your head, and she uses something called "Manic Phobia" in the fight. When the battle goes on, she does this scary thing when her health gets low. The person she's fighting with gets sent far away from her, like they're banished to a corner. And a creepy thing called an "essence manifestation" appears next to them. After a little while, this manifestation starts attacking. It kinda looks like a blood knight from Kyne’s Aegis.
Here's the tricky part: the person who got sent away can come back to the group, but they bring the essence thing with them. But there's a problem – Ansuul makes an invisible ring around herself that only the banished person can see. If they cross this ring, they get in big trouble with something called "Avulse." And if Ansuul moves in a way that goes through this ring, the banished person has the same trouble.
But the essence thing can move inside the ring without a problem. The only way to get rid of this dangerous ring is to defeat the essence. Ansuul ignores the banished person, so someone else must battle her now.
Ansuul has another trick up her sleeve – she can make really confusing hedge mazes in the fighting area. When her health gets low, she disappears into the ground and shows up in one of the corners. A big area around her starts getting really dangerous, and almost the whole fighting area is covered except for one side.
This dangerous area is really deadly. It explodes and hurts or kills anyone inside it with something called Ritual Blast. Most of the smaller enemies survive this big explosion, but some don't. Inside this dangerous area, a maze appears, and the walls of the maze can be on fire, poison, or have lightning.
Small areas with the same elements as the maze start moving around. It seems like the element is chosen randomly. When Ansuul comes back above a corner, she has a color – either red, green, or blue. This color tells you what element she's going to use: red for fire, green for poison, and blue for lightning.
In the fiery maze, the fire hurts people with Ignite, and it can spread to other group members. In the poison maze, the poison hurts people with Toxic Impression and makes them slower with each hit. If you get too slow, you can't move. In the lightning maze, the lightning hurts people with "Chilling Thought" and stuns them.
There's also a wall that moves through the maze, showing the group where to go. People who rush through the maze and hit the wall get hit with Mental Barrier and almost always die.
After each hedge maze, Ansuul adds something new to the fight that stays for the rest of the battle. These things are there in all phases except during the hedge mazes:
- Fire: Fiery creatures that look like fire atronachs show up around the fighting area, especially in the corners. You can't bring them to the group, and they attack with "Flare" and a strong attack called Inferno, throwing fireballs at group members for 12 seconds unless you stop them.
- Lightning: Small lightning areas appear randomly, kind of like landmines. Stepping into these areas hurts you with "Anxiety's Grip" and makes you slower for 10 seconds. These landmines can be tricky, especially if they show up under someone who didn't see them because of other effects.
- Poison: Poison areas appear under random group members, hurting them every half-second with Poisoned Mind. These areas get bigger, about 5 meters wide. If you're in one, you get hurt, and if you're in more than one, you get hurt by all of them. Ansuul picks a new person every 5 seconds, and this effect lasts for 10 seconds on each person. This means that at any time, two people are affected.
When Ansuul's health gets really low, like 20%, she splits into three parts – red, green, and blue. Each part does different things. Even when they reach zero health, they keep fighting until all three of them have zero health.
After the boss splits, the fight goes into the last phase. Hedge mazes don't show up anymore, but the landmines, fiery creatures, and poison areas keep making things hard for the group.
Only adventurers who can work together really well and are really tough can solve her mind-bending puzzles and win this tricky fight deep in the Elden Hollow.
Deep in the Elden Hollow, Ansuul the Tormentor brings a wild mix of dangerous moves to the battle. Our brave adventurers need skill and precision to deal with her.
Let's break down the chaos that makes up Ansuul's attacks:
- Dreadful Bolts: Ansuul shoots deadly bolts at the person she's focused on.
- Dreadful Claws: If you get too close, Ansuul will swipe at you with her claws. This can leave you with a nasty debuff called Hamstrung, which slows you down for 5 seconds. But that's not all – it can also give you Gaping Wound, a debuff that healers won't like, but they can get rid of it.
- Catastrophe: This is a big attack that covers a wide area in front of Ansuul. If you're in it, you might take extra damage from Mental Disturbance for 8 seconds.
- Execution: This one doesn't happen often, but when it does, it's really bad. Ansuul picks one person and hits them with searing lightning. If the group doesn't stop her in time, that person is in big trouble. You need to work together and be quick to stop this move.
- Manic Phobia: Ansuul can mess with your head and send the person who's got her attention to the farthest corner of the fighting area. An essential thing shows up and starts bothering them. But watch out, there's an invisible ring that only the banished person can see. If they cross it, they're in big trouble – Avulse will get them.
- Toxin Spray: This venomous attack doesn't happen a lot, but when it does, it hits hard. It's like a big poison attack in a wide cone in front of her. It's wider than her usual Calamity attack.
- Solar Burst: As the fight goes on, Ansuul aims her "Solar Burst" at the person farthest from her. A fiery meteor comes down, tracking them first and then locking onto a spot just before it hits. You can dodge to avoid it, usually without using up your stamina. Watch out after the meteor impact! It creates a danger zone for about 8 seconds, releasing smaller danger zones in various directions that inflict "Afterburn" damage on anyone inside.
- Torment: Ansuul is relentless. She charges up lightning and releases it in six random locations, causing explosions that damage and stun anyone caught within. Watch out for the tricky memory entities created with each explosion.
- Ragestorm: This one doesn't come often, but when it does, it's really dangerous. Ansuul makes a bunch of little fire areas in a ring around her. Initially small, around 2 meters wide, but then a much larger area, nearly 10 meters wide, fills up and eventually causes chaos when it explodes.
Mini Boss: Spiral Descender
In Sanity's Edge, you'll come across a strange crimson scorpion called the Spiral Descender. It looks a bit like a spider-like creature from Oblivion. This enigmatic creature acts as a mini-boss, showing up just before the main boss battle and again between the first and second boss fights.
What makes the Spiral Descender unique is its unpredictability. Unlike most enemies that appear in set places, this mysterious creature can show up almost anywhere, at any time. It's like a surprise storm that hits when you least expect it. Sometimes, it prefers to lurk in the shadows, adding an extra layer of suspense to your journey through Sanity's Edge. Unfortunately, there's no pattern to its appearances, so you have to stay alert at all times.
- Lacerate: A basic attack aimed at the player who has its attention.
- Raze: A powerful attack also directed at the player with its attention. Depending on how you counter it, it can have different effects like making you upset, slowing you down, rattling you, or draining your vitality.
- Maddening Wail: A chilling move where the Spiral Descender surrounds itself with a red mist and deals significant damage to six players.
- Pervade: A sneaky move against the player it's focused on. It envelops them in a red mist, causing continuous damage over eight seconds. Even if you block or shield the initial attack, this damage keeps going.
- Disrupting Splinter: Sometimes, the Spiral Descender shoots a mysterious projectile, often aiming at the player it's focused on. This ability has hidden complexities that aren't fully understood yet.
- Frightening Grasp: A spine-tingling move where the Spiral Descender pulls all players toward itself, snaring everyone and causing significant damage. The more health you have, the more damage it deals. After the pull, a zone of effect (AOE) appears around the boss, causing increasing damage to everyone inside. It eventually explodes in a burst of Unbound Horror. Normally, this is survivable unless certain conditions like being upset or having very low health are met.
- Ruin: This ability has two phases. First, the Spiral Descender shoots a frontal cone-shaped AOE attack in quick succession. Then, it releases a bunch of AOEs in all directions. When you face the Spiral Descender, be ready for a dance of uncertainty and shadows. It thrives on being unpredictable, so every encounter is a test of your quick thinking and teamwork. Stay sharp, because in Sanity's Edge, each step could take you closer to uncovering the mystery of this spectral scorpion or deeper into darkness.
Summoning More Trouble: The Spiral Descender's Sneaky Move
As you journey through the dangerous depths, you'll face not only the tricky Spiral Descender but also its crafty ability to call for backup. When you're battling this mini-boss on its own, get ready for it to surround itself with a red mist, which signals that reinforcements are coming.
Usually, this means three menacing Spiral Shalks will appear, along with a tough Spiral Incarnate. But watch out, about 20 seconds later, more reinforcements might show up. These summoned allies disappear when the mini-boss is defeated.
Imagine a gigantic, see-through, red warrior wielding a massive two-handed sword. That's the fearsome Spiral Incarnate, and it's not here for a friendly chat:
- Swift Strike: This is the Incarnate's standard move, aimed at the one who has its attention. Each hit not only deals damage but also causes bleeding.
- Fury: This attack means business, like an uppercut from your worst nightmares, and it directly targets the tank.
- Fiery Surge: This one's a surprise. It's not used often, but when it is, the Incarnate swings its fiery sword, sending a fiery wave across the ground. It's like a blazing river, and anyone caught in its path, especially the tank, better be ready for some heat. Usually, a couple of these surges follow one another, with a short break between them.
Don't underestimate the Spiral Shalks:
- Bite: Their basic attack, aimed at the tank who's got their attention.
- Flaming Bite: When they mean business, they unleash a powerful attack that might slow down the tank.
- Flame Emission: Ever seen a Shalk breathe fire? It's a cone-shaped attack targeting the tank.
- Infernal Ground: Rarely spotted, it creates a fiery area on the ground for 4 tense seconds.
- Combustion: When their health gets really low, things get explosive. Shalks tend to explode within a fiery blast. As their health drops, these explosions can happen quickly, making the fight even more chaotic.
The Spiral Descender is a tough opponent, but being adaptable is your best weapon:
- Main Tank Focus: In many battles, the main tank's job is to keep the Spiral Descender's attention while the rest of the group stands behind it. The off-tank handles the summoned reinforcements, making sure they don't get too close to the main tank when they explode.
- Adapt to the Unpredictable: Sometimes, the mini-boss shows up alongside other enemies, requiring quick thinking. One strategy is to have the main tank engage the mini-boss while the off-tank gathers the other reinforcements around the main boss for efficient damage. However, certain reinforcements, like disruptors after the first boss fight, should be kept away from the mini-boss.
- Stay Flexible: Be ready to change your tactics as needed. The Spiral Descender's unpredictable behavior means your group must stay adaptable, making sure victory is always possible, no matter the challenges.
Achievements and Rewards in Sanity's Edge Trial
Here are the achievements and rewards for them you can obtain in the Sanity's Edge Trial:
| Achievements | How to get |
|---|---|
| Sanity’s Edge Conqueror | Beat Exarchanic Yaselya, Archwizard Twelvane, and Ansuul the Tormentor in Veteran Sanity's Edge. Achieving this gets you the "Sanity's Warrior" title and "Whorls of the Dark Dream Marks" body marking. |
| Sanity’s Edge Vanquisher | Beat Exarchanic Yaselya, Archwizard Twelvane, and Ansuul the Tormentor in Sanity's Edge on the normal difficulty. As a reward, you'll earn the title "Sanity's Scourge" and the dye called "Sanity's Orchid". |
| Mage Protector | Beat Exarchanic Yaselya with the challenge banner activated in Veteran Sanity’s Edge. |
| Tenacious Dreamer | Beat Exarchanic Yaselya, Archwizard Twelvane, and Ansuul the Tormentor together in one go in Veteran Sanity’s Edge. You get a title "Tenacious Dreamer" and a special head marking called "Whorls of the Dark Dream Visage" as a reward. |
| Dream Destroyer | Beat Archwizard Twelvane with the challenge banner in Veteran Sanity's Edge. |
| Sanity's Edge Sprinter | Beat all enemies, including Exarchanic Yaselya, Archwizard Twelvane, and Ansuul the Tormentor, in Veteran Sanity’s Edge in under 30 minutes. Your timer starts when you enter Vanton’s Nightmare. |
| Master of the Mind | Beat Exarchanic Yaselya, Archwizard Twelvane, and Ansuul the Tormentor with their friends. Don't let anyone in your group die and do it all within 30 minutes after you start in Veteran Sanity's Edge. Get the "Dream Master" title. |
| Paranoxia Slayer | Beat 50 Paranoxia in the challenging Veteran Sanity's Edge |
| Terror Slayer | Beat 125 Enemies in Veteran Sanity's Edge. |
| Positive Visualization | In Sanity's Edge, during the fight against Exarchanic Yaselya, 8 different players must use Vanton's Clarity to defeat Horrors, which are like spooky ghosts. |
| Clinical Mortality | Once the Chimera awakens, it stays active and doesn't turn back into a statue when you battle Archwizard Twelvane in Veteran Sanity's Edge. |
| Astral Cycle | As a team, make sure you always enter the right crystal code while dealing with Archwizard Twelvane in Veteran Sanity's Edge, especially during the puzzle room boss fight. |
| Group Therapyr | Ensure that 11 players successfully reach the end during one maze run while battling Ansuul the Tormentor in Sanity's Edge (the third boss encounter involving hedge mazes). |
| Fearless Sanity | Defeat Torments with less than 4 players against Ansuul in Veteran Sanity's Edge. |
| Voice of Clarity | During the battle with Ansuul the Tormentor in Sanity's Edge, go into Vanton's Torment 7 times. |
| Sane and Clearheaded | To master Sanity's Edge, complete all achievements. Rewards - the Ram of Dark Dreams, and earn the title "Mindmender" with your group! |
Check our The Elder Scrolls Online Boosts
Mastering the details of each fight, understanding boss signals, and learning how every move works are your most important tools. This knowledge helps you predict problems and find smart solutions.
In the ESO world, teamwork is essential. Your group is your biggest advantage, and working together strategically is how you win. Talking to each other and combining your abilities can change the course of battle.
And if you want an extra advantage, Sanity's Edge Trial Boost has your back. With our knowledge and skills, we'll help you conquer Sanity's Edge and more. It's not just a boost, it's a partnership on your path to success.