


Wailing Caverns Dungeon Guide
Wailing Caverns is the Classic dungeon under Lushwater Oasis in the Barrens, tuned for levels 17–24 and playable in the WoW Forever beta. Here is the entrance and the way for both factions, all 11 quests with their givers, every boss with tactics and the reworked loot, and a full clear takes about 45–65 minutes.
- Level
- 17–24
- Bosses
- 9
- Full clear
- 45–65min
- Difficulty
- 5/10
The Barrens · KalimdorEntrance 47.7, 35.0Show on the mapRun it with mmonster





Overview
Inside Wailing Caverns
The night elf druid Naralex wanted to heal the Barrens by tying the springs under Lushwater Oasis to the Emerald Dream. The Dream turned into a nightmare while he slept. The water went foul, the wildlife mutated into Deviate beasts and his followers became the Druids of the Fang. The caves got their name from the steam vents that howl through the tunnels.
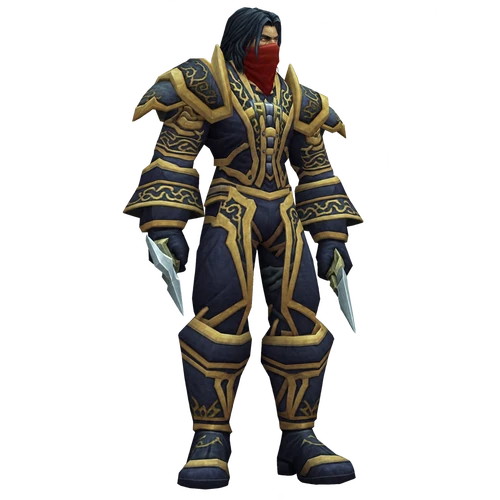
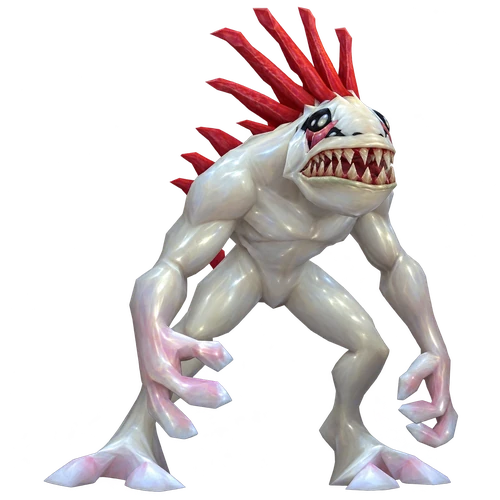
The run has eight bosses and a rare. Four Druids of the Fang lead the place: Lady Anacondra, Lord Cobrahn, Lord Pythas and Lord Serpentis. Once all four are dead, the Disciple of Naralex at the start begins the event that ends with Mutanus the Devourer. Kresh, Skum and Verdan the Everliving are optional, and the Deviate Faerie Dragon is a rare spawn. It is a maze with sleeping casters and poison snakes, so a slow, careful group beats a fast one.
The caves and the bosses are the same as in Classic. The loot is not: nearly every boss drop has new stats, four new rare items joined the tables and the Embrace of the Viper set has new bonuses. Horde players walk over from the Crossroads, Alliance players have the longer trip from Ashenvale or by boat to Ratchet.
Level 17–24 is the range the dungeon is tuned for, not a minimum entry level. This is the Forever level range as it stands today. It can still shift before launch.
Forever vs Classic
What changed in Wailing Caverns for WoW Forever
What is different from the Classic version you may know. Everything else works as it did in Classic.
Boss loot reworkedBeta data
Almost every boss drop got new stats, and most of them are blue now instead of green or white. Serpent's Shoulders from Lady Anacondra used to be a plain white item and are now a blue leather piece with Agility. Several pieces need a lower level than before, the Mutant Scale Breastplate from Mutanus from 18 instead of 23.
Four new dropsBeta data
Snake Eye Kaleidoscope (Lady Anacondra) is a necklace with a point in every stat and resistance. Cloak of Hermitic Bliss (Kresh) slows you on land and makes you swim faster. Slither Cord (Lord Pythas) is a cloth belt whose use effect frees you from roots. Skum's Bucket (Skum) is an off-hand that restores mana while you sit. Beta players report all four as very rare.
Embrace of the Viper has new bonusesBeta data
The five-piece leather set now gives 10 Intellect for two pieces, 10 Attack Power for three, a small heal and mana return when you drop to 25 percent health for four, and a chance on melee hits to stun for 1 second with Dream Venom for all five. Every piece is blue. Four come from the Fanglords, the Gloves of the Fang drop from Druids of the Fang and can be traded.
A serpent look for druidsBeta
Beta players found that a druid wearing all five Embrace of the Viper pieces turns into a large serpent. Most reports say it is Cat Form only, one says every form. Blizzard has not commented and no item text mentions it.
New quest rewardsBeta data
Leaders of the Fang adds Hammerbone, a two-handed mace, as a third choice. Serpentbloom adds Heat Resistant Mitts for leather users and Safety Boots for mail users next to the Apothecary Gloves. Deviate Hides changed how it hands out the bag and the leggings, and it is not clear yet whether you now get both.
Deviate Scale Belt pattern at 90Beta data
Pattern: Deviate Scale Belt from Deviate Eradication needs Leatherworking 90 now instead of 115, so leatherworkers can use it while they are still in the dungeon's level range.
Bigger numbers on two boss spellsBeta data
Thundercrack from Mutanus shows 475 Nature damage and a 2.5 second stun on its tooltip, far more than in Classic. Skum's Chained Bolt shows 143 damage per target. The druid bosses heal about 8 to 13 percent less with Healing Touch. Nobody has reported yet whether the bosses really hit that hard in the beta.
Less quest bonus, more kill experienceConfirmed
Dungeon quests give a big experience bonus in Forever, and Blizzard halved that bonus on October 1. A beta player got 7700 experience for The Glowing Shard at level 18 before the cut and 5150 at level 20 after it. Since October 8 dungeon kills give about 20% more experience, and in a group your own level decides your kill experience, not the highest player in the party. One player far above the mobs' level still means no experience for anyone in the group.
Serpentbloom snakes despawnConfirmed
Picking Serpentbloom can spawn a snake. Since October 1 those snakes despawn after a couple of minutes instead of piling up around the nodes.
Location
Where is Wailing Caverns? Entrance and how to get there
The cave mouth is on the north side of Lushwater Oasis in the Barrens, south-west of the Crossroads, at about 46.0, 36.3. Its front looks like a giant serpent skull. Inside, an outer cave with Deviate beasts and a few rare elites winds to the instance portal at about 47.7, 35.0. Nalpak and Ebru stand in a small cave above the entrance with two quests for both factions.
Now you can move the map.
No spawn points on the map for this one.
- 1Fly to Astranaar in Ashenvale.
- 2Ride east, cross the river and take the next road south into the Barrens. Mor'shan Base Camp, a Horde outpost, sits on that road near the border, so keep your distance on PvP realms.
- 3Follow the road south and turn west before the Crossroads, which is a Horde town full of guards.
- 4Head for the north side of Lushwater Oasis and enter the skull cave at about 46.0, 36.3. The portal is at the end of the outer cave.
- 5Coming from Stranglethorn instead? Take the boat from Booty Bay to Ratchet, grab the neutral flight path there and ride west to the oasis. Ratchet also has three of your quests.
- 1Fly to the Crossroads in the Barrens. Tonga Runetotem there starts the chain that leads to Leaders of the Fang.
- 2Ride south-west to the north side of Lushwater Oasis.
- 3Before you go in, climb to the small cave above the entrance at about 45.6, 35.6 for Nalpak and Ebru.
- 4Enter the skull cave at about 46.0, 36.3 and follow it to the portal at about 47.7, 35.0. Mad Magglish hides in the outer cave, kill him for Trouble at the Docks.
- Entrance portalMap coordinates, The Barrens
47.7, 35.0
Copies the /way command for TomTom.
Group Finder
No meeting stone has turned up near the cave in the beta, so walk in together or let a warlock summon. The Group Finder lists Wailing Caverns from level 17.
After a wipe
A wipe means a ghost run from the nearest spirit healer back to the oasis and through the outer cave. Get a rez from a priest, shaman or paladin whenever one is still standing.
Map and route
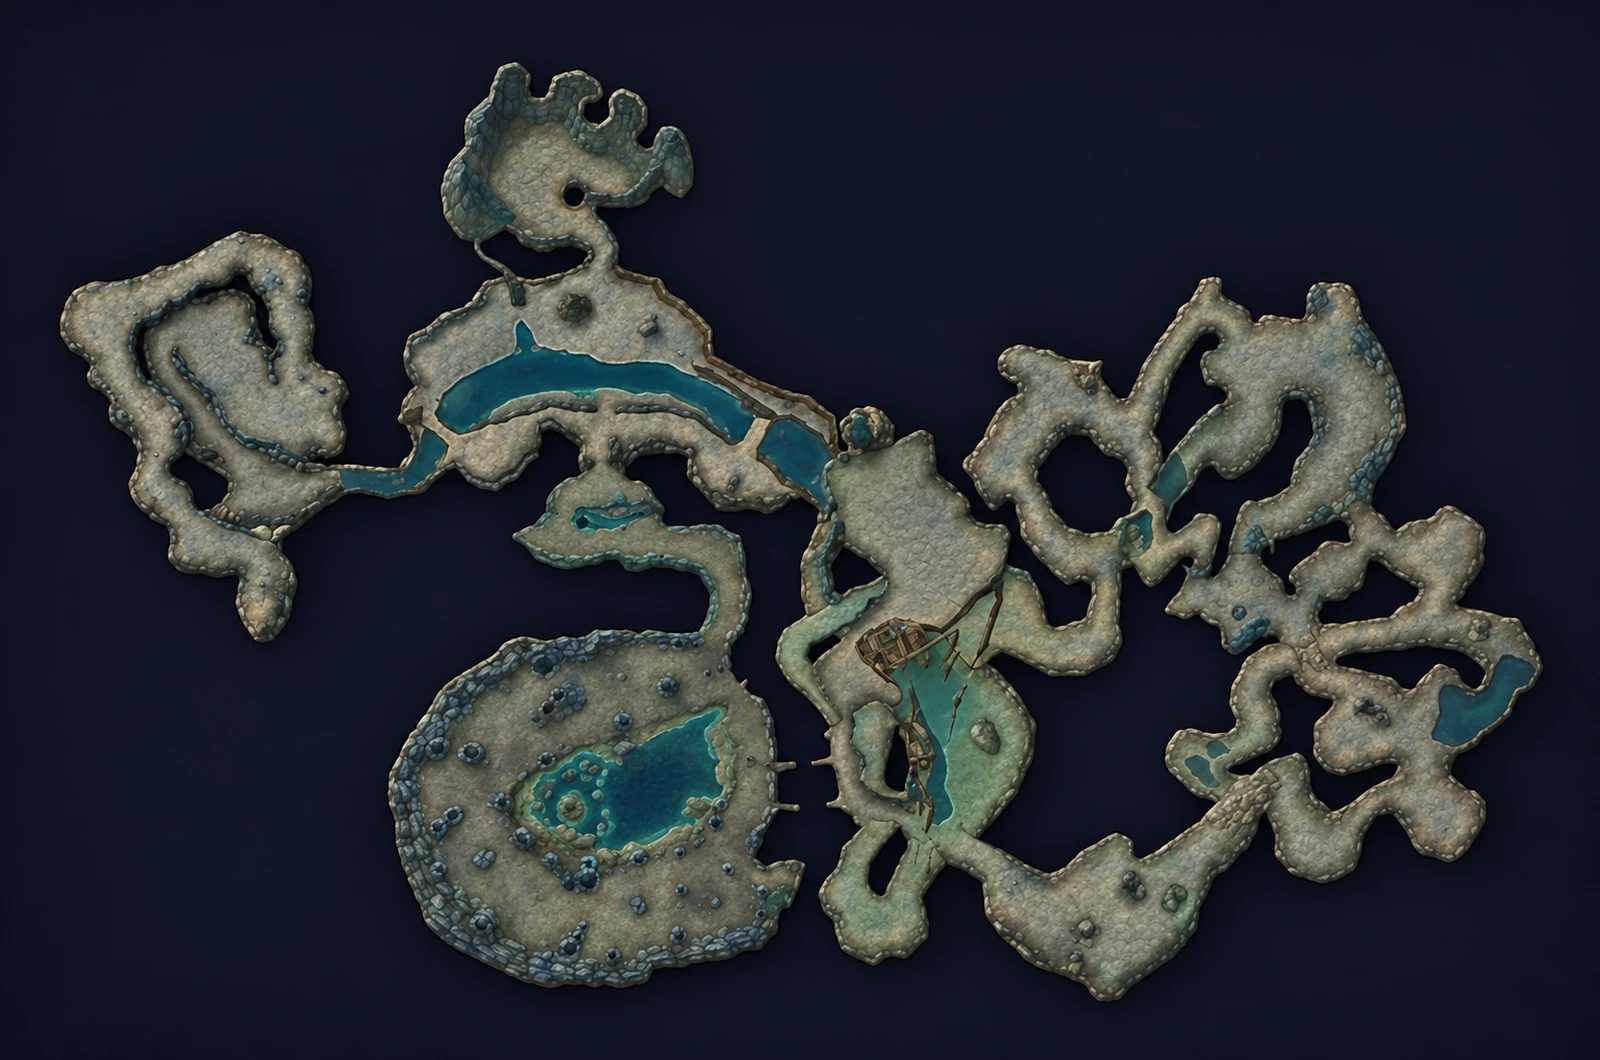
The route through the dungeon
5 areas, one path. Tap a stop to see what waits there.
Area 1 of 5
Screaming Gully
Behind the portal the Disciple of Naralex waits near the start. Leave him for now. Elite Deviate raptors and Druids of the Fang guard the way through the Screaming Gully to Lady Anacondra, usually the first Fanglord you meet.
Area 2 of 5
Pit of Fangs
Lord Cobrahn and Lord Pythas hold the area around the Pit of Fangs. Cobrahn stands with three non-elite Deviate Pythons, Pythas with a Druid of the Fang and a Deviate Shambler. Kresh the turtle swims along the river and is optional. Their exact spots differ between guides.
Boss here
BetaSpot from beta reports, it can still change
Area 3 of 5
Winding Chasm
The twisting tunnels and the water caves below hold the optional fights. The rare Deviate Faerie Dragon spawns with two Druids of the Fang, Skum lurks in the water, and Evolving Ectoplasm drops the Wailing Essence for Smart Drinks. Mark the way you came, the tunnels look alike.
Boss here
BetaSpot from beta reports, it can still change
Area 4 of 5
Crag of the Everliving
Lord Serpentis, the last Fanglord, can be pulled on his own here. Verdan the Everliving stands on the crag behind him. Kill Verdan even though the event does not need him, in Classic his death opens a waterfall shortcut back to the start.
Boss here
Area 5 of 5
Dreamer's Rock
With all four Fanglords dead, talk to the Disciple of Naralex at the start. He walks to Naralex on Dreamer's Rock, raptors and then snakes ambush you on the way, and the ritual brings three elite Deviate Moccasins, a swarm of Nightmare Ectoplasm and finally Mutanus.
Boss here
 Deviate MoccasinElite
Encounters
Boss roster
Main bosses8
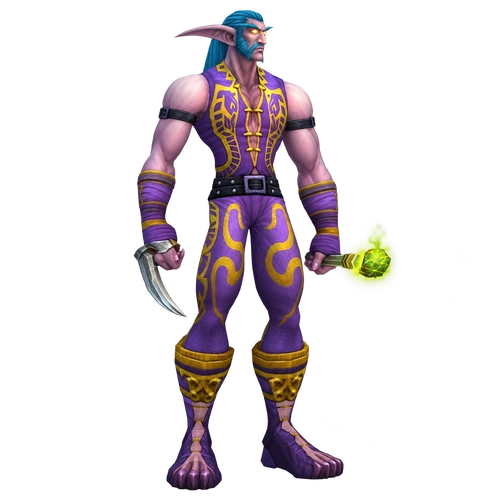
Lord Cobrahn stands with three non-elite Deviate Pythons. He sleeps a player with Druid's Slumber, poisons the tank and later shifts into Cobrahn Serpent Form, which swings slower but much harder.
Abilities
- Poison · Inflicts Nature damage to an enemy every 3 sec. for 30 sec.
- Healing Touch · Heals a friendly target for (85.7% of Spell Power).
- Cobrahn Serpent Form · Shapeshifts into a serpent for 5 min., increasing attack damage and increasing the time between attacks by 43%.
- Druid's Slumber · Puts the enemy target to sleep for up to 15 sec. Any hostile action will awaken the target. Only one target can be slept at a time.
- Lightning Bolt · Blasts an enemy with lightning, inflicting Nature damage.
Tactics
- AoE the three Pythons down first, they have little health.
- Interrupt Druid's Slumber and Healing Touch.
- When he turns into a serpent he stops casting and starts hitting hard. The tooltip shows 238 extra attack damage, so the tank uses a cooldown then.
Tank
Pick up the Pythons and Cobrahn together, then save a defensive for Serpent Form.
Healer
Remove his Poison from the tank when you can, it ticks for 30 seconds.
Damage
Kill the Pythons, then switch and burn Cobrahn while he still casts.
Watch out for: The hard melee hits once he is in Serpent Form.
Adds
Notable loot
 Robe of the Moccasin · Chest
 Leggings of the Fang · Legs
 Cobrahn's Grasp · Waist
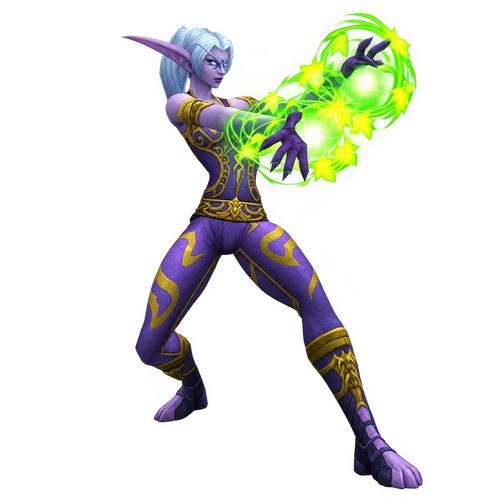
Lady Anacondra is usually the first of the four Fanglords. She is a caster with Sleep, Healing Touch, Lightning Bolt and Thorns Aura, and she drops a gem for Leaders of the Fang.
Abilities
- Sleep · Puts the enemy target to sleep for up to 20 sec. Any damage caused will awaken the target. Only one target can be asleep at a time.
- Healing Touch · Heals a friendly target for (71.4% of Spell Power).
- Thorns Aura · Causes Nature damage to any creature that strikes a nearby party member. Players may only have one aura on them per paladin at any one time. The aura lasts 1 min.
- Lightning Bolt · Blasts an enemy with lightning, inflicting Nature damage.
Tactics
- Clear the raptors and druids around her before the pull. In Classic, one Sleep is fine but two sleeps from her and an extra druid at once wipe groups.
- Kick Sleep first, Healing Touch second.
- Thorns Aura hurts melee that hit her, so healers keep an eye on the melee too, not just the tank.
Tank
Pull her away from any druid pack and keep her facing away from the group.
Healer
If you get slept, the tank needs a top up right after, so stay in range and pre-heal before a cast lands.
Damage
Agree on an interrupt order before the pull so every Sleep and Healing Touch gets kicked.
Watch out for: Two sleeps at once when an extra Druid of the Fang joins.
Notable loot
 Serpent's Shoulders · Shoulder
 Belt of the Fang · Waist
 Snake Eye Kaleidoscope · Neck
 Snakeskin Bag · Other
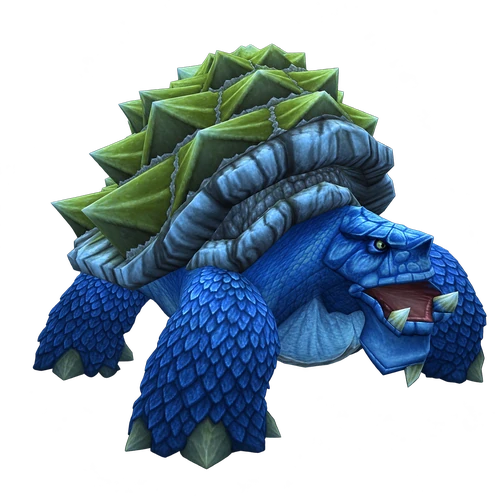
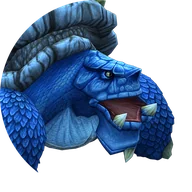
Kresh is a big turtle that swims along the river. He is optional and a plain tank and spank with lots of armor, and he drops two shields and the new Cloak of Hermitic Bliss.
Tactics
- Fight him in the open. In Classic he could swim into the rocks and become hard to reach.
- His armor makes melee groups slow, so casters and wands speed this up.
Tank
Hold him where he stands, there is nothing to dodge.
Healer
Steady damage on the tank only.
Damage
Casters do the work here, melee just keep hitting.
Watch out for: Him pathing into the rocks mid fight.
Notable loot
 Worn Turtle Shell Shield · Shield
 Kresh's Back · Shield
 Cloak of Hermitic Bliss · Back
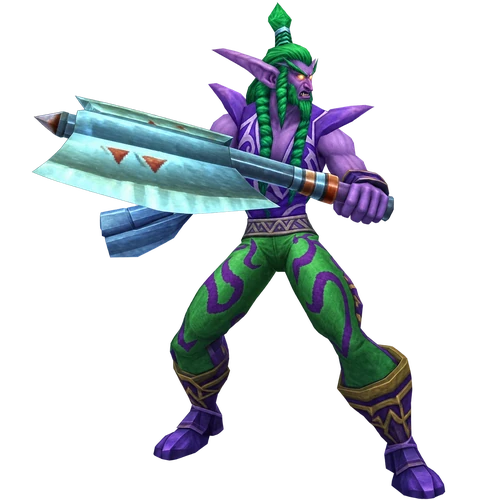
Lord Pythas brings a Druid of the Fang and a Deviate Shambler. He casts Sleep, Healing Touch and Lightning Bolt, and his Thunderclap slows everyone close to him.
Abilities
- Sleep · Puts the enemy target to sleep for up to 20 sec. Any damage caused will awaken the target. Only one target can be asleep at a time.
- Healing Touch · Heals a friendly target for (71.4% of Spell Power).
- Thunderclap · Inflicts Nature damage to nearby enemies, increasing the time between their attacks by 43% and slowing their movement by 40% for 10 sec.
- Lightning Bolt · Blasts an enemy with lightning, inflicting Nature damage.
Tactics
- CC the Druid of the Fang for the whole fight.
- Kill the Shambler first and interrupt its Wild Regeneration.
- Keep one player on Pythas the whole time to kick Sleep while the rest kill the Shambler.
- Thunderclap hits everyone nearby for Nature damage and slows attacks and movement for 10 seconds, so ranged stay out of melee range.
Tank
Hold Pythas and the Shambler together and face them away from the group.
Healer
Watch the CC on the druid, if it breaks you deal with two sleeps.
Damage
Shambler first, then Pythas, and never hit the CC'd druid.
Watch out for: The CC on his Druid of the Fang breaking.
Adds
 Druid of the Fang ×1 · Druid's Slumber: Puts the enemy target to sleep for up to 15 sec. Any hostile action will awaken the target. Only one target can be slept at a time. · Healing Touch: Heals a friendly target for (71.4% of Spell Power).
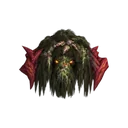 Deviate Shambler ×1 · Wild Regeneration: Heals the caster for damage every 2 sec. for 20 sec.
Notable loot
 Armor of the Fang · Chest
 Stinging Viper · One-Hand
 Slither Cord · Waist
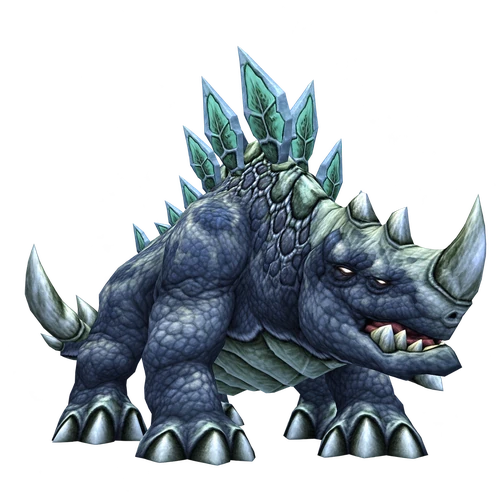
Skum is an optional thunder lizard in the water caves. His only real spell is Chained Bolt, but his loot makes him worth the detour, including the new Skum's Bucket.
Abilities
- Chained Bolt · Strikes an enemy with a lightning bolt that arcs to another nearby enemy. The spell affects up to 3 targets, causing Nature damage to each.
Tactics
- Chained Bolt jumps between up to three players. The tooltip shows 143 Nature damage per target, so melee spread around him.
- In Classic he runs away at low health. Slow or stun him so he does not pull more mobs.
Tank
Keep him still and turned so melee can stand apart.
Healer
Heal up after each Chained Bolt before the next one jumps.
Damage
Spread out and save a slow or stun for when he tries to flee.
Watch out for: Chained Bolt jumping through a stacked melee group.
Notable loot
 Tail Spike · One-Hand
 Glowing Lizardscale Cloak · Back
 Skum's Bucket · Held In Off-hand
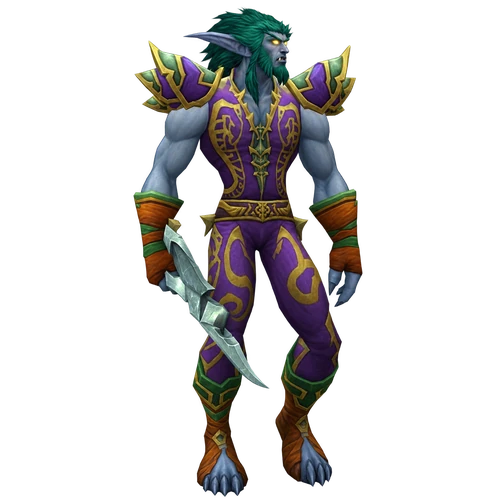
Lord Serpentis is the last of the four Fanglords and the easiest. He has no adds and casts Sleep, Healing Touch and Lightning Bolt.
Abilities
- Sleep · Puts the enemy target to sleep for up to 20 sec. Any damage caused will awaken the target. Only one target can be asleep at a time.
- Healing Touch · Heals a friendly target for (100% of Spell Power).
- Lightning Bolt · Blasts an enemy with lightning, inflicting Nature damage.
Tactics
- Pull him on his own after you clear the area.
- Kick Sleep and Healing Touch, and the fight is over quickly.
Tank
Pull him away from the next packs and hold him there.
Healer
Nothing special, just watch for Sleep on yourself.
Damage
Keep a kick ready for when the main interrupter is asleep.
Watch out for: Healing Touch going off when nobody has an interrupt ready.
Notable loot
 Footpads of the Fang · Feet
 Serpent Gloves · Hands
 Savage Trodders · Feet
 Venomstrike · Ranged
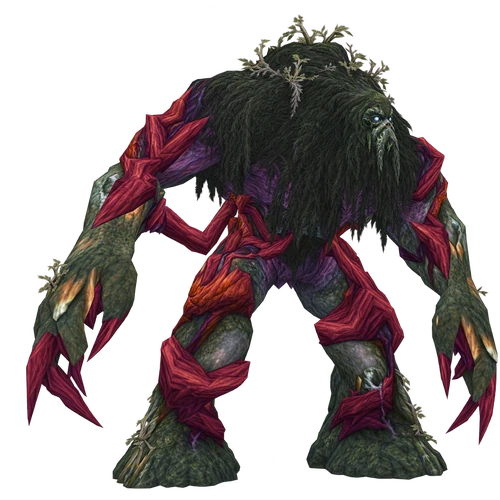
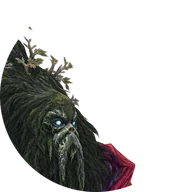
Verdan the Everliving is a big elemental on the Crag of the Everliving. The event does not need him, but he drops a staff, a shield and a cloak worth having.
Abilities
- Grasping Vines · Inflicts Physical damage to nearby enemies, knocking them down and immobilizing them for 10 sec.
Tactics
- Grasping Vines hits everyone close to him, knocks them down and roots them for 10 seconds. Ranged and healers stand at max range.
- Once you are rooted, you cannot move away, so take your spot before the pull.
Tank
Find your spot before the first Vines and stay there.
Healer
Stand at max range so the Vines never reach you, and heal the melee through it.
Damage
Ranged at max range, melee accept the roots and keep hitting.
Watch out for: Healers standing close enough to get rooted.
Notable loot
 Seedcloud Buckler · Shield
 Living Root · Two-Hand
- Sporid Cape · Back
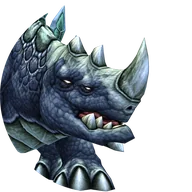
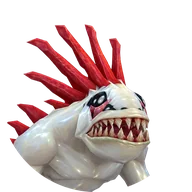
Mutanus the Devourer is the final boss. He only appears at the end of the Naralex event, after the escort and two waves of adds, and he tries to kill the Disciple. Killing him is what counts for the Novice Spelunker achievement.
Abilities
- Terrify · Terrifies an enemy, causing it to flee in fear for 4 sec. Only 1 target can be terrified at a time.
- Naralex's Nightmare · Puts the enemy target to sleep for up to 15 sec. Any hostile action will awaken the target. Only one target can be slept at a time.
- Thundercrack · Inflicts Nature damage to nearby enemies, stunning them for 2.5 sec.
Tactics
- Talk to the Disciple of Naralex at the start once all four Fanglords are dead, then escort him to Dreamer's Rock.
- Thundercrack hits everyone close to him. The tooltip shows 475 Nature damage and a 2.5 second stun, so ranged and healers stay well away.
- Terrify fears one player for 4 seconds and Naralex's Nightmare sleeps one player for up to 15 seconds. Have a backup healer or potions ready.
- If the Disciple dies, the event fails and you need a reset and all four Fanglords again.
Tank
Grab him the second he spawns and turn him away from the Disciple.
Healer
Stand at max range, out of Thundercrack, and watch the tank during your own sleep.
Damage
Ranged do the heavy lifting here, melee use cooldowns and potions to survive the stuns.
Watch out for: Thundercrack stunning the melee and the tank at once.
Adds
Notable loot
 Slime-encrusted Pads · Shoulder
 Deep Fathom Ring · Finger
 Mutant Scale Breastplate · Chest
Rare spawns1
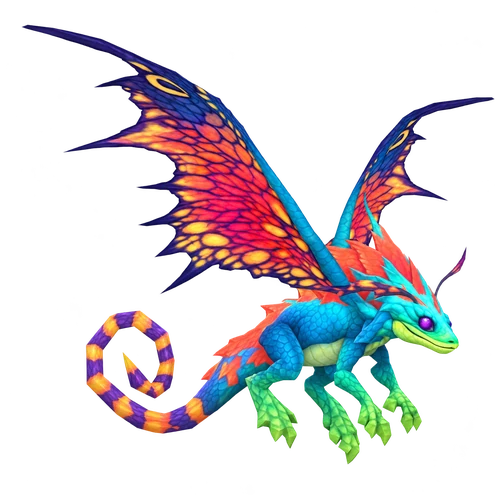
The Deviate Faerie Dragon is a rare elite that does not spawn in every run. It has no special spells but comes in a pull of four elites with two Druids of the Fang, and it drops the Firebelcher wand and the Feyscale Cloak.
Tactics
- CC one druid, kill the other first and kick its sleeps.
- Then burn the dragon. It has low armor and hits hard.
- The tank takes hits from three elites, so hybrids help with heals.
Tank
Hold the dragon and the free druid together.
Healer
Expect heavy tank damage at the start of the pull.
Damage
Focus one target at a time and do not break the CC.
Watch out for: Druid's Slumber on the healer while the tank holds three elites.
Adds
- Druid of the Fang ×2 · Druid's Slumber: Puts the enemy target to sleep for up to 15 sec. Any hostile action will awaken the target. Only one target can be slept at a time. · Healing Touch: Heals a friendly target for (71.4% of Spell Power).
Notable loot
 Firebelcher · Ranged
 Feyscale Cloak · Back
Trash
Dangerous trash and diseases
Most wipes here start before a boss. These are the packs and effects to respect.
Druids of the Fang
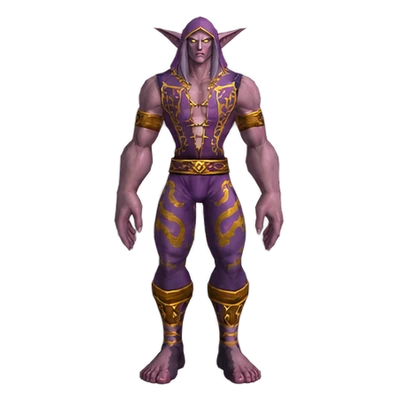
The pack that wipes groups. Druid's Slumber puts one player to sleep for up to 15 seconds, often the healer, and they heal each other with Healing Touch. Fight one druid at a time, CC the rest and kick every Slumber. Once they shift into Serpent Form they cannot cast for 10 seconds, so that is your window to burn them. They also drop the Gloves of the Fang.
Shamblers and Lashers
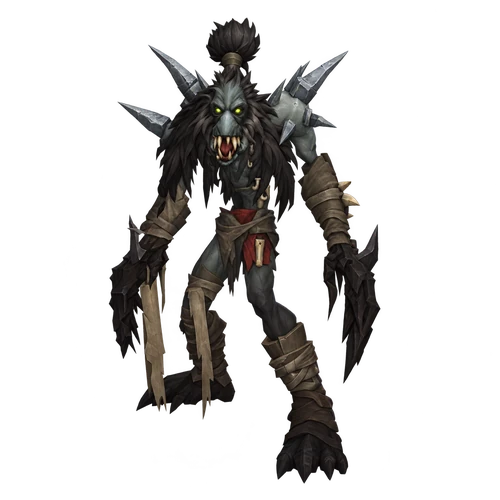
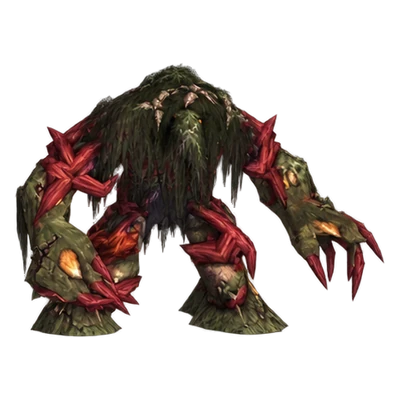
Deviate Shamblers cast Wild Regeneration, a big heal over 20 seconds. Interrupt it or kill the Shambler first. Deviate Lashers hit everything in a cone in front of them, so the tank turns them away from the group.
Deviate wind serpents
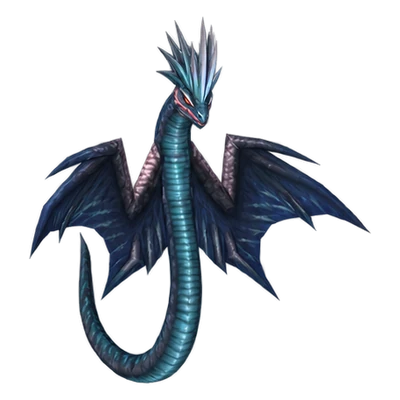
Deviate Dreadfangs fear one player for 4 seconds with Terrify, which can send him into the next pack. Venomwings spit Nature damage from range. Pull them back around a corner so they come to you. A shaman's Tremor Totem helps.
Poison snakes
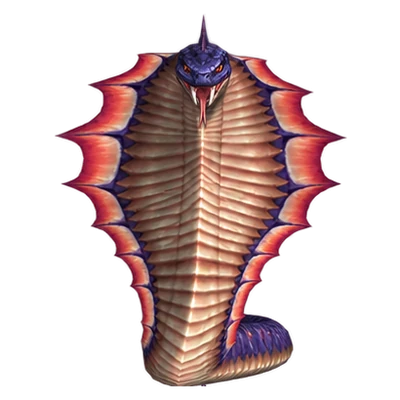
Deviate Vipers stack Localized Toxin for a minute and Deviate Adders a 30 second poison. Several stacks on the tank add up fast, so bring poison removal or anti-venom. The non-elite Pythons near Lord Cobrahn die to a bit of AoE.
The Naralex ritual
Three elite Deviate Moccasins come first, then a swarm of non-elite Nightmare Ectoplasm. Everything goes for the Disciple, so the tank grabs the Moccasins and the damage dealers AoE the slimes off him before Mutanus shows up.
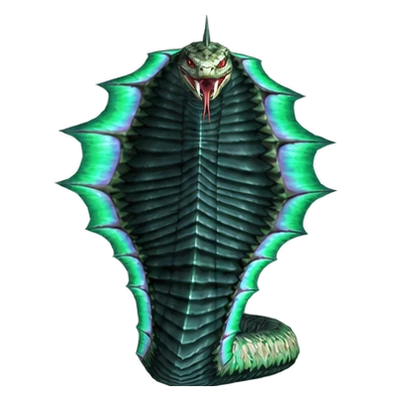
 Deviate Lasher
 Deviate DreadfangElite
 Deviate ViperElite
Quests
Wailing Caverns quests
Wailing Caverns has 11 quests: ten for the Horde and six for the Alliance, five of them shared by both factions. Most can be taken from level 13 to 15 and are level 17 to 22, The Glowing Shard chain goes up to 26. Blizzard halved the extra experience of dungeon quests on October 1, so the experience still moves in the beta and is left out below.
Alliance6
Pick up before you go
- 1Ratchet: Crane Operator Bigglefuzz (Trouble at the Docks) and Mebok Mizzyrix (Smart Drinks, after his Raptor Horns quest).
- 2The small cave above the entrance, about 45.6, 35.6: Nalpak (Deviate Hides) and Ebru (Deviate Eradication).
- 3Inside the dungeon: the Glowing Shard from Mutanus starts The Glowing Shard and the In Nightmares follow-up.
- Level 18, from 14
- Quest giver
- Crane Operator BigglefuzzThe Barrens · 63.0, 37.5
- Turn in
- Crane Operator BigglefuzzThe Barrens · 63.0, 37.5
Crane Operator Bigglefuzz in Ratchet wants his 99-Year-Old Port back. Mad Magglish has it, a rare goblin in the outer cave before the portal.
- Level 18, from 13
- Quest giver
- Mebok MizzyrixThe Barrens · 62.4, 37.6
- Turn in
- Mebok MizzyrixThe Barrens · 62.4, 37.6
Mebok Mizzyrix in Ratchet unlocks it after his Raptor Horns quest. Collect 6 Wailing Essence from the oozes inside, mostly Evolving Ectoplasm.
- Level 17, from 13
Nalpak in the small cave above the entrance wants 20 Deviate Hides. Most Deviate beasts inside and in the outer cave drop them. Rewards a 10-slot bag and leather leggings.
You get: Deviate Hide Pack, Slick Deviate Leggings
- Level 21, from 15
Ebru, next to Nalpak, wants 7 each of Deviate Ravagers, Vipers, Shamblers and Dreadfangs. Pick a wand, mail gloves or the leatherworking pattern.
- Level 26, from 15
- Starts from
 Glowing Shard
- Turn in
- Falla SagewindThe Barrens · 48.2, 32.8
Starts from the Glowing Shard that Mutanus drops. Show it to Sputtervalve near the flight master in Ratchet, then hand it in to Falla Sagewind on the hill above the cave.
- Level 25, from 10
Follow-up: The Glowing Shard
In Nightmares- Quest giver
- Falla SagewindThe Barrens · 48.2, 32.8
- Turn in
- Mathrengyl BearwalkerDarnassus · 35.2, 8.0
Falla Sagewind sends you with the Nightmare Shard to Mathrengyl Bearwalker in the Cenarion Enclave of Darnassus. Rewards Talbar Mantle or Quagmire Galoshes.
Choose one
 Pattern: Deviate Scale Belt
 Sizzle Stick
 Dagmire Gauntlets
 Talbar Mantle
 Quagmire Galoshes
Horde10
Pick up before you go
- 1Crossroads: Tonga Runetotem starts the chain to Hamuul and Nara Wildmane in Thunder Bluff, who gives Leaders of the Fang.
- 2Thunder Bluff: Apothecary Zamah in the Pools of Vision (Serpentbloom).
- 3Ratchet: Crane Operator Bigglefuzz (Trouble at the Docks) and Mebok Mizzyrix (Smart Drinks).
- 4The small cave above the entrance: Nalpak (Deviate Hides) and Ebru (Deviate Eradication).
- 5Inside the dungeon: the Glowing Shard from Mutanus starts The Glowing Shard.
- Level 16, from 10
- Quest giver
- Tonga RunetotemThe Barrens · 52.2, 31.8
- Turn in
- Arch Druid Hamuul RunetotemThunder Bluff · 78.4, 28.5
Tonga Runetotem at the Crossroads sends you to Hamuul Runetotem on Elder Rise in Thunder Bluff once the oasis quests are done.
- Level 16, from 10
Follow-up: Hamuul Runetotem
Nara Wildmane- Quest giver
- Arch Druid Hamuul RunetotemThunder Bluff · 78.4, 28.5
- Turn in
- Nara WildmaneThunder Bluff · 75.4, 31.0
Hamuul passes you on to Nara Wildmane, a few steps away on Elder Rise.
- Level 22, from 10
Follow-up: Nara Wildmane
Leaders of the Fang- Quest giver
- Nara WildmaneThunder Bluff · 75.4, 31.0
- Turn in
- Nara WildmaneThunder Bluff · 75.4, 31.0
Nara Wildmane wants the gems of Cobrahn, Anacondra, Pythas and Serpentis. Horde only. Pick Crescent Staff, Wingblade or the new Hammerbone.
Choose one
- Level 18, from 14
- Quest giver
- Apothecary ZamahThunder Bluff · 22.8, 20.4
- Turn in
- Apothecary ZamahThunder Bluff · 22.8, 20.4
Apothecary Zamah in the Pools of Vision under Thunder Bluff wants 10 Serpentbloom from the plants inside and in the outer cave. There are few nodes, so not everyone finishes it in one run.
- Level 18, from 14
- Quest giver
- Crane Operator BigglefuzzThe Barrens · 63.0, 37.5
- Turn in
- Crane Operator BigglefuzzThe Barrens · 63.0, 37.5
Crane Operator Bigglefuzz in Ratchet wants his 99-Year-Old Port back. Mad Magglish has it, a rare goblin in the outer cave before the portal.
- Level 18, from 13
- Quest giver
- Mebok MizzyrixThe Barrens · 62.4, 37.6
- Turn in
- Mebok MizzyrixThe Barrens · 62.4, 37.6
Mebok Mizzyrix in Ratchet unlocks it after his Raptor Horns quest. Collect 6 Wailing Essence from the oozes inside, mostly Evolving Ectoplasm.
- Level 17, from 13
Nalpak in the small cave above the entrance wants 20 Deviate Hides. Most Deviate beasts inside and in the outer cave drop them. Rewards a 10-slot bag and leather leggings.
You get: Deviate Hide Pack, Slick Deviate Leggings
- Level 21, from 15
Ebru, next to Nalpak, wants 7 each of Deviate Ravagers, Vipers, Shamblers and Dreadfangs. Pick a wand, mail gloves or the leatherworking pattern.
- Level 26, from 15
- Starts from
- Glowing Shard
- Turn in
- Falla SagewindThe Barrens · 48.2, 32.8
Starts from the Glowing Shard that Mutanus drops. Show it to Sputtervalve near the flight master in Ratchet, then hand it in to Falla Sagewind on the hill above the cave.
- Level 25, from 10
Follow-up: The Glowing Shard
In Nightmares- Quest giver
- Falla SagewindThe Barrens · 48.2, 32.8
- Turn in
- Arch Druid Hamuul RunetotemThunder Bluff · 78.4, 28.5
Falla Sagewind sends you with the Nightmare Shard to Hamuul Runetotem on Elder Rise. Rewards Talbar Mantle or Quagmire Galoshes.
Choose one
 Crescent Staff
 Wingblade
 Hammerbone
 Apothecary Gloves
 Heat Resistant Mitts
Loot
Loot table
Every boss drop and every quest reward of the dungeon. Hover an item for its stats.
Almost every boss drop is blue now. Leather users get the most with the Embrace of the Viper set and the Serpent's Shoulders. Mail users get Cobrahn's Grasp, Savage Trodders and the Mutant Scale Breastplate, casters the Robe of the Moccasin, Serpent Gloves and Slime-encrusted Pads, and tanks three shields. Short on evenings to farm these drops? A booked WoW Forever dungeon run with a booster team takes you through Wailing Caverns without the group search.
 Slick Deviate Leggings
Beta drop chances come from a handful of kills and are left out until the sample is bigger.
 Which class? Our tier lists


Collect
Achievements, Pet families and Classes from Wailing Caverns
Achievement1
 Novice SpelunkerEarned in Wailing Caverns, Needs Mutanus the Devourer
Tameable beasts5
 Deviate CrocoliskTameable in Wailing Caverns
 Deviate DreadfangTameable in Wailing Caverns
 Deviate GuardianTameable in Wailing Caverns
- Deviate RavagerTameable in Wailing Caverns
- Deviate VenomwingTameable in Wailing Caverns
Pet family1
 TurtleMembers Kresh
Pet abilities2
 BiteLearned from KreshClassic
- Shell ShieldLearned from KreshClassic
Class1
 HunterUses Kresh
Before you go
Before you go
- Bring interrupts and CCFive bosses and every Druid of the Fang cast sleeps. Rogues, warriors and shamans with a kick, and a mage, hunter or warlock for CC, make the druid pulls safe.
- Bring poison removalVipers and Adders stack long poisons on the tank, and Lord Cobrahn adds his own. A druid, shaman or paladin, or a stack of anti-venom, saves a lot of healing.
- Collect the quests firstHorde quests start at the Crossroads, in Thunder Bluff and in Ratchet, Alliance ones in Ratchet. Nalpak and Ebru stand right above the entrance for both factions.
- Plan for the eventRest to full and drink up before you talk to the Disciple. A group with two or three ranged damage dealers has the easiest time with Mutanus.
- Ranged and healers stay at max range on Verdan and Mutanus. Both punish anyone close.
- Hunters who want Kresh as a pet can tame him. Beta players report that a fresh Kresh spawns for the group's loot.
- Keep your Glowing Shard. The follow-up gives a blue shoulder or boots choice for both factions.
Known beta issues
Serpentbloom for one player only. Each Serpentbloom plant can be picked by one player only. Beta players asked on September 20 for the plants to be lootable by the whole group. Until then, take turns or plan two runs.
Mad Magglish respawns slowly. Since September 30 beta players report that Mad Magglish takes a long time to come back. If he is dead when you arrive, finish the dungeon and check his spot on the way out.
Hermitic Bliss and Aquatic Form. The swim speed of the Cloak of Hermitic Bliss does not add to a druid's Aquatic Form, a beta player found on September 23.
FAQ
Questions players ask
What level is Wailing Caverns in WoW Forever?
It is tuned for levels 17–24. The Group Finder lists it from level 17, the bosses are level 20 to 22 and the quests can be taken from level 10 to 15.
Where is the Wailing Caverns entrance?
On the north side of Lushwater Oasis in the Barrens, south-west of the Crossroads. The skull-shaped cave mouth is at about 46.0, 36.3 and the instance portal at the end of the outer cave at about 47.7, 35.0.
How do Alliance players get to Wailing Caverns?
Fly to Astranaar, ride east and take the road south into the Barrens, then turn west before the Crossroads to Lushwater Oasis. From Stranglethorn, take the boat from Booty Bay to Ratchet and ride west.
Where do you pick up the Wailing Caverns quests?
Horde quests start at the Crossroads, on Elder Rise and in the Pools of Vision in Thunder Bluff and in Ratchet. Alliance players get theirs in Ratchet. Nalpak and Ebru above the entrance have two for both factions, and Mutanus drops the Glowing Shard.
Is Leaders of the Fang still in WoW Forever?
Yes. Nara Wildmane in Thunder Bluff still gives it after Tonga Runetotem's oasis chain, Horde only, and it now offers Hammerbone as a third reward. There is no Alliance version.
How do you start the Naralex event and reach Mutanus?
Kill Lady Anacondra, Lord Cobrahn, Lord Pythas and Lord Serpentis, then talk to the Disciple of Naralex at the start. Escort him to Dreamer's Rock and protect him through two waves until Mutanus spawns.
How many bosses are in Wailing Caverns?
Eight, plus the rare Deviate Faerie Dragon. Kresh, Skum and Verdan the Everliving are optional, the four Fanglords are needed for the event and Mutanus is the final boss.
How long does a full Wailing Caverns clear take?
Plan about 45–65 minutes with the event. Skipping Kresh, Skum and the rare saves time, and a wipe on Mutanus costs a full reset.
What does Wailing Caverns drop, and is the Embrace of the Viper set in Forever?
Every boss drops blue gear: leather, cloth and mail armor, weapons, three shields and a ring. The Embrace of the Viper set is in Forever with new bonuses, four pieces from the Fanglords and the gloves from Druids of the Fang.
What level is too high for Wailing Caverns?
Past about level 25 the boss gear falls behind and quest experience shrinks the more you outlevel the quests. The Glowing Shard chain at level 26 stays worth it a little longer.
What changed in Wailing Caverns for WoW Forever?
The caves and bosses are the same. The loot was reworked, four new rare drops were added, the Embrace of the Viper set got new bonuses and two quests got new rewards.
Sources
Sources
- Blizzard: WoW Forever beta development notes, October 1Confirmed
- Wowhead · Forever beta databaseBeta data
- Warcraft Wiki · Classic referenceClassic
- Run time and difficulty are editorial estimates by mmonster.
mmonster boost
Short on time? Run Wailing Caverns with mmonster
Our boosters organize the group and run the dungeon with you. Run styles, play methods and the current price are on the service page.
Keep going