


Scholomance Dungeon Guide
Scholomance, Scholo for short, is the Scourge's school of necromancy in the crypts under Caer Darrow in the Western Plaguelands, a level 58–60 Classic dungeon in WoW Forever. Here is the way to the island, the Skeleton Key chain for both factions, every Scholomance quest, the route over four floors, all 16 bosses with Classic tactics and the Forever loot.
- Level
- 58–60
- Bosses
- 16
- Full clear
- 75–105min
- Difficulty
- 8/10
Western Plaguelands · Eastern KingdomsEntrance 69.0, 72.7Show on the mapRun it with mmonster
The bosses
 1Blood Steward of KirtonosLevel 61
 2Kirtonos the HeraldLevel 60
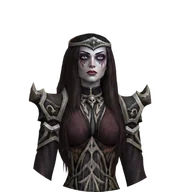 3Jandice BarovLevel 61
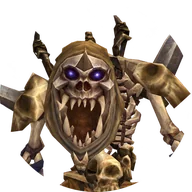 4RattlegoreLevel 61
 5Death Knight DarkreaverLevel 62
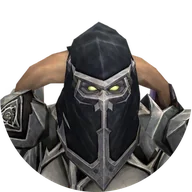 6Marduk BlackpoolLevel 58
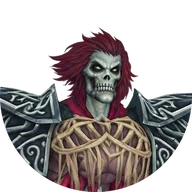 7VectusLevel 60
 8Ras FrostwhisperLevel 62
 10Instructor MaliciaLevel 60
 11Doctor Theolen KrastinovLevel 60
 12Lorekeeper PolkeltLevel 60
 13The RavenianLevel 60
 14Lord Alexei BarovLevel 60
 15Lady Illucia BarovLevel 60
 16Final bossDarkmaster GandlingLevel 61
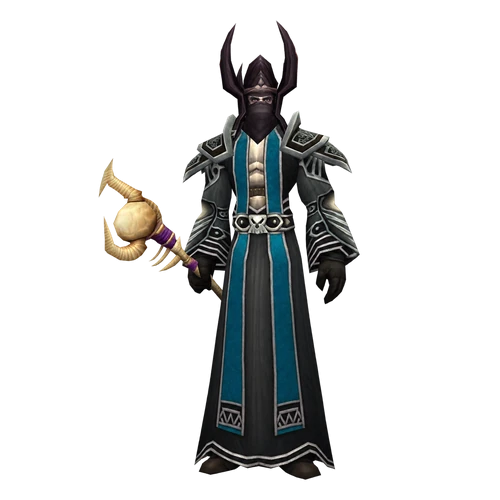
Overview
Inside Scholomance
The Barov family gave their keep on Caer Darrow to the Cult of the Damned, and its crypts became the school where the Scourge trains its necromancers. A locked gate at the top of the island keeps you out until someone brings the Skeleton Key. Inside you pass the Reliquary and the Chamber of Summoning, cross a great hall to the Great Ossuary, where Rattlegore drops the key to the Viewing Room, then reach Ras Frostwhisper's laboratory. Six teachers hold the rooms around the Headmaster's Study, and when they are dead Darkmaster Gandling waits inside.
16 bosses live here. Some are optional or summoned: the Blood Steward of Kirtonos, Kirtonos the Herald, who comes for the Blood of Innocents, Jandice Barov below the hatchery and Death Knight Darkreaver, who only appears for a paladin or shaman class quest. Marduk Blackpool and Vectus turn hostile in the Viewing Room, and Kormok of the Dungeon Set 2 chain is summoned in Ras Frostwhisper's room. The bosses are level 58 to 62 and the trash 57–61.
The school in the Forever client is the Classic one, with the same rooms and quests, and Forever left the Western Plaguelands map as it was. What changed is the loot, a few quest rewards and some spell numbers. The tactics below are how the fights work in Classic until the first Forever runs.
Level 58–60 is the range the dungeon is tuned for, not a minimum entry level. This is the Forever level range as it stands today. It can still shift before launch.
Beta status
Scholomance in the WoW Forever beta
Not open in the beta yetConfirmedChecked October 4, 2026
Scholomance is not open in the WoW Forever beta. Blizzard raised the beta level cap to 30 on October 1, and Scholomance is not on the list of dungeons players can enter, and no post says when the 50s follow. Until then this page combines the Forever game data with the Classic fights, and the first beta runs will replace the Classic tactics here.
Forever vs Classic
What changed in Scholomance for WoW Forever
What is different from the Classic version you may know. Everything else works as it did in Classic.
Dungeon Set 1 was reworkedBeta data
The eight-piece Dungeon Set 1 now gives its bonuses at 2, 3, 4, 5 and 6 pieces instead of 2, 4, 6 and 8, and most pieces trade their Spirit for other stats. Darkmaster Gandling drops the helms of all nine sets, and nine other bosses drop one piece each.
New stats on the Scholomance dropsBeta data
The five Deathbone Guardian pieces swap their Defense and mana regeneration for Intellect and Defense Rating, and the Boneclenched Gauntlets of Ras Frostwhisper gain a little Strength and Stamina. Death Knight Darkreaver's Necromantic Band now adds Shadow Resistance and regenerates twice as much health, and Mirah's Song from Kirtonos the Herald has a new damage range and health regeneration.
53 Classic boss items are missingBeta data
53 Classic boss items of Scholomance have no Forever entry yet, most of them the blues outside the sets. Marduk Blackpool and Vectus show no boss loot in Forever for now. Whether these items come back or were cut is open, so the loot table only lists what Forever has.
Three quests lost their rewardsBeta data
Kirtonos the Herald, Dawn's Gambit and The Lich, Ras Frostwhisper no longer offer their Classic items. Kirtonos the Herald still gives Mirah's Song, the others have no known Forever reward yet. The Spectral Essence from Kirtonos the Herald is gone too, and in Classic that was the item that let you see Magistrate Marduke and the ghosts of Caer Darrow.
Ras Frostwhisper hits harderBeta data
Ras Frostwhisper's Frostbolt Volley hits much harder in the Forever data than in Classic. The Bone Armor of the Occultists and Bonewarders and the Disease Cloud of the Diseased Ghouls show new numbers too. Plan with the Classic fights until a run shows how hard they really hit.
Less bonus XP from dungeon questsConfirmed
Since October 1 dungeon quests give only half of their bonus experience on top of a normal quest. The Scholomance quests still pay well for the time, but less than in Classic.
Location
Where is Scholomance? Entrance and how to get there
Scholomance lies under the ruined keep on Caer Darrow, an island in Darrowmere Lake in the south-east of the Western Plaguelands. The portal is at about 69.0, 72.7, behind a locked gate at the top of the island. One player with the Skeleton Key opens it for the group. In Classic a rogue with Lockpicking, a Powerful Seaforium Charge or a player who dies and resurrects past the gate also gets you in. Forever did not change the Western Plaguelands map, so Classic coordinates still fit here.
Now you can move the map.
No spawn points on the map for this one.
- 1Fly to Chillwind Camp in the south-west of the Western Plaguelands, the flight master is at about 42.9, 85.0.
- 2Head east across the zone to Darrowmere Lake.
- 3Cross over to Caer Darrow and climb to the gate at the top of the island, the portal is at about 69.0, 72.7.
- 1Fly to Undercity. The Horde has no flight point in the Western Plaguelands.
- 2Ride east through Tirisfal to the Bulwark on the border, at about 26.4, 56.1 on the Western Plaguelands map.
- 3Head east across the zone to Darrowmere Lake, cross over to Caer Darrow and climb to the gate at about 69.0, 72.7.
- Entrance portalMap coordinates, Western Plaguelands
69.0, 72.7
Copies the /way command for TomTom.
Group Finder
The Forever Group Finder lists Scholomance at levels 58–60. Nothing shows a working meeting stone on Caer Darrow in Forever yet, so meet on the island and let a warlock summon the rest.
After a wipe
In Classic a death in Scholomance sends you to the spirit healer on Caer Darrow itself, at about 65.8, 74.3, a short run to the gate. Which spirit healer Forever uses has not been reported yet. Inside, the way back to the lower floors is long, so do not pull the Viewing Room in a hurry.
Map and route
The route through the dungeon
15 areas, one path. Tap a stop to see what waits there.
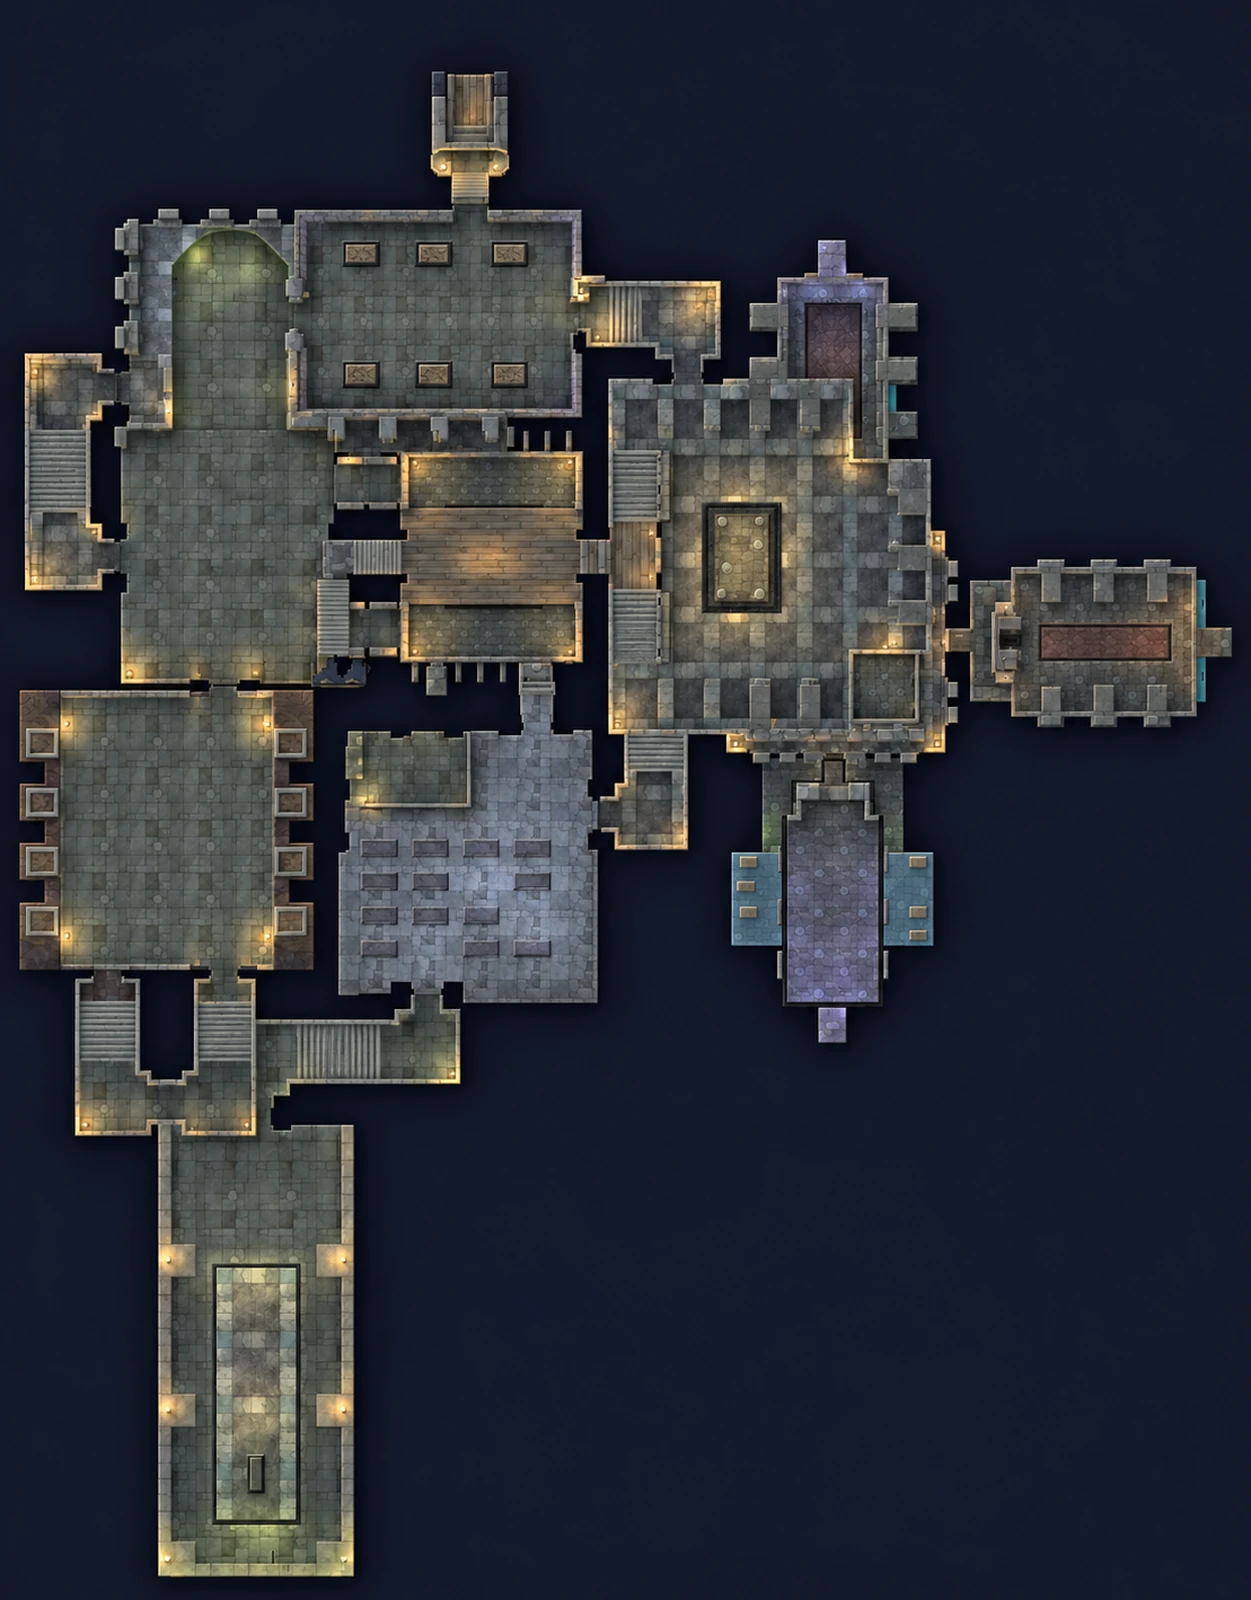
Area 1 of 15
The Herald's balcony
The balcony next to the Chamber of Summoning with the Brazier of the Herald. Kirtonos the Herald only comes when someone places the Blood of Innocents in it.
Boss here
BetaSpot from beta reports, it can still change
Area 2 of 15
The Reliquary
The first hall after the arrival, with Neophytes, Acolytes and Spectral Researchers. The Blood Steward of Kirtonos walks here, and The Deed to Southshore for Barov Family Fortune lies in this room.
 Spectral ResearcherElite
Area 3 of 15
Chamber of Summoning
Dark Summoners sit at their campfires here with a few Risen Guards and a Necrolyte. Take them one camp at a time.
Area 4 of 15
The great hall
The big room after the Chamber of Summoning, with Risen Aberrations, Diseased Ghouls, Necromancers and Necrofiends. It has three exits: stairs down to Jandice Barov, straight on to the Great Ossuary and left to the last part of the school. The Deed to Tarren Mill lies here.
 Risen Aberration
 Scholomance NecromancerElite
BetaSpot from beta reports, it can still change
Area 5 of 15
Jandice's hall
The lower hall with Jandice Barov, the biggest pack area of the second floor. A torch on the wall below the hatchery opens her room in Classic. Many groups skip her unless they need Krastinov's Bag of Horrors.
Boss here
BetaSpot from beta reports, it can still change
Area 6 of 15
The Great Ossuary
Rattlegore waits here with Risen Constructs and Scholomance Handlers, and the Plagued Hatchlings for Betina's quests fill the hatchery. Rattlegore drops the key to the Viewing Room. The Divination Scryer for Death Knight Darkreaver is used in this room.
 Risen ConstructElite
Area 7 of 15
The Viewing Room
Dozens of Scholomance Students sit around Marduk Blackpool and Vectus. Dawn's Gambit turns the students into skeletons and the two bosses hostile, without it groups walk past. The Old Treasure Chest stands here.
 Scholomance StudentElite
Area 8 of 15
The Laboratory
Ras Frostwhisper's room with the alchemy lab, where the flasks are made, and The Deed to Brill. The Dungeon Set 2 chain summons Kormok here with the Brazier of Beckoning.
Area 9 of 15
The Coven
Instructor Malicia with her Occultists. Clear the humans in this room too, they count for Gandling.
Area 10 of 15
Hall of the Damned
Doctor Theolen Krastinov's laboratory with the Remains of Eva and Lucien Sarkhoff and his work bench.
Boss here
Mobs here
Area 12 of 15
Vault of the Ravenian
The Ravenian with Splintered Skeletons. Clear the room first, Knock Away throws the tank into anything left standing.
Boss here
Area 13 of 15
Barov Family Vault
Lord Alexei Barov with his guards and Diseased Ghouls. The Deed to Caer Darrow lies here.
Area 14 of 15
The Shadow Vault
Lady Illucia Barov with Risen Bonewarders and a crowd of Unstable Corpses.
 Risen BonewarderElite
Area 15 of 15
Headmaster's Study
Darkmaster Gandling's study. In Classic he appears once the six teachers around it are dead.
Boss here
Mobs here
Encounters
Boss roster
Main bosses16
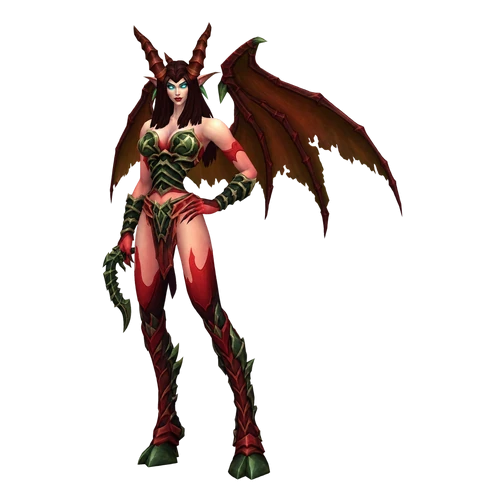
The Blood Steward of Kirtonos is a demon in the Reliquary who carries the Blood of Innocents.
Abilities
- Paralyzing Poison · Stuns an enemy, rendering it unable to move or attack for 8 sec.
- Curse of Weakness · Reduces the Physical damage dealt by an enemy for 2 min. Only one curse per warlock can be active on any one target.
- Curse of Impotence · Decreases the Magical damage dealt by the target for 2 min.
Tactics
- Paralyzing Poison stuns a player for 8 seconds. Cure it on the healer first.
- Curse of Weakness and Curse of Impotence lower physical and magic damage. Remove them if you can.
Healer
Ask for a poison cure when you get stunned.
Watch out for: The stun on the healer while a pack is still up.
Quest item
 Blood of Innocents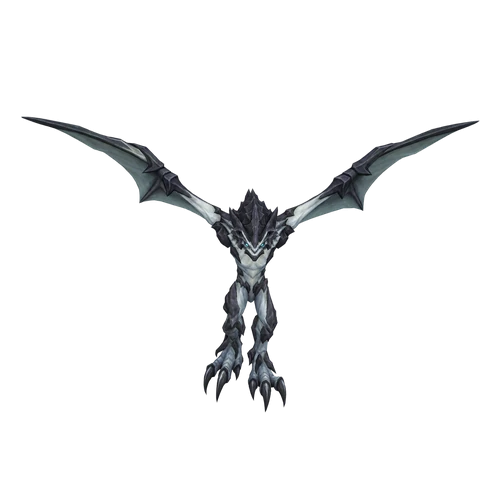
Kirtonos the Herald is an optional summon on the balcony by the Chamber of Summoning, called with the Blood of Innocents.
Abilities
- Wing Flap · Strikes enemies in a cone in front of the caster, knocking them back.
- Swoop · Inflicts normal damage to enemies in a cone in front of the caster, stunning them for 2 sec.
- Disarm · Disarms an enemy, forcing it to stop wielding its weapon for 10 sec.
- Pierce Armor · Reduces an enemy's armor by 50% for 20 sec.
- Curse of Tongues · Forces nearby enemies to speak in Demonic, reducing their casting speed by 50% for 15 sec. Only one curse per warlock can be active on any one target.
- Dominate Mind · Takes control of a humanoid enemy up to level 25 for 15 sec.
- Shadow Bolt Volley · Hurls missiles of dark magic, inflicting Shadow damage to nearby enemies.
Tactics
- In Classic you place the Blood of Innocents in the Brazier of the Herald, the gate at the top of the stairs shuts, and nobody may stand outside it. Kirtonos flies in through the window.
- Tank him at the top of the stairs with your back to a wall. Wing Flap can throw the tank out of the window and out of the instance.
- He also uses Swoop, Disarm, Pierce Armor, Curse of Tongues, Dominate Mind and Shadow Bolt Volley. Remove Curse of Tongues from the casters.
Tank
Back to the wall, never to the window.
Healer
Decurse and watch for a dominated player.
Watch out for: Wing Flap throwing the tank out of the window.
Notable loot
 Boots of Valor · Feet
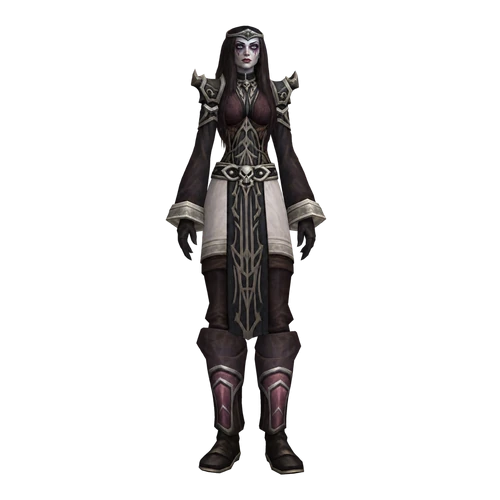
Jandice Barov is an optional boss in the lower hall who splits into illusions.
Abilities
- Curse of Blood · Increases the Physical damage taken by nearby enemies for 10 min.
Tactics
- In Classic she splits into a crowd of illusions. Find the real Jandice, she is the one with missing health, mark her and focus her.
- If the illusions deal too much damage, AoE them down first.
- Remove Curse of Blood, it makes its target take more physical damage.
Tank
Pick her up again after every split.
Healer
Decurse the tank.
Damage
Stay on the marked Jandice.
Watch out for: Losing her among the illusions.
Notable loot
 Dreadmist Mantle · Shoulder
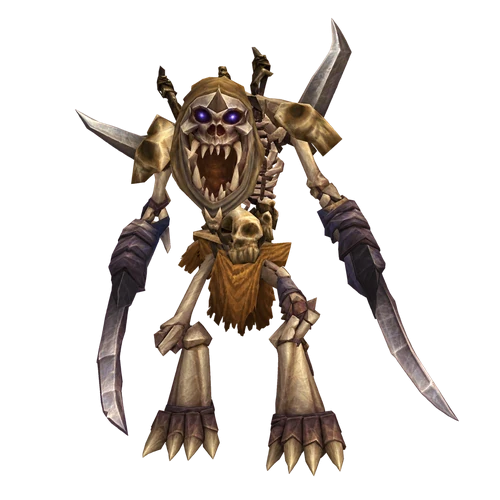
Rattlegore is a huge bone golem in the Great Ossuary who carries the key to the Viewing Room.
Abilities
- War Stomp · Inflicts normal damage to nearby enemies, knocking them back and stunning them for 5 sec.
Tactics
- He hits the tank very hard, and War Stomp knocks everyone near him back and stuns them.
- Let the tank build threat first. A damage dealer who pulls him dies.
- Clear the room before the pull, the constructs around him are tough on their own.
Tank
Use cooldowns early, his swings hurt.
Healer
Stand out of War Stomp range.
Damage
Start slow and watch your threat.
Watch out for: A damage dealer pulling threat right after War Stomp.
Notable loot
 Shadowcraft Boots · Feet
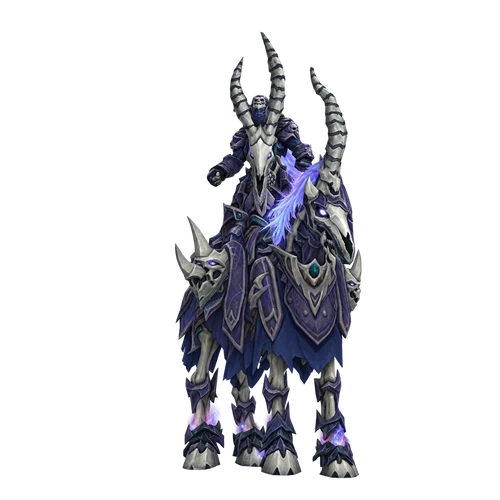
Death Knight Darkreaver only appears for the paladin and shaman class quests of the epic mount chain.
Abilities
- Blood Leech · Drains health from nearby enemies, healing the caster for up to three times the amount stolen.
- Cleave · Inflicts weapon damage to an enemy and its nearest allies, affecting up to 3 targets.
- Shadow Bolt · Hurls a bolt of dark magic at an enemy, inflicting Shadow damage.
Tactics
- In Classic you use the Divination Scryer in the Great Ossuary, and waves of spirits come for about 15 to 20 minutes before Darkreaver rides in.
- Blood Leech drains health from everyone near him, Cleave hits the melee in front and he casts Shadow Bolt.
- He drops Charger's Lost Soul and Darkreaver's Head for the class quests.
Tank
Keep him turned away from the melee.
Healer
Heal through Blood Leech on the melee.
Damage
Kill the spirit waves fast so the healer keeps mana for him.
Watch out for: Running out of mana before he even arrives.
Notable loot
 Necromantic Band · Finger
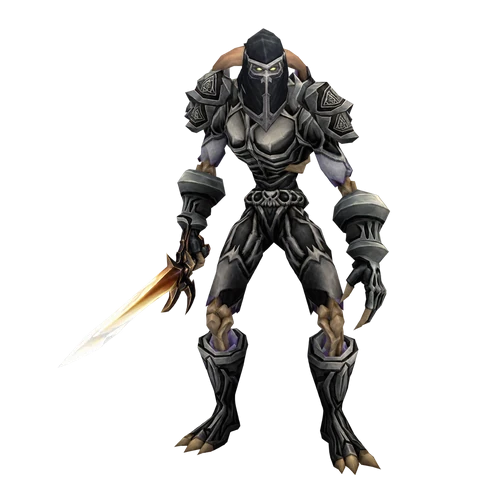
Marduk Blackpool is a death knight in the Viewing Room who turns hostile when Dawn's Gambit is used.
Abilities
Tactics
- In Classic his Shadow Shield sends damage back at the melee, so melee watch their health.
- Stand behind him for Cleave. Defiling Aura lowers your Shadow Resistance, and he casts Shadow Bolt Volley.
Tank
Face him away from the group.
Healer
Watch the melee while his shield is up.
Damage
Ranged take the lead while the shield is up.
Watch out for: Melee killing themselves on his Shadow Shield.
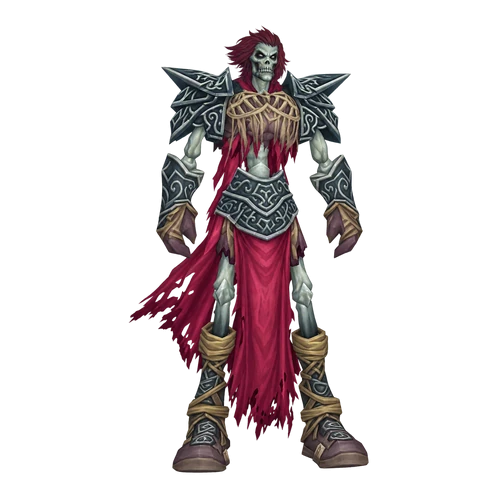
Vectus is the other teacher of the Viewing Room and turns hostile with Marduk when Dawn's Gambit is used.
Abilities
- Flamestrike · Calls down a pillar of flame, burning all enemies in a selected area and inflicting additional damage every 2 sec. for 8 sec.
- Blast Wave · Unleashes a wave of flame, inflicting Fire damage to nearby enemies and reducing their movement speed for 6 sec.
Tactics
- Move out of Flamestrike. Blast Wave hits everyone close to him and slows them.
- Kill the skeleton students and Marduk first, then Vectus.
Tank
Keep him away from the ranged.
Healer
Stay out of Blast Wave range.
Damage
Step out of Flamestrike before you finish a cast.
Watch out for: Standing in Flamestrike while the students are still up.
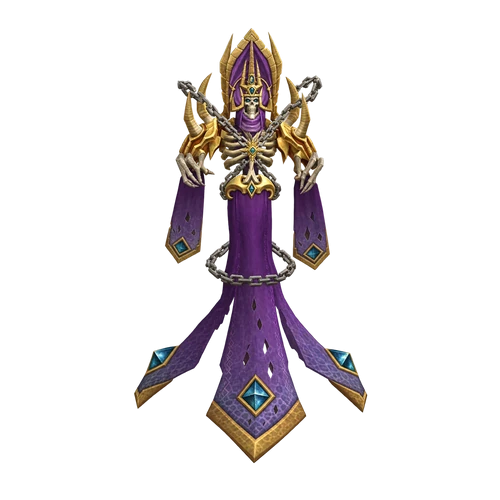
Ras Frostwhisper is the lich of the laboratory at the far end of the Viewing Room.
Abilities
- Frostbolt Volley · Inflicts Frost damage to nearby enemies, reducing their movement speed by 50% for 8 sec.
- Freeze · Stuns an enemy and inflicts Frost damage every 3 sec. for 15 sec.
- Fear · Strikes fear in an enemy, causing it to flee in terror for up to 8 sec. Only 1 target can be feared at a time.
- Chill Nova · Blasts nearby enemies for Frost damage, knocking them back and reducing their movement speed for up to 10 sec.
- Knock Away · Inflicts normal damage to nearby enemies and knocks them back.
- Frost Armor · Encases the caster in a layer of frost that lasts 30 min. The thick ice increases armor slows melee attackers' movement to 40%, and increases the time between their attacks by 100%.
- Chilled
Tactics
- Fear can send a player into other packs, so clear the room or pull him away.
- Interrupt his casts. Tank him facing away so Freeze only hits the tank, Frostbolt Volley, Chill Nova and Knock Away add damage on top.
- Frostbolt Volley hits much harder in the Forever data, so expect more group damage than in Classic.
- For The Lich, Ras Frostwhisper, the Soulbound Keepsake channels for 20 seconds within 15 yards of him and draws threat.
Tank
Turn him away and stand still for Freeze.
Healer
Keep everyone topped up for the volley.
Damage
Interrupt and stay in the room after a Fear.
Watch out for: A feared player running into the next room.
Notable loot
 Recipe: Flask of Supreme Power · Other
 Boneclenched Gauntlets · Hands
 Magister's Mantle · Shoulder
Kormok is a summoned boss of the Dungeon Set 2 chain. He holds the left and the right piece of Lord Valthalak's Amulet.
Abilities
- Enrage · Increases the caster's attack speed by 60% and the Physical damage it deals for 2 min.
- Shadow Bolt Volley · Hurls missiles of dark magic, inflicting Shadow damage to nearby enemies.
- Summon Bone Minions
- Bone Shield
- Bloodlust · Increases an ally's attack speed by 100% for 30 sec.
- Summon Bone Mages
Tactics
- In Classic you summon him in Ras Frostwhisper's laboratory with the Brazier of Beckoning or the Brazier of Invocation.
- He calls Bone Minions in waves. Gather them and AoE them down.
- Bone Mages go for the healer. Switch to them as soon as they appear.
- Dispel his Bone Shield. In Classic it reflects damage back at the melee.
Tank
Hold Kormok and pick up loose Bone Minions.
Healer
Stay close to the tank so the Bone Mages run into the group.
Damage
Kill the Bone Mages first, then AoE the minions.
Watch out for: Bone Mages reaching the healer.
 Left Piece of Lord Valthalak's Amulet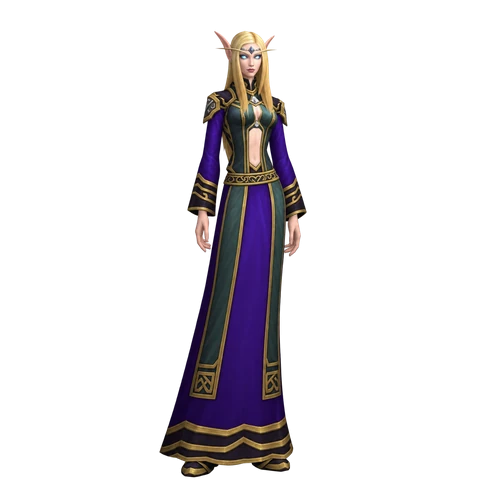
Instructor Malicia teaches in the Coven, one of the six rooms around the Headmaster's Study.
Abilities
- Heal · Calls upon Holy magic to heal an ally.
- Flash Heal · Calls upon Holy magic to heal an ally.
- Renew · Heals an ally for damage every 3 sec. for 20 sec.
- Corruption · Corrupts nearby enemies, inflicting Shadow damage every 3 sec. for 24 sec.
- Slow · Increases the time between nearby enemies' attacks by 54% and slows their movement by 60% for 10 sec.
- Call of the Grave · Inflicts Shadow damage to nearby enemies after 60 sec.
Tactics
- She heals herself with Heal, Flash Heal and Renew. Interrupt or dispel the heals and she goes down easily.
- Corruption and Slow hit the group, and Call of the Grave explodes on its target a minute later. Clear the adds before her.
Healer
Dispel Corruption and top up the Call of the Grave target.
Damage
Kick every heal.
Watch out for: A heal that nobody interrupts.
Notable loot
 Deathbone Girdle · Waist
 Deathbone Sabatons · Feet
 Deathbone Gauntlets · Hands
 Deathbone Legguards · Legs
 Deathbone Chestplate · Chest
 Shadowcraft Bracers · Wrist
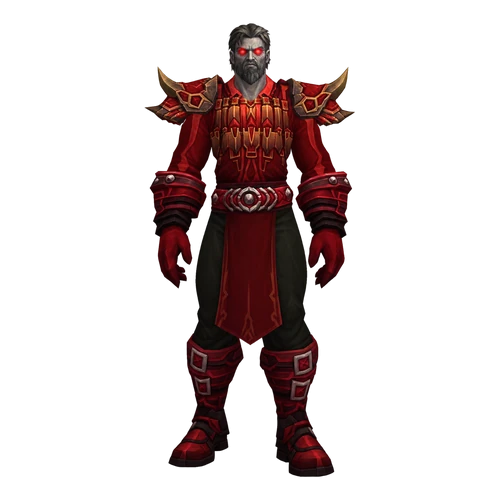
Doctor Theolen Krastinov, the Butcher, works in the Hall of the Damned next to the remains of Eva and Lucien Sarkhoff.
Abilities
Tactics
- A melee boss with Rend and Backhand. He enrages around half health and can kill a lightly armored player in one or two hits.
- Save cooldowns for the enrage and burn him fast.
- Burn the remains after the kill for Doctor Theolen Krastinov, the Butcher.
Tank
Keep a cooldown for the enrage.
Healer
Big heals on the tank once he enrages.
Damage
Never pull threat after the enrage.
Watch out for: The enrage hitting a cloth wearer.
Notable loot
- Deathbone Girdle · Waist
- Deathbone Sabatons · Feet
- Deathbone Gauntlets · Hands
- Deathbone Legguards · Legs
- Deathbone Chestplate · Chest
 Magister's Gloves · Hands
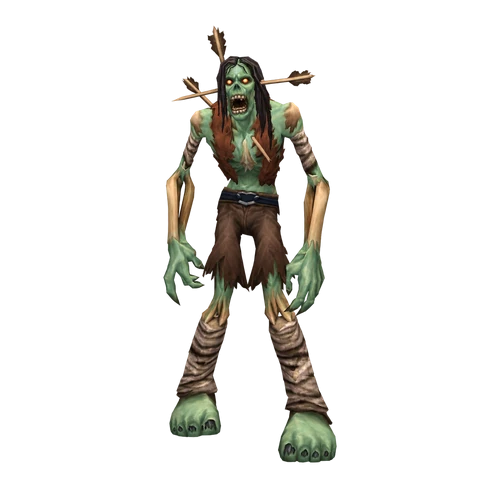
Lorekeeper Polkelt guards the Hall of Secrets.
Abilities
- Corrosive Acid · Reduces the armor of nearby enemies for 5 min.
Tactics
- Low damage, but he usually comes with the corpses of his room.
- In Classic Volatile Infection makes the infected player hurt the allies standing near them. Dispel it if group damage gets high.
- Corrosive Acid lowers your armor.
Healer
Dispel the infection on players in a crowd.
Watch out for: An infected player standing in the group.
Notable loot
- Deathbone Girdle · Waist
- Deathbone Sabatons · Feet
- Deathbone Gauntlets · Hands
- Deathbone Legguards · Legs
- Deathbone Chestplate · Chest
 Dreadmist Wraps · Hands

The Ravenian guards the Vault of the Ravenian, one of the three rooms on the lower floor around the Headmaster's Study.
Abilities
- Sundering Cleave · Hacks at the armor of an enemy and its nearby allies, affecting up to 3 targets. A target's armor is reduced per Sunder Armor. Can be applied up to 5 times. Lasts 30 sec.
- Cleave · Inflicts normal damage to an enemy and its nearest allies, affecting up to 3 targets.
- Trample · Inflicts Physical damage to nearby enemies.
- Knock Away · Inflicts normal damage to an enemy and knocks it back.
Tactics
- Sundering Cleave stacks an armor cut on the tank and the players next to it.
- Knock Away throws the tank back and drops threat, so the tank taunts back right away.
- Trample hits everyone close to him. Clear the room first, Knock Away pulls in anything left.
Tank
Taunt after every Knock Away.
Healer
Watch the tank as the armor cut stacks.
Damage
Stay behind him, out of Sundering Cleave.
Watch out for: Knock Away throwing the tank into a pack.
Notable loot
- Deathbone Girdle · Waist
- Deathbone Sabatons · Feet
- Deathbone Gauntlets · Hands
- Deathbone Legguards · Legs
- Deathbone Chestplate · Chest
 Wildheart Belt · Waist
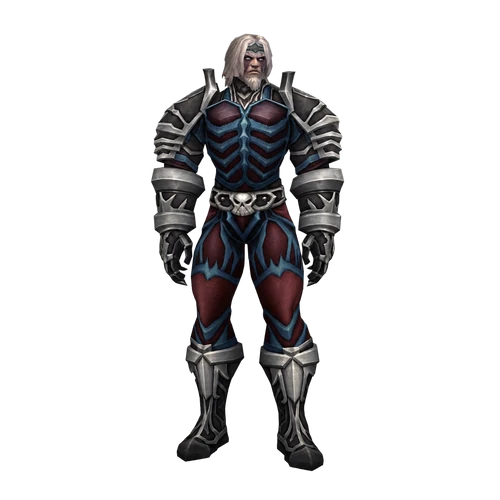
Lord Alexei Barov holds the Barov Family Vault and is the hardest of the six teachers.
Abilities
- Unholy Aura · Causes the caster to automatically inflict Shadow damage every 2 sec. to nearby enemies. The aura lasts until cancelled.
- Veil of Shadow · Reduces healing effects for nearby enemies by 75% for 15 sec.
- Immolate · Burns an enemy, then inflicts additional Fire damage every 3 sec. for 21 sec.
Tactics
- Unholy Aura hurts everyone near him. Ranged and the healer stay at range, and he is tanked where the aura cannot reach them, like the bottom of the stairs.
- In Classic two linked guards come with him. CC them or kill them fast.
- Veil of Shadow cuts the healing on its target by 75%. Decurse the tank right away.
Tank
Drag him away from the ranged.
Healer
Stay out of the aura and watch for Veil of Shadow.
Damage
Kill or CC the guards first.
Watch out for: Veil of Shadow on the tank with nobody to remove it.
Notable loot
- Deathbone Girdle · Waist
- Deathbone Sabatons · Feet
- Deathbone Gauntlets · Hands
- Deathbone Legguards · Legs
- Deathbone Chestplate · Chest
 Lightforge Bracers · Wrist
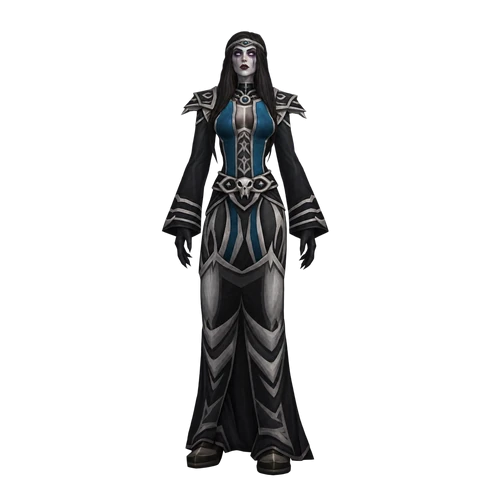
Lady Illucia Barov waits in the Shadow Vault, a shadow caster among a crowd of corpses.
Abilities
- Fear · Strikes fear in an enemy, causing it to flee in terror for 4 sec. Only 1 target can be feared at a time.
- Dominate Mind · Takes control of a humanoid enemy up to level 25 for 15 sec.
- Silence · Silences nearby enemies, preventing them from casting spells for 10 sec.
- Shadow Shock · Instantly lashes an enemy with dark magic, inflicting Shadow damage.
- Curse of Agony · Curses nearby enemies with agony, inflicting Shadow damage every 3 sec. for 30 sec. Only one curse per warlock can be active on any one target.
Tactics
- Fear can send players into other packs, so clear around her first.
- Dominate Mind takes over a player. Dispel it or CC the player, do not cleave them down.
- Silence and Curse of Agony hit the group, and Shadow Resistance helps.
Tank
Pull her away from the corpses.
Healer
Dispel Dominate Mind and decurse.
Damage
Stop hitting a dominated teammate.
Watch out for: A dominated player getting killed by the group.
Notable loot
- Deathbone Girdle · Waist
- Deathbone Sabatons · Feet
- Deathbone Gauntlets · Hands
- Deathbone Legguards · Legs
- Deathbone Chestplate · Chest
Darkmaster Gandling is the headmaster and last boss of Scholomance, in the Headmaster's Study.
Abilities
- Shadow Portal · Teleports an enemy to one of 6 locations within Scholomance.
- Curse of the Darkmaster · Reduces an enemy's Strength and Stamina for 1 min.
- Shadow Shield · Surrounds the caster with a shield woven of Shadow magic. The shield lasts 30 sec., absorbs up to Physical or magical damage, and inflicts damage to melee attackers.
Tactics
- In Classic he appears once the six teachers around the study and the humans of the Coven are dead.
- Shadow Portal sends a random player into one of the side rooms, which stays locked until that player kills the weak mobs inside. Clear all side rooms before the pull.
- The tank or the healer can be sent away too, so the rest decurses and holds on until they are back. Curse of the Darkmaster lowers Strength and Stamina.
Tank
Pick him up again when you come back from a side room.
Healer
Decurse and keep the remaining group alive while someone is away.
Damage
If you are sent away, kill the mobs and run straight back.
Watch out for: A side room that was not cleared before the pull.
Notable loot
- Recipe: Major Mana Potion · Other
 Pattern: Robe of the Void · Other
 Coif of Elements · Head
 Beaststalker's Cap · Head
 Magister's Crown · Head
 Devout Crown · Head
 Dreadmist Mask · Head
 Shadowcraft Cap · Head
Trash
Dangerous trash and diseases
Most wipes here start before a boss. These are the packs and effects to respect.
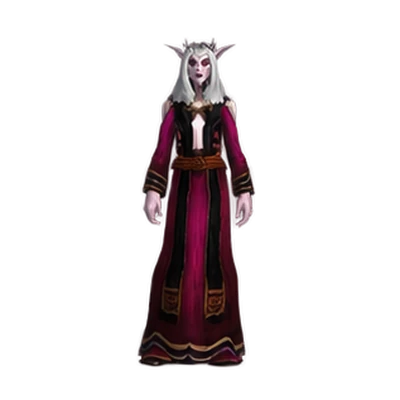
Necromancers and Dark Summoners
Dark Summoners keep calling Risen Lackeys and drain life, Necrolytes cast Shadow Bolt and Shadow Shock behind a Shadow Barrier, Necromancers raise more undead. Kill or CC the casters first, in Classic their adds die with them.
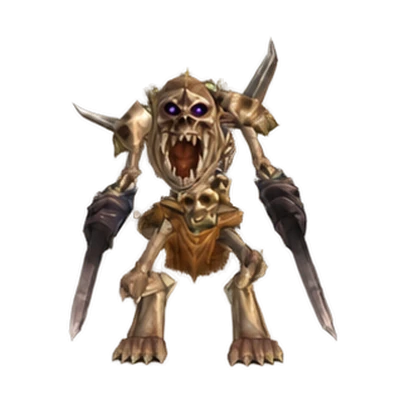
Risen Constructs and Handlers
Risen Constructs hit very hard, cleave with Arcing Smash and enrage. Face them away from the group and pull one at a time. Handlers in the same room cast Arcane Blast, Cone of Cold and Blast Wave, and the Plagued Hatchlings come in big groups and spit a disease that lowers Stamina.
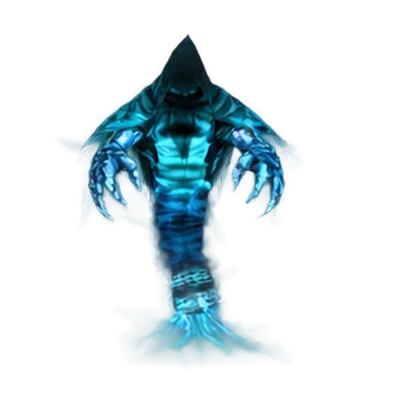
Spectral Researchers, Tutors and Teachers
Researchers Mana Burn, Tutors silence and split with Image Projection, Teachers banish a player. Pull them into melee range and kill them fast before the healer runs dry.
Aberrations, ghouls and corpses
Big packs of Risen Aberrations fixate on a player, Diseased Ghouls spread Wandering Plague and Disease Cloud, Reanimated Corpses stack Dark Plague and Unstable Corpses burst into disease. Necrofiends poison and root with Web Explosion. AoE and a disease cure win these pulls.
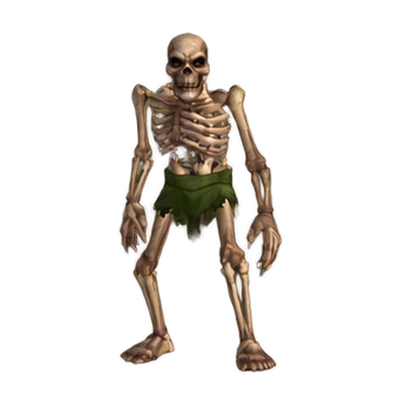
Scholomance Students
Over thirty elite students fill the Viewing Room. Without Dawn's Gambit, walk past them. With it, they turn into weak skeletons that area damage clears quickly.
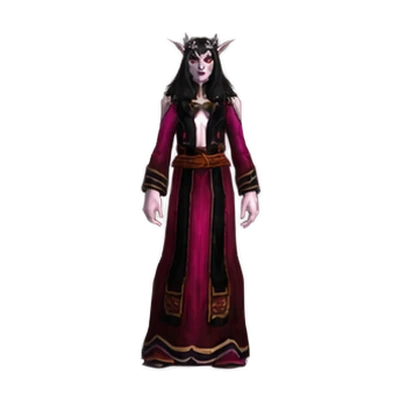
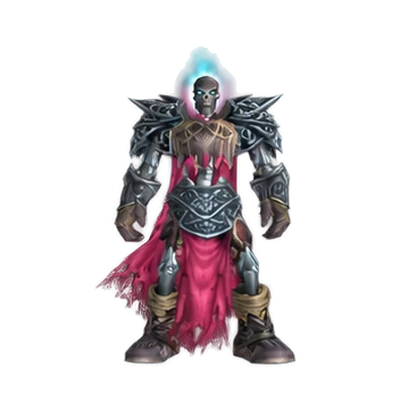
Risen Bonewarders
They shield themselves with Bone Armor and channel Drain Life and Consuming Shadows. Interrupt the channels and burn them down.
Quests
Scholomance quests
Every Scholomance quest for both factions, and the Skeleton Key chain that opens the door. The key chain starts with Commander Ashlam Valorfist at Chillwind Camp for the Alliance and High Executor Derrington at the Bulwark for the Horde. Eva Sarkhoff and Magistrate Marduke stand at the gate on Caer Darrow, Betina Bigglezink at Light's Hope Chapel, and the Barov brothers at the faction camps.
Alliance19
Pick up before you go
- 1Chillwind Camp: Commander Ashlam Valorfist for the Skeleton Key chain and Weldon Barov (Barov Family Fortune).
- 2Caer Darrow at the gate: Eva Sarkhoff (Doctor Theolen Krastinov, the Butcher, then the Kirtonos chain) and Magistrate Marduke for the Ras Frostwhisper chain.
- 3Light's Hope Chapel: Betina Bigglezink (Plagued Hatchlings, then Dawn's Gambit).
- 4Paladins: Lord Grayson Shadowbreaker in Stormwind for the epic mount chain.
- Level 60, from 55
Follow-up: Krastinov's Bag of Horrors
Kirtonos the Herald- Quest giver
- Eva SarkhoffWestern Plaguelands · 70.2, 73.8
- Turn in
- Eva SarkhoffWestern Plaguelands · 70.2, 73.8
Eva Sarkhoff on Caer Darrow gives you the Blood of Innocents. Summon Kirtonos the Herald with it and kill him.
Choose one
- Level 60, from 55
- Quest giver
- Eva SarkhoffWestern Plaguelands · 70.2, 73.8
- Turn in
- Eva SarkhoffWestern Plaguelands · 70.2, 73.8
Eva Sarkhoff wants Doctor Theolen Krastinov dead and the remains of Eva and Lucien Sarkhoff burned in his laboratory.
- Level 60, from 55
Follow-up: Doctor Theolen Krastinov, the Butcher
Krastinov's Bag of Horrors- Quest giver
- Eva SarkhoffWestern Plaguelands · 70.2, 73.8
- Turn in
- Eva SarkhoffWestern Plaguelands · 70.2, 73.8
Eva's next step: take Krastinov's Bag of Horrors from Jandice Barov.
- Level 60, from 57
- Quest giver
- Magistrate MardukeWestern Plaguelands · 70.4, 74.0
- Turn in
- Magistrate MardukeWestern Plaguelands · 70.4, 74.0
Magistrate Marduke on Caer Darrow: use the Soulbound Keepsake on Ras Frostwhisper to make him mortal, kill him and bring his human head back.
- Level 58, from 55
- Quest giver
- Betina BigglezinkEastern Plaguelands · 71.6, 49.7
- Turn in
- Betina BigglezinkEastern Plaguelands · 71.6, 49.7
Betina Bigglezink at Light's Hope Chapel wants 20 Plagued Hatchlings dead in the hatchery.
- Level 58, from 55
Follow-up: Plagued Hatchlings
Healthy Dragon Scale- Starts from
 Healthy Dragon Scale
- Turn in
- Betina BigglezinkEastern Plaguelands · 71.6, 49.7
Starts from the Healthy Dragon Scale, which the Plagued Hatchlings can drop. Take it to Betina Bigglezink.
- Level 60, from 57
- Quest giver
- Betina BigglezinkEastern Plaguelands · 71.6, 49.7
- Turn in
- Betina BigglezinkEastern Plaguelands · 71.6, 49.7
The end of Betina's chain: place Dawn's Gambit in the Viewing Room, kill Vectus and report back.
- Level 60, from 52
- Quest giver
- Weldon BarovWestern Plaguelands · 43.4, 83.4
- Turn in
- Weldon BarovWestern Plaguelands · 43.4, 83.4
Alliance. Weldon Barov at Chillwind Camp wants the four Barov deeds from inside Scholomance.
- Level 60, from 60
- Quest giver
- Lord Grayson ShadowbreakerStormwind City · 37.2, 33.0
- Turn in
- Darkreaver's Fallen Chargerinside the dungeon
Paladins only, the epic mount chain from Lord Grayson Shadowbreaker in Stormwind. Summon Death Knight Darkreaver and redeem his fallen charger.
- Level 60, from 58
Dungeon Set 2 chain. Bodley in Blackrock Mountain sends you to summon Kormok with the Brazier of Beckoning in Ras Frostwhisper's room.
- Level 60, from 58
Dungeon Set 2 chain. Summon Kormok again, this time with the Brazier of Invocation.
- Level 52, from 50
- Quest giver
- Commander Ashlam ValorfistWestern Plaguelands · 42.8, 84.0
- Turn in
- Commander Ashlam ValorfistWestern Plaguelands · 42.8, 84.0
Key chain, step 1. Commander Ashlam Valorfist at Chillwind Camp wants Skeletal Flayers and Slavering Ghouls cleared at the Felstone Field.
- Level 56, from 50
Follow-up: Clear the Way
All Along the Watchtowers- Quest giver
- Commander Ashlam ValorfistWestern Plaguelands · 42.8, 84.0
- Turn in
- Commander Ashlam ValorfistWestern Plaguelands · 42.8, 84.0
Key chain. Mark the four Scourge watchtowers around Andorhal with the Beacon Torch.
- Level 55, from 55
Follow-up: All Along the Watchtowers
Scholomance- Quest giver
- Commander Ashlam ValorfistWestern Plaguelands · 42.8, 84.0
- Turn in
- Alchemist ArbingtonWestern Plaguelands · 42.6, 83.8
Key chain. Report to Alchemist Arbington in Chillwind Camp.
- Level 57, from 55
Follow-up: Scholomance
Skeletal Fragments- Quest giver
- Alchemist ArbingtonWestern Plaguelands · 42.6, 83.8
- Turn in
- Alchemist ArbingtonWestern Plaguelands · 42.6, 83.8
Key chain. Bring 15 Skeletal Fragments from the undead of the Plaguelands to Alchemist Arbington.
- Level 57, from 55
Follow-up: Skeletal Fragments
Mold Rhymes With...- Quest giver
- Alchemist ArbingtonWestern Plaguelands · 42.6, 83.8
- Turn in
- Krinkle GoodsteelTanaris · 51.4, 28.8
Key chain. Take the imbued fragments to Krinkle Goodsteel in Gadgetzan for the mold.
- Level 57, from 55
Follow-up: Mold Rhymes With...
Fire Plume Forged- Quest giver
- Krinkle GoodsteelTanaris · 51.4, 28.8
- Turn in
- Alchemist ArbingtonWestern Plaguelands · 42.6, 83.8
Key chain. Forge the Unfinished Skeleton Key at Fire Plume Ridge in Un'Goro Crater, with two Thorium Bars.
- Level 60, from 55
Follow-up: Fire Plume Forged
Araj's Scarab- Quest giver
- Alchemist ArbingtonWestern Plaguelands · 42.6, 83.8
- Turn in
- Alchemist ArbingtonWestern Plaguelands · 42.6, 83.8
Key chain. Kill Araj the Summoner in Andorhal for Araj's Scarab, bring a group.
- Level 60, from 55
Follow-up: Araj's Scarab
The Key to Scholomance- Quest giver
- Alchemist ArbingtonWestern Plaguelands · 42.6, 83.8
- Turn in
- Alchemist ArbingtonWestern Plaguelands · 42.6, 83.8
Key chain, last step. Alchemist Arbington hands you the Skeleton Key.
You get: Skeleton Key
 Mirah's Song
Horde19
Pick up before you go
- 1The Bulwark: High Executor Derrington for the Skeleton Key chain and Alexi Barov (Barov Family Fortune).
- 2Caer Darrow at the gate: Eva Sarkhoff (Doctor Theolen Krastinov, the Butcher, then the Kirtonos chain) and Magistrate Marduke for the Ras Frostwhisper chain.
- 3Light's Hope Chapel: Betina Bigglezink (Plagued Hatchlings, then Dawn's Gambit).
- 4Shamans: the Divination Scryer from the shaman chain for The Darkreaver Menace.
- Level 60, from 55
Follow-up: Krastinov's Bag of Horrors
Kirtonos the Herald- Quest giver
- Eva SarkhoffWestern Plaguelands · 70.2, 73.8
- Turn in
- Eva SarkhoffWestern Plaguelands · 70.2, 73.8
Eva Sarkhoff on Caer Darrow gives you the Blood of Innocents. Summon Kirtonos the Herald with it and kill him.
Choose one
- Level 60, from 55
- Quest giver
- Eva SarkhoffWestern Plaguelands · 70.2, 73.8
- Turn in
- Eva SarkhoffWestern Plaguelands · 70.2, 73.8
Eva Sarkhoff wants Doctor Theolen Krastinov dead and the remains of Eva and Lucien Sarkhoff burned in his laboratory.
- Level 60, from 55
Follow-up: Doctor Theolen Krastinov, the Butcher
Krastinov's Bag of Horrors- Quest giver
- Eva SarkhoffWestern Plaguelands · 70.2, 73.8
- Turn in
- Eva SarkhoffWestern Plaguelands · 70.2, 73.8
Eva's next step: take Krastinov's Bag of Horrors from Jandice Barov.
- Level 60, from 57
- Quest giver
- Magistrate MardukeWestern Plaguelands · 70.4, 74.0
- Turn in
- Magistrate MardukeWestern Plaguelands · 70.4, 74.0
Magistrate Marduke on Caer Darrow: use the Soulbound Keepsake on Ras Frostwhisper to make him mortal, kill him and bring his human head back.
- Level 58, from 55
- Quest giver
- Betina BigglezinkEastern Plaguelands · 71.6, 49.7
- Turn in
- Betina BigglezinkEastern Plaguelands · 71.6, 49.7
Betina Bigglezink at Light's Hope Chapel wants 20 Plagued Hatchlings dead in the hatchery.
- Level 58, from 55
Follow-up: Plagued Hatchlings
Healthy Dragon Scale- Starts from
- Healthy Dragon Scale
- Turn in
- Betina BigglezinkEastern Plaguelands · 71.6, 49.7
Starts from the Healthy Dragon Scale, which the Plagued Hatchlings can drop. Take it to Betina Bigglezink.
- Level 60, from 57
- Quest giver
- Betina BigglezinkEastern Plaguelands · 71.6, 49.7
- Turn in
- Betina BigglezinkEastern Plaguelands · 71.6, 49.7
The end of Betina's chain: place Dawn's Gambit in the Viewing Room, kill Vectus and report back.
- Level 60, from 52
- Quest giver
- Alexi BarovTirisfal Glades · 83.0, 71.4
- Turn in
- Alexi BarovTirisfal Glades · 83.0, 71.4
Horde. Alexi Barov at the Bulwark wants the four Barov deeds from inside Scholomance.
- Level 60, from 58
Dungeon Set 2 chain. Bodley in Blackrock Mountain sends you to summon Kormok with the Brazier of Beckoning in Ras Frostwhisper's room.
- Level 60, from 58
Dungeon Set 2 chain. Summon Kormok again, this time with the Brazier of Invocation.
- Starts from
 Divination Scryer
Shamans only, starts from the Divination Scryer. Summon Death Knight Darkreaver in the Great Ossuary and take his head.
- Level 53, from 50
- Quest giver
- High Executor DerringtonTirisfal Glades · 83.0, 69.0
- Turn in
- High Executor DerringtonTirisfal Glades · 83.0, 69.0
Key chain, step 1. High Executor Derrington at the Bulwark sends you to burn the Scarlet Crusade's command tent.
- Level 56, from 50
Follow-up: Scarlet Diversions
All Along the Watchtowers- Quest giver
- High Executor DerringtonTirisfal Glades · 83.0, 69.0
- Turn in
- High Executor DerringtonTirisfal Glades · 83.0, 69.0
Key chain. Mark the four Scourge watchtowers around Andorhal with the Beacon Torch.
- Level 55, from 55
Follow-up: All Along the Watchtowers
Scholomance- Quest giver
- High Executor DerringtonTirisfal Glades · 83.0, 69.0
- Turn in
- Apothecary DithersTirisfal Glades · 83.2, 69.2
Key chain. Report to Apothecary Dithers at the Bulwark.
- Level 57, from 55
Follow-up: Scholomance
Skeletal Fragments- Quest giver
- Apothecary DithersTirisfal Glades · 83.2, 69.2
- Turn in
- Apothecary DithersTirisfal Glades · 83.2, 69.2
Key chain. Bring 15 Skeletal Fragments from the undead of the Plaguelands to Apothecary Dithers.
- Level 57, from 55
Follow-up: Skeletal Fragments
Mold Rhymes With...- Quest giver
- Apothecary DithersTirisfal Glades · 83.2, 69.2
- Turn in
- Krinkle GoodsteelTanaris · 51.4, 28.8
Key chain. Take the imbued fragments to Krinkle Goodsteel in Gadgetzan for the mold.
- Level 57, from 55
Follow-up: Mold Rhymes With...
Fire Plume Forged- Quest giver
- Krinkle GoodsteelTanaris · 51.4, 28.8
- Turn in
- Apothecary DithersTirisfal Glades · 83.2, 69.2
Key chain. Forge the Unfinished Skeleton Key at Fire Plume Ridge in Un'Goro Crater, with two Thorium Bars.
- Level 60, from 55
Follow-up: Fire Plume Forged
Araj's Scarab- Quest giver
- Apothecary DithersTirisfal Glades · 83.2, 69.2
- Turn in
- Apothecary DithersTirisfal Glades · 83.2, 69.2
Key chain. Kill Araj the Summoner in Andorhal for Araj's Scarab, bring a group.
- Level 60, from 55
Follow-up: Araj's Scarab
The Key to Scholomance- Quest giver
- Apothecary DithersTirisfal Glades · 83.2, 69.2
- Turn in
- Apothecary DithersTirisfal Glades · 83.2, 69.2
Key chain, last step. Apothecary Dithers hands you the Skeleton Key.
You get: Skeleton Key
Loot
Loot table
Every boss drop and every quest reward of the dungeon. Hover an item for its stats.
Gandling is the big one: the helms of all nine Dungeon Set 1 sets, the Robe of the Void pattern for tailors and the Major Mana Potion recipe for alchemists. Plate wearers look at the Deathbone Guardian pieces from the six teachers and the Boneclenched Gauntlets from Ras Frostwhisper, who also carries the Flask of Supreme Power recipe. The Necromantic Band from Darkreaver and Mirah's Song from the Kirtonos quest round it off.
 Wildheart Cowl
 Lightforge Helm
 Helm of Valor
Beta drop chances come from a handful of kills and are left out until the sample is bigger.
 Which class? Our tier lists


Collect
Achievements, Mounts and Sets from Scholomance
Mounts2
 Summon ChargerDrops from Death Knight Darkreaver, Earned in ScholomanceClassic
 Summon DreadsteedEarned in ScholomanceClassic
Sets9
 Battlegear of ValorEarned in Scholomance
 Beaststalker ArmorEarned in Scholomance
 Dreadmist RaimentEarned in Scholomance
- Lightforge ArmorEarned in Scholomance
 Magister's RegaliaEarned in Scholomance
 Shadowcraft ArmorEarned in Scholomance
 The ElementsEarned in Scholomance
 Vestments of the DevoutEarned in Scholomance
and 1 more
 Wildheart RaimentEarned in Scholomance
Achievement1
 Master SpelunkerEarned in Scholomance, Needs Darkmaster Gandling
Before you go
Before you go
- Get the Skeleton KeyOne player with the key opens the gate for everyone. The chain sends you across half the world, to Gadgetzan and Un'Goro Crater, so start it early.
- Pick up the quests on Caer DarrowEva Sarkhoff and Magistrate Marduke stand right at the gate. Betina's quests come from Light's Hope Chapel and the Barov deeds from your faction's camp.
- Bring a disease and poison cureGhouls, corpses and hatchlings spread diseases, Necrofiends and the Blood Steward poison. Someone who removes both saves the healer a lot of mana.
- Plan the six teachersGandling only comes when Malicia, Krastinov, Polkelt, the Ravenian and the two Barovs are dead. Clear the side rooms well, his Shadow Portal sends players into them during the fight.
- Tank Kirtonos with your back to the wall, never to the window.
- Rattlegore's key opens the Viewing Room, so loot it before you move on.
- Pull Ras Frostwhisper away from the door so a Fear cannot send anyone into the next pack.
FAQ
Questions players ask
What level is Scholomance in WoW Forever, and from what level can you enter?
Plan for 58–60. The bosses are level 58 to 62 and the trash 57–61, and the Forever Group Finder lists Scholomance at 58–60. The beta client lets you in from level 33, where Classic wanted 45, but you still need the Skeleton Key. Nobody can check it in play yet, the beta stops at level 30.
Where is Scholomance?
Under the Barov estate on Caer Darrow, an island in Darrowmere Lake in the south-east of the Western Plaguelands. The portal is at about 69.0, 72.7, behind a locked gate at the top of the island.
How do you get the Scholomance key?
The Skeleton Key comes from The Key to Scholomance at the end of a long chain. The Alliance starts with Commander Ashlam Valorfist at Chillwind Camp, the Horde with High Executor Derrington at the Bulwark. You collect Skeletal Fragments, get a mold from Krinkle Goodsteel in Gadgetzan, forge the key at Fire Plume Ridge in Un'Goro Crater and kill Araj the Summoner in Andorhal. The whole chain is in the Forever quest data.
How do you summon Kirtonos the Herald?
Place the Blood of Innocents in the Brazier of the Herald on the balcony next to the Chamber of Summoning. Eva Sarkhoff gives you the blood for the quest Kirtonos the Herald, and the Blood Steward of Kirtonos, Jandice Barov and Doctor Theolen Krastinov can drop it.
How many bosses does Scholomance have?
16, counting the summoned and optional ones: the Blood Steward of Kirtonos, Kirtonos the Herald, Jandice Barov, Rattlegore, Death Knight Darkreaver, Marduk Blackpool, Vectus, Ras Frostwhisper, Kormok of the Dungeon Set 2 chain, the six teachers around the Headmaster's Study and Darkmaster Gandling.
Who is the last boss of Scholomance?
Darkmaster Gandling in the Headmaster's Study. He only shows up once Instructor Malicia, Doctor Theolen Krastinov, Lorekeeper Polkelt, The Ravenian, Lord Alexei Barov and Lady Illucia Barov are dead. His kill counts for the Master Spelunker achievement.
What quests are there for Scholomance?
Kirtonos the Herald, Doctor Theolen Krastinov, the Butcher and Krastinov's Bag of Horrors from Eva Sarkhoff, The Lich, Ras Frostwhisper from Magistrate Marduke, Plagued Hatchlings, Healthy Dragon Scale and Dawn's Gambit from Betina Bigglezink, Barov Family Fortune for each faction, the two Kormok steps of the Dungeon Set 2 chain and the paladin and shaman class quests. The Skeleton Key chain comes first.
How long does a full Scholomance clear take?
In Classic videos a full run takes about 48 minutes, and careful uncut clears need up to an hour and a half. There is no Forever time yet.
Sources
Sources
- Blizzard: WoW Forever beta development notes, October 1Confirmed
- Wowhead · Forever beta databaseBeta data
- Warcraft Wiki · Classic referenceClassic
- Run time and difficulty are editorial estimates by mmonster.
mmonster boost
Short on time? Run Scholomance with mmonster
Our boosters organize the group and run the dungeon with you. Run styles, play methods and the current price are on the service page.
Keep going