


Lower Blackrock Spire Dungeon Guide
Lower Blackrock Spire, LBRS for short, is the Dark Horde fortress at the top of Blackrock Mountain, a Classic dungeon for levels 55–60 with nine encounters and seven rare spawns. Here is the way up to the Spire portal, all 20 quests with the start of the Seal of Ascension, every boss with its Classic tactics and the loot Forever already lists.
- Level
- 55–60
- Bosses
- 16
- Full clear
- 75–105min
- Difficulty
- 8/10
Blackrock Mountain · Eastern KingdomsEntrance 33.0, 25.2Show on the mapRun it with mmonster
The bosses
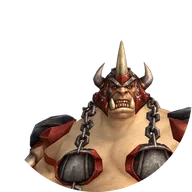 1Highlord OmokkLevel 59
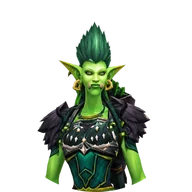 2Shadow Hunter Vosh'gajinLevel 58
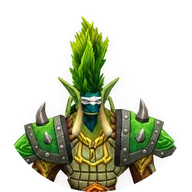 3War Master VooneLevel 59
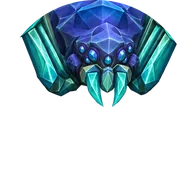 4Mother SmolderwebLevel 59
 5Urok DoomhowlLevel 60
 6Quartermaster ZigrisLevel 59
 7HalyconLevel 59
 8Gizrul the SlavenerLevel 60
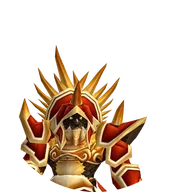 9Final bossOverlord WyrmthalakLevel 60
 10Rare spawnBurning FelguardLevel 57
 11Rare spawnSpirestone ButcherLevel 57
 12Rare spawnSpirestone Battle LordLevel 58
 13Rare spawnSpirestone Lord MagusLevel 58
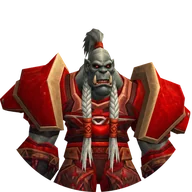 14Rare spawnBannok GrimaxeLevel 59
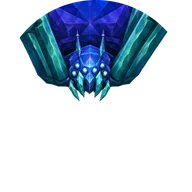 15Rare spawnCrystal FangLevel 60
 16Rare spawnGhok BashguudLevel 59
Overview
Inside Lower Blackrock Spire
The lower spire is a fortress of many peoples. Scarshield, Firebrand and Bloodaxe orcs fill Hordemar City, Highlord Omokk rules the Spirestone ogres in Mok'Doom, Shadow Hunter Vosh'gajin and War Master Voone hold the Smolderthorn trolls of Tazz'Alaor, and Mother Smolderweb waits at the end of the Skitterweb Tunnels. Behind them come Quartermaster Zigris in the Storehouse, the worgs of Halycon and Gizrul the Slavener, and Overlord Wyrmthalak in the Chamber of Battle. Urok Doomhowl only shows up when you call him.
LBRS is where the way into Upper Blackrock Spire begins. Vaelan's Seal of Ascension needs the three gemstones of Omokk, Voone and Wyrmthalak, and both factions run a chain here that ends in UBRS: Maxwell's Mission and General Drakkisath's Command for the Alliance, Warlord's Command for the Horde. Bodley outside the portal also sends Dungeon Set 2 players in to summon Mor Grayhoof in Tazz'Alaor.
Lower and Upper Blackrock Spire are one map in Forever with one portal, and the Group Finder lists both at 53. The Upper Blackrock Spire guide covers the group size. The bosses here are level 57–60, nobody has been inside on the beta yet, and every tactic below is the Classic one.
Level 55–60 is the range the dungeon is tuned for, not a minimum entry level. This is the Forever level range as it stands today. It can still shift before launch.
Beta status
Lower Blackrock Spire in the WoW Forever beta
Not open in the beta yetConfirmedChecked October 4, 2026
Lower Blackrock Spire is not open on the WoW Forever beta. Blizzard's notes of October 1 raised the cap to 30 and list the dungeons you can enter, and no Blackrock Mountain dungeon is on that list. Until the beta gets here, the tactics and the route on this page are the Classic ones. The day it opens we add what the first runs show.
Forever vs Classic
What changed in Lower Blackrock Spire for WoW Forever
What is different from the Classic version you may know. Everything else works as it did in Classic.
The door opens at level 50Beta data
In Forever the spire lets characters in from level 50, the Classic door said 48. The beta cap of 30 keeps everyone out for now.
Dungeon Set 1 pieces with new statsBeta data
Six Dungeon Set 1 pieces from the lower spire were reworked. Omokk's Boots of Elements gained spell power, the Shadowcraft Gloves of Vosh'gajin and the Beaststalker's Gloves of Voone a little more Stamina, Mother Smolderweb's Wildheart Boots and Gizrul's Wildheart Spaulders spell damage, and Wyrmthalak's Beaststalker's Mantle more Spirit. Vosh'gajin's bow Blackcrow now has Hit Rating instead of its old hit chance.
The worg and spider pets are no longer soulboundBeta data
The Worg Carrier from Kibler's Exotic Pets and the Smolderweb Carrier from En-Ay-Es-Tee-Why no longer bind when you pick them up.
Bloodaxe Worgs howl less often, but longerBeta data
Furious Howl of the Bloodaxe Worgs now has a 30 second cooldown instead of 10 and lasts a full minute instead of 10 seconds. The attack power buff stays on their pack much longer.
Part of the Classic loot is not listed yetBeta data
58 Classic boss drops, the Fist of Omokk, Rosewine Circle and Mark of the Dragon Lord among them, plus several quest rewards such as the choice of Maxwell's Mission and Warlord's Command, are not in the Forever item database yet. The items still exist in the game files, so this is a gap in the data, not a removal. This guide adds them the day the dungeon opens.
Less bonus XP from dungeon questsConfirmed
Since October 1 dungeon quests give only half of their old bonus experience on top of the normal quest reward.
Location
Where is Lower Blackrock Spire? Entrance and how to get there
Lower and Upper Blackrock Spire share one portal at the top of Blackrock Mountain, at about 33.0, 25.2 on the Burning Steppes map. Enter the mountain from Searing Gorge or Burning Steppes and follow the chains up, not down. Upper Blackrock Spire starts behind a sealed door inside the lower spire.
Now you can move the map.
No spawn points on the map for this one.
- 1Fly to Thorium Point in Searing Gorge, the gryphon master stands at about 37.9, 30.4, and ride south into Blackrock Mountain.
- 2Inside, follow the chains up to the portal at the top.
- 3Morgan's Vigil in Burning Steppes (about 84.4, 68.3) is where Marshal Maxwell and Helendis Riverhorn give the Alliance quests for the spire.
- 1Fly to Thorium Point in Searing Gorge (wind rider master at about 34.8, 30.6) or to Flame Crest in Burning Steppes (about 65.6, 24.2), then ride into Blackrock Mountain.
- 2Inside, follow the chains up to the portal at the top.
- 3Kargath in the Badlands (about 4.1, 44.9) is where Warlord Goretooth, Galamav the Marksman and Lexlort give the Horde quests for the spire.
- Entrance portalMap coordinates, Burning Steppes
33.0, 25.2
Copies the /way command for TomTom.
Group Finder
The Group Finder lists Lower Blackrock Spire at level 53, the same as Upper. A warlock can summon latecomers right at the top of the mountain.
After a wipe
In Classic a wipe sends you to the Spirit Healer at Thorium Point in Searing Gorge, at about 35.4, 23.6, and the climb back up through the mountain takes a while. Where Forever sends you after a wipe nobody has reported yet.
Map and route
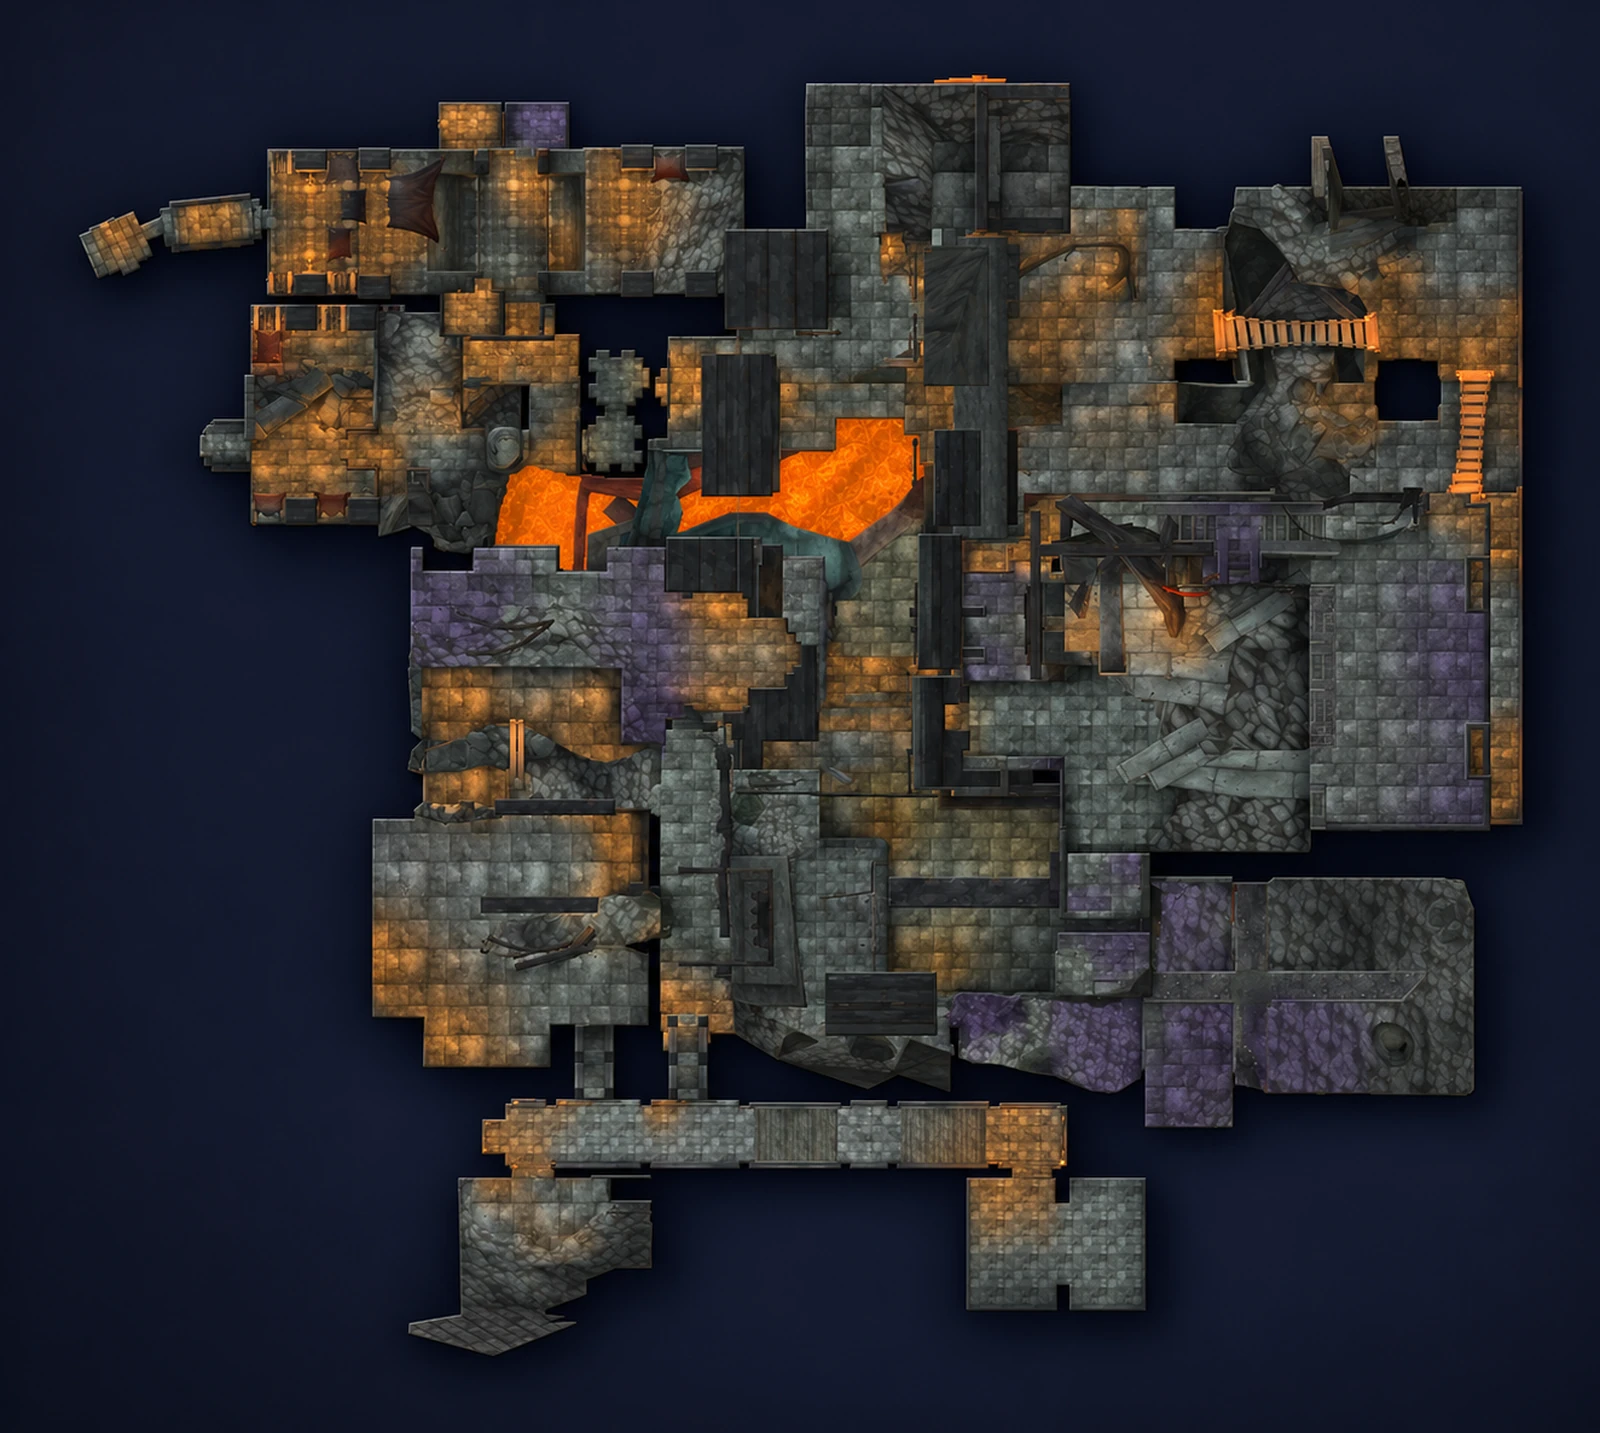
The route through the dungeon
8 areas, one path. Tap a stop to see what waits there.
Area 1 of 8
Blackrock Spire
The first halls behind the portal, held by Scarshield orcs. In Classic Vaelan waits near the start for the Seal of Ascension, and the sealed door to Upper Blackrock Spire is above this part.
Area 2 of 8
Hordemar City
The orc city and the biggest part of LBRS. Scarshield legionnaires, spellbinders and warlocks, Firebrand orcs and Bloodaxe warmongers fill it. Bijou's belongings lie on the bottom floor, Warosh stands by Urok's Tribute Pile, and the rares Bannok Grimaxe and the Burning Felguard can turn up here.
 Scarshield SpellbinderElite
Area 3 of 8
Mok'Doom
The Spirestone ogre camp. Highlord Omokk holds it, and the rares Spirestone Butcher, Spirestone Battle Lord and Spirestone Lord Magus can stand around him.
 Spirestone MysticElite
Area 4 of 8
Tazz'Alaor
The Smolderthorn troll quarter. Shadow Hunter Vosh'gajin and War Master Voone both have their spots here, Bijou herself waits in this part and the Sixth Mosh'aru Tablet lies here. The brazier spot where Mor Grayhoof is summoned for the Dungeon Set 2 quests is in Tazz'Alaor too.
 Smolderthorn Witch DoctorElite
Area 5 of 8
Skitterweb Tunnels
Spider tunnels full of eggs. Mother Smolderweb sits at the end, the rare Crystal Fang can roam nearby, and the Fifth Mosh'aru Tablet lies in the tunnels. The eggs are also the ones Kibler wants.
 Spire SpiderElite
 Firebrand PyromancerElite
Area 6 of 8
The Storehouse
Quartermaster Zigris's storeroom, guarded by Bloodaxe warmongers and summoners.
Boss here
Area 7 of 8
Halycon's Lair
The worg den. Halycon sits here with her pups, and Gizrul the Slavener comes down the hallway once she dies.
Boss here
Area 8 of 8
Chamber of Battle
The last hall across the bridge. The rare Ghok Bashguud sleeps with two guards in the room before the bridge, and Overlord Wyrmthalak waits on the other side with Bloodaxe, Spirestone and Smolderthorn elites.
 Bloodaxe EvokerElite
Encounters
Boss roster
Main bosses9
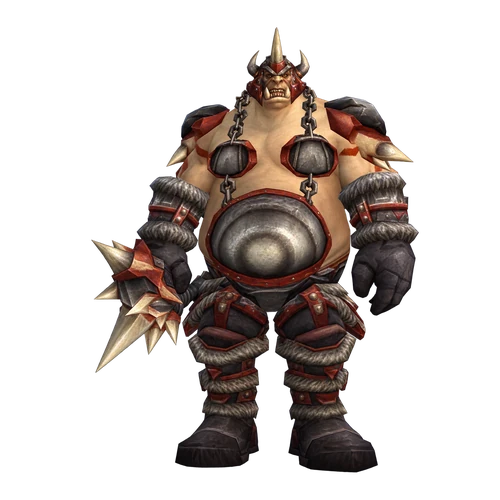
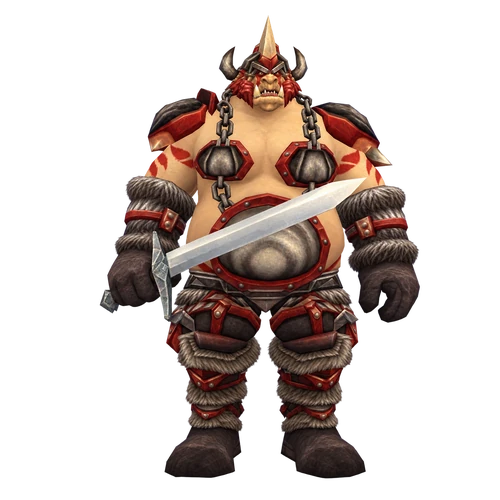
Highlord Omokk rules the Spirestone ogres in Mok'Doom. He drops the Gemstone of Spirestone for the Seal of Ascension and his head for Warosh's Urok quest.
Abilities
- Enrage · Increases the caster's attack speed by 60% and the Physical damage it deals for 2 min.
- Knock Away · Inflicts normal damage to an enemy and knocks it back.
Tactics
- In Classic tank him against a wall so Knock Away cannot throw the tank around.
- Save your cooldowns for his Enrage at low health.
Tank
Keep a wall at your back.
Healer
Heal hard through the Enrage.
Damage
Burn him fast once he enrages.
Watch out for: The tank knocked into the next ogre pack.
Notable loot
 Gemstone of Spirestone · Other
 Boots of Elements · Feet
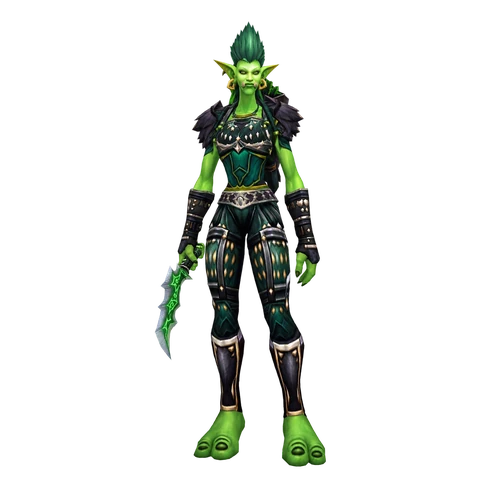
Shadow Hunter Vosh'gajin leads the Smolderthorn trolls in Tazz'Alaor.
Abilities
- Curse of Blood · Increases the Physical damage taken by nearby enemies for 10 min.
- Hex · Transforms nearby enemies into frogs, rendering them unable to attack or cast spells for 10 sec.
Tactics
- In Classic troll guards stand with her. Clear or control them first.
- Curse of Blood makes everyone near her take more physical damage for 10 minutes. Decurse it.
- In Classic she also casts Hex, which turns nearby players into frogs for 10 seconds.
Tank
Face her away from the group.
Healer
Decurse Curse of Blood on the tank first.
Damage
Stay spread so Hex catches fewer of you.
Watch out for: Curse of Blood left on the tank.
Notable loot
 Blackcrow · Ranged
 Shadowcraft Gloves · Hands
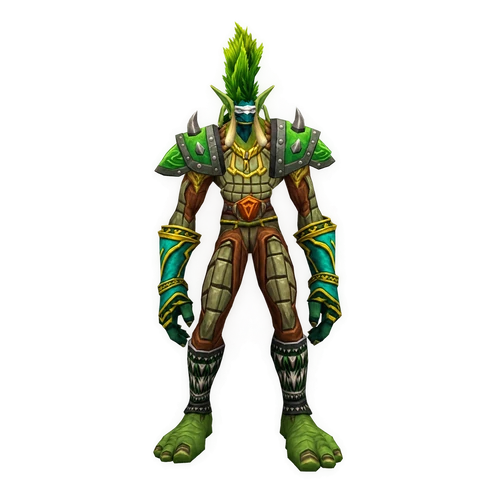
War Master Voone is the Smolderthorn warlord of Tazz'Alaor and drops the Gemstone of Smolderthorn.
Abilities
- Thrash · Gives the caster 2 extra attacks.
- Uppercut · Inflicts normal damage to an enemy, knocking it back.
- Pummel · Pummels an enemy for (100% of Spell Power) damage and interrupts the spell being cast for 5 sec.
- Snap Kick · Inflicts damage to an enemy, stunning it for 2 sec.
- Mortal Strike · Inflicts 300% weapon damage and leaves the target wounded, reducing the effectiveness of any healing by 50% for 5 sec.
- Cleave · Inflicts weapon damage to an enemy and its nearest allies, affecting up to 3 targets.
- Throw Axe
Tank
Use a cooldown when Mortal Strike lands.
Healer
Heal from range so Pummel cannot reach you.
Damage
Melee stay behind him, out of the Cleave.
Watch out for: Mortal Strike on a low tank.
Notable loot
 Gemstone of Smolderthorn · Other
 Beaststalker's Gloves · Hands
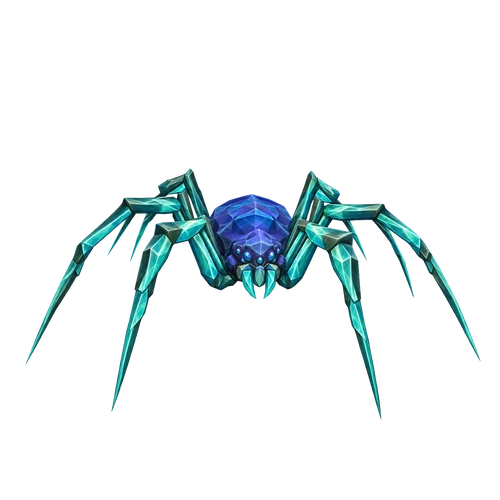
Mother Smolderweb sits at the end of the Skitterweb Tunnels.
Abilities
- Summon Spire Spiderling
- Crystallize · Stuns enemies in a cone in front of the caster, rendering them unable to move or attack for 6 sec.
- Mother's Milk · Poisons nearby enemies. Until the poison is entirely removed from the bloodstream by a knowledgeable medical professional, it will periodically immobilize a poisoned individual and any nearby allies.
Tactics
- She calls Spire Spiderlings. AoE them.
- Crystallize stuns everyone in a cone in front of her for 6 seconds, so only the tank stands there.
- Mother's Milk poisons nearby players and roots them and their neighbours now and then. That poison is what Ragged John wants for Mother's Milk, so the quest holder keeps it on.
Tank
Face her away from the group.
Healer
Do not cure Mother's Milk on the quest holder.
Damage
Kill the Spiderlings, then her.
Watch out for: The whole group standing in front of her.
Notable loot
 Wildheart Boots · Feet
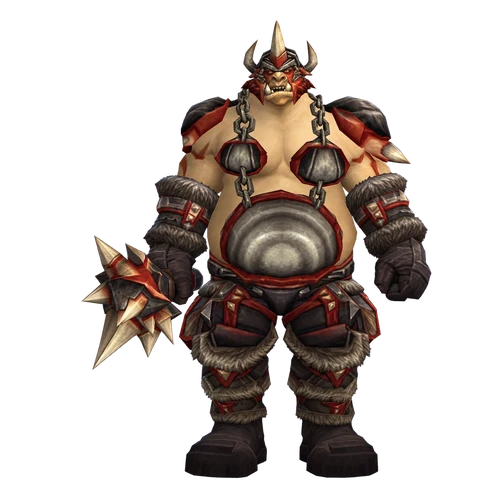
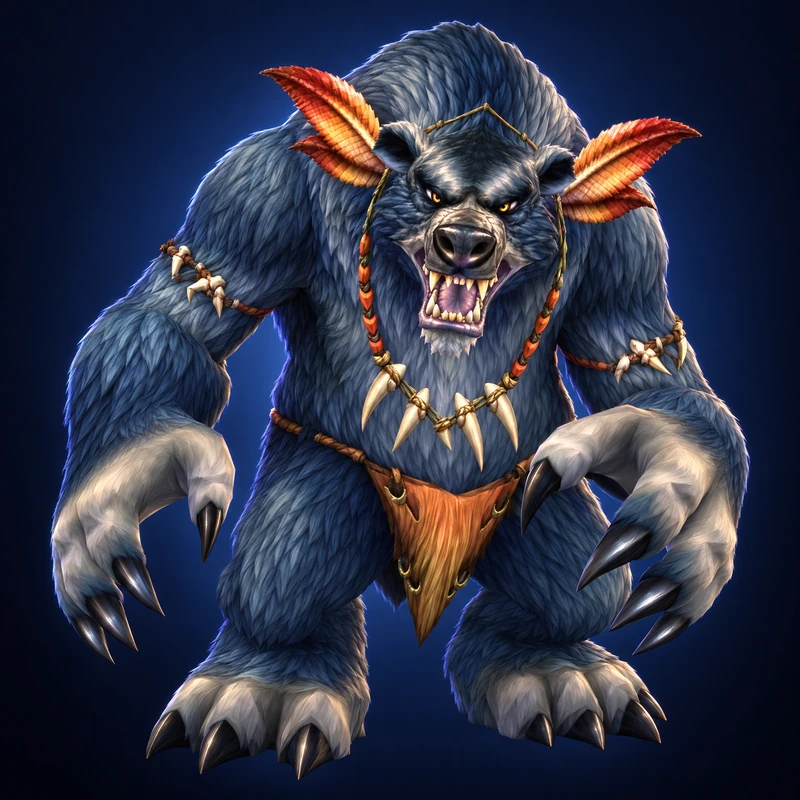
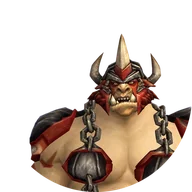
Urok Doomhowl is the ogre boss you summon in Hordemar City for Warosh's quest.
Abilities
- Strike · Strikes at an enemy, inflicting increased melee damage.
- Intimidating Roar · Roars at an enemy, paralyzing it with terror for 8 sec. and causing all other nearby enemies to flee in fear.
- Rend · Inflicts Physical damage to an enemy every 3 sec. for 15 sec.
Tactics
- In Classic you put Omokk's Head on a Roughshod Pike at Urok's Tribute Pile. Waves of ogres come first, Urok last.
- Clear the area before you start, the waves need room.
- In Classic the pike can be used during the fight to hurt the ogres.
- Intimidating Roar paralyzes his target for 8 seconds and sends everyone near it running, Rend bleeds the tank. He is not immune to fear in Classic.
Tank
Pick up each wave and Urok as he comes.
Healer
Stand away from the tank, out of the roar.
Damage
Kill the ogres fast, they pile up.
Watch out for: Waves piling up on the healer.
Notable loot
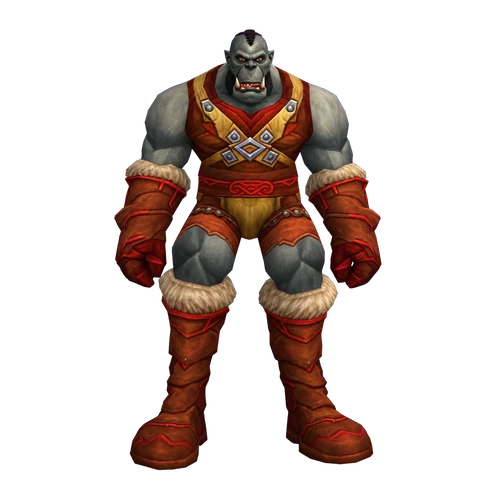
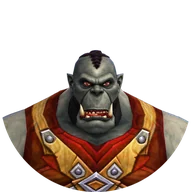
Quartermaster Zigris walks around the Storehouse.
Abilities
- Drink Healing Potion · Uses a Holy elixir to heal the caster.
- Hooked Net · Immobilizes nearby enemies for 10 sec. and inflicts Physical damage.
- Shoot · Shoots at an enemy, inflicting Physical damage.
- Stun Bomb · Hurls a stun bomb, inflicting normal damage to all enemies in a selected area and stunning them for 5 sec.
Tactics
- He shoots, throws Hooked Net and Stun Bomb and drinks a healing potion.
- In Classic clear the hallway first and pull him into it, so he cannot back off and bring adds.
Tank
Pull him into the cleared hallway.
Healer
Stay out of the Stun Bomb area.
Damage
Interrupt or stun the potion.
Watch out for: Adds from the Storehouse joining.
Notable loot
 Plans: Annihilator · Other
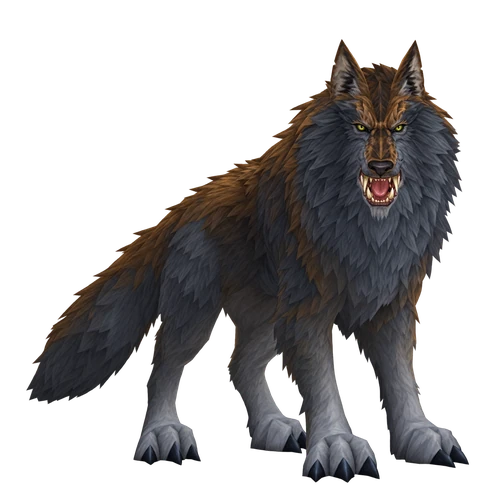
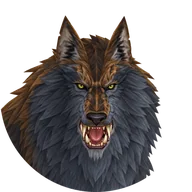
Halycon is the worg mother in Halycon's Lair, and both factions have a quest to kill her.
Abilities
Tactics
- In Classic AoE her non-elite pups first, then tank her inside the lair.
- Rend and Thrash keep the tank busy.
- Gizrul the Slavener comes down the hallway when she dies, so stay where you are.
Tank
Tank her inside the lair, not in the hallway.
Healer
Keep mana for Gizrul right after.
Damage
Pups first.
Watch out for: Low mana when Gizrul arrives.
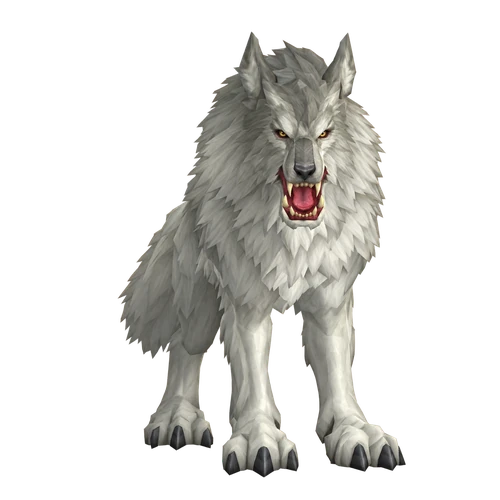
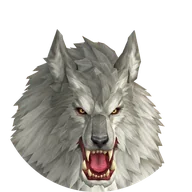
Gizrul the Slavener comes into Halycon's Lair right after Halycon dies.
Abilities
- Enrage · Increases the caster's attack speed by 60% and the Physical damage it deals for 2 min.
- Infected Bite · Inflicts Nature damage to an enemy every 10 sec. and increases the Physical damage it takes for 3 min.
- Fatal Bite · Drains health from an enemy, healing the caster for up to twice that amount.
Tactics
- Infected Bite is a disease that ticks and makes the target take more physical damage. Cure it.
- Fatal Bite drains health and heals him, Enrage speeds him up at low health.
Watch out for: Infected Bite stacking on the tank.
Notable loot
 Wildheart Spaulders · Shoulder
Overlord Wyrmthalak commands the lower spire from the Chamber of Battle. He drops the Gemstone of Bloodaxe and General Drakkisath's Command.
Abilities
- Sweeping Slam · Inflicts normal damage to enemies in a cone in front of the caster, knocking them back.
- Cleave · Inflicts weapon damage to an enemy and its nearest allies, affecting up to 3 targets.
- Demoralizing Shout · Reduces the melee attack power of nearby enemies for 30 sec.
Tactics
- In Classic tank him against the wall behind him, Sweeping Slam knocks back everyone in front.
- Melee stand behind him for Cleave, Demoralizing Shout lowers your attack power.
- Around half health two elites run up the ramp: a Spirestone Warlord, a Smolderthorn Berserker or a Bloodaxe Veteran. Crowd control or off-tank them.
Tank
Keep the wall behind you.
Healer
Be ready for the adds at half health.
Damage
Crowd control the adds, then finish Wyrmthalak.
Watch out for: The two adds running free at half health.
Notable loot
 Gemstone of Bloodaxe · Other
 Beaststalker's Mantle · Shoulder
Rare spawns7
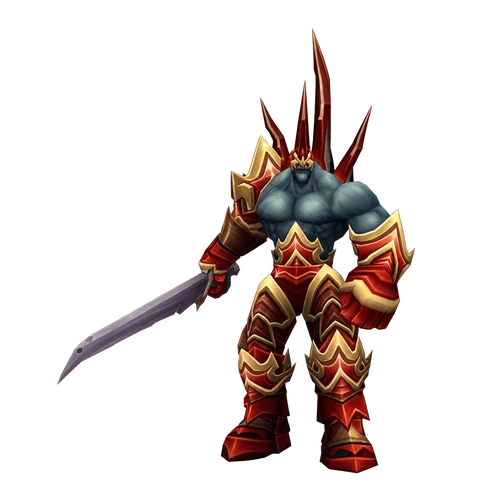
The Burning Felguard is a rare demon that can come out of the portals the Scarshield Warlocks open in Hordemar City.
Abilities
- Thunderclap · Inflicts Nature damage to nearby enemies, increasing the time between their attacks by 33% and slowing their movement by 40% for 10 sec.
- Strike · Strikes at an enemy, inflicting increased melee damage.
- Blast Wave · Unleashes a wave of flame, inflicting Fire damage to nearby enemies and reducing their movement speed for 6 sec.
- Burning Felguard Spawn
Tactics
- Thunderclap and Blast Wave hit and slow everyone near it, Strike hits the tank.
- Kill the Warlocks fast and it has less chance to show up.
Tank
Pull it away from the casters.
Healer
Stay out of its melee range.
Damage
Ranged do the work, melee eat Thunderclap.
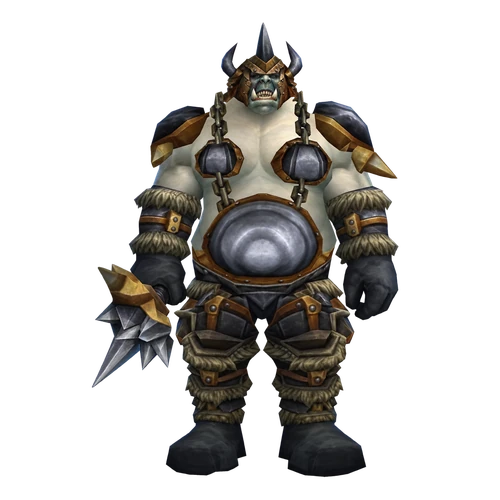
11Boss 11 of 16Rare spawn
Spirestone Butcher
The Spirestone Butcher is a rare ogre that patrols alone in the hallway toward Omokk.
Tactics
- In Classic kill the ogre packs first so he does not walk into them.
- Forever lists no spells for him.
Tank
Pick him up away from other packs.
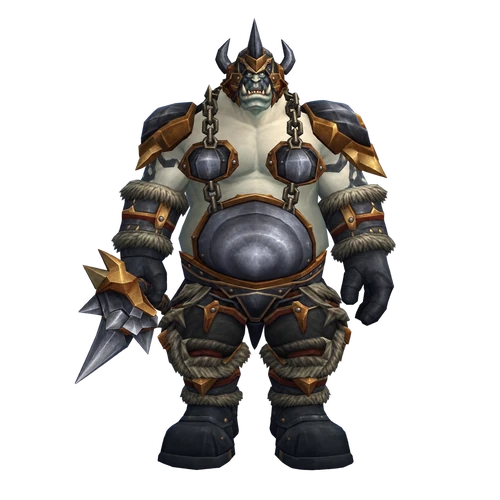
12Boss 12 of 16Rare spawn
Spirestone Battle Lord
The Spirestone Battle Lord is a rare ogre on the hill next to Omokk.
Tactics
- In Classic pull him on his own before you go for Omokk.
- Forever lists no spells for him.
Tank
Pull him away from Omokk.
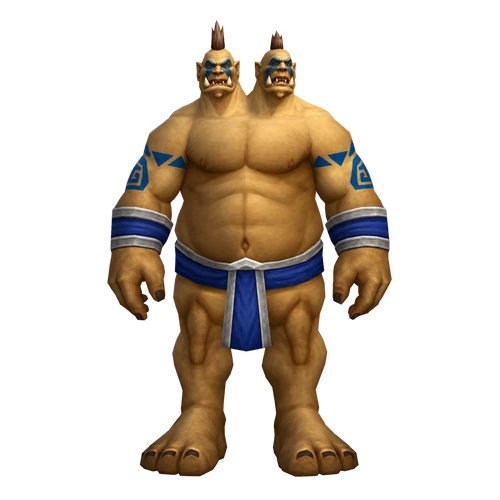
The Spirestone Lord Magus is a rare ogre caster next to Omokk.
Abilities
- Enlarge · Increases the Physical damage dealt by an ally for 1 min.
- Polymorph · Transforms an enemy into a sheep, forcing it to wander around for up to 20 sec. While wandering, the sheep cannot attack or cast spells, but regenerates very quickly. Any damage will transform the target back into its normal form. Only one target can be polymorphed at a time. Only works on beasts, dragons, giants, humanoids, and critters.
- Arcane Bolt · Hurls a magical bolt at an enemy, inflicting Arcane damage.
- Bloodlust · Increases an ally's attack speed by 60% for 30 sec.
Tactics
- He casts Polymorph and Arcane Bolt and buffs his friends with Bloodlust and Enlarge.
- Kill him before the melee ogres he buffs.
Tank
Expect to be polymorphed out of the fight.
Healer
Dispel Polymorph.
Damage
Kill the Lord Magus first.
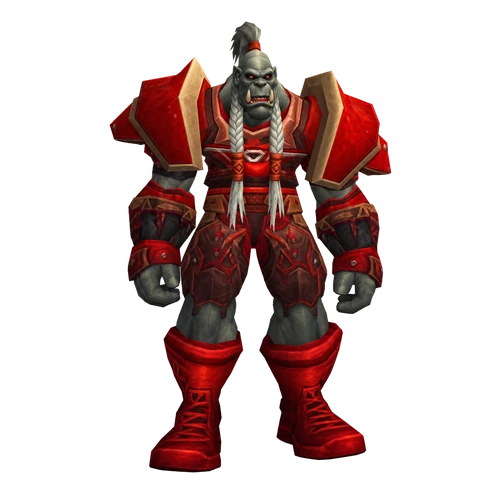
Bannok Grimaxe is a rare orc in the lowest part of Hordemar City before the Skitterweb Tunnels. He can drop Plans: Arcanite Reaper.
Tactics
- Forever lists no spells for him. Tank him like any elite orc.
Notable loot
- Plans: Arcanite Reaper · Other
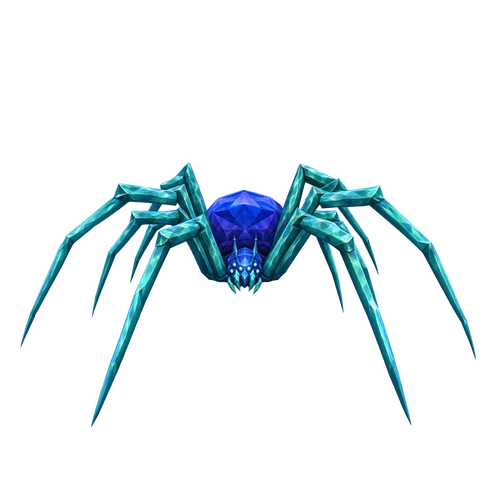
Crystal Fang is a rare crystal spider near Mother Smolderweb.
Abilities
Tactics
- It calls Spire Spiderlings like Smolderweb. AoE them.
Tank
Face it away from the group.
Damage
Kill the Spiderlings first.
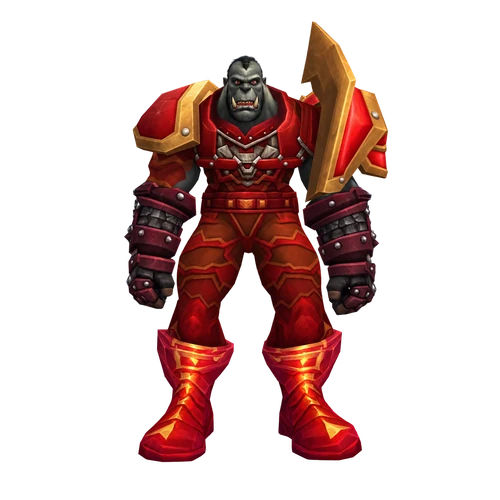
16Boss 16 of 16Rare spawn
Ghok Bashguud
Ghok Bashguud is a rare orc who sleeps with two guards in the room before the bridge to Wyrmthalak.
Tactics
- Forever lists no spells for him. Pull the room carefully, the guards come with him.
Trash
Dangerous trash and diseases
Most wipes here start before a boss. These are the packs and effects to respect.
Scarshield casters
Hordemar City. Scarshield Spellbinders and Warlocks are the casters, and the Warlocks open a Scarshield Portal that keeps sending demons for 30 seconds, sometimes a Burning Felguard. Legionnaires Shield Bash and Cleave, Acolytes cast Shadow Word: Pain. Kill the Warlocks first.
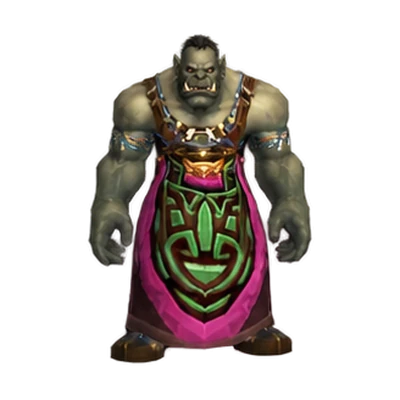
Spirestone ogres
Mok'Doom. Mystics heal with Healing Wave and Rejuvenation and cast Chain Lightning, Battle Mages Bloodlust their friends, Ogre Magi cast Slow, and Warlords Enrage and break your crowd control with Empower Will. Kill the healers and buffers first.
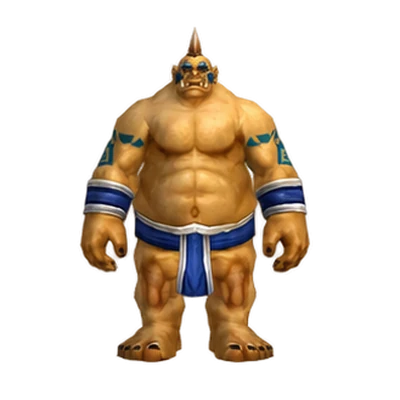
Smolderthorn trolls
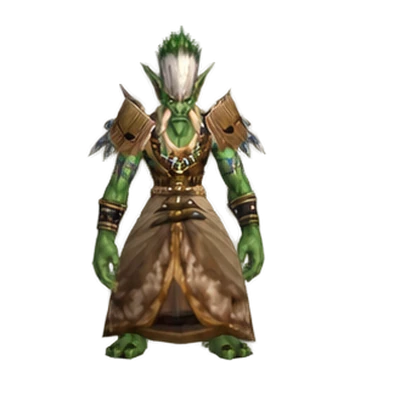
Tazz'Alaor. Witch Doctors drop healing wards and Flame Buffet totems, Headhunters hit from range with Throw and Impale, Shadow Priests Hex, Mana Burn and dispel, and Berserkers Enrage with Mortal Strike. Kill the wards and pull the ranged trolls around a corner.
Spire Spiders
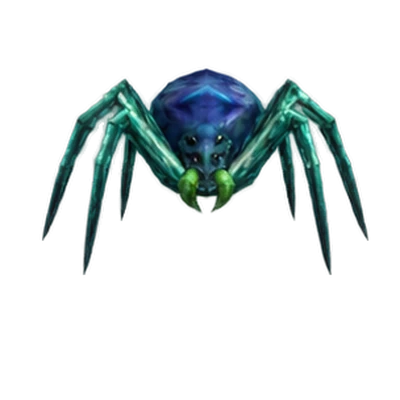
The Skitterweb Tunnels. Spire Spiders call Spiderlings and stun everyone in front of them with Crystallize. Walk around the eggs and AoE the Spiderlings.
Firebrand orcs
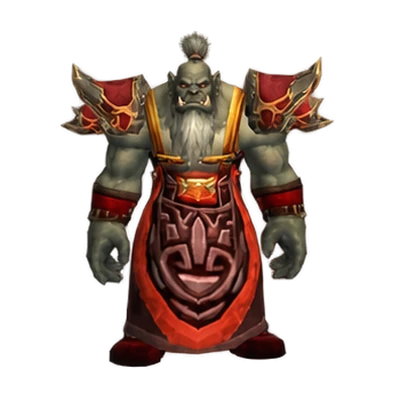
Lower Hordemar City and the mouth of the Skitterweb Tunnels. Pyromancers Immolate, Invokers cast Flamestrike, Fire Nova and Mark of Flames, Dreadweavers put Curse of the Firebrand on you, and Grunts Enrage and Mortal Strike. Line of sight the casters and get out of Flamestrike.
Bloodaxe orcs and worgs
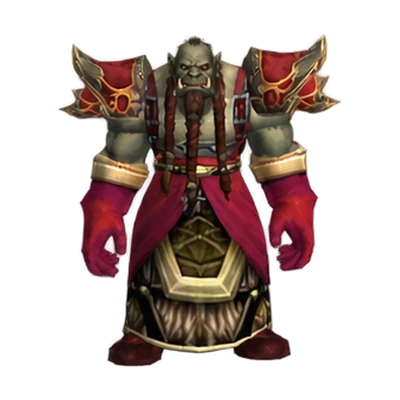
Around Halycon and Wyrmthalak, in big packs. Evokers cast Flamecrack and Blast Wave, Summoners Frost Nova and pull a player to them with Summon, Veterans stun with Snap Kick and Pummel casters, and the Bloodaxe Worgs howl for attack power. Crowd control the casters.
Quests
Lower Blackrock Spire quests
Twenty quests lead into Lower Blackrock Spire: 5 for the Alliance, 5 for the Horde and 10 for both factions. Most start in Burning Steppes, at Morgan's Vigil for the Alliance and at Flame Crest for both, the Horde ones in Kargath, and a few inside the spire. The Seal of Ascension, the key to Upper Blackrock Spire, starts here with Vaelan.
Alliance15
Pick up before you go
- 1Morgan's Vigil in Burning Steppes: Helendis Riverhorn (Put Her Down). Marshal Maxwell gives Maxwell's Mission once Bijou has sent you to him.
- 2Flame Crest in Burning Steppes: Kibler (Kibler's Exotic Pets, En-Ay-Es-Tee-Why) and Ragged John (Mother's Milk).
- 3Tanaris: Prospector Ironboot (The Final Tablets, after The Lost Tablets of Mosh'aru).
- 4Next to the Spire portal: Bodley (the two Valthalak amulet quests of Dungeon Set 2).
- Level 60, from 57
Vaelan near the start of the spire. Bring the Gemstones of Spirestone, Smolderthorn and Bloodaxe from Omokk, Voone and Wyrmthalak plus an Unadorned Seal of Ascension, which drops inside the spire.
- Level 60, from 57
Follow-up: Seal of Ascension
Seal of AscensionVaelan's second step. Take the Unforged Seal of Ascension to Emberstrife in the Wyrmbog of Dustwallow Marsh (about 56.5, 87.7), beat him down and use the Orb of Draconic Energy on him. The reward is the Seal of Ascension.
- Level 60, from 55
Follow-up: Message to Maxwell
Maxwell's Mission- Quest giver
- Marshal MaxwellBurning Steppes · 84.6, 68.8
- Turn in
- Marshal MaxwellBurning Steppes · 84.6, 68.8
Marshal Maxwell at Morgan's Vigil, after Bijou's message. Kill Voone, Omokk and Wyrmthalak.
- Level 60, from 55
- Starts from
 General Drakkisath's Command
- Turn in
- Marshal MaxwellBurning Steppes · 84.6, 68.8
Starts from General Drakkisath's Command, which Overlord Wyrmthalak drops. Bring it to Marshal Maxwell, it opens General Drakkisath's Demise in UBRS.
- Level 59, from 55
- Quest giver
- Helendis RiverhornBurning Steppes · 85.5, 68.9
- Turn in
- Helendis RiverhornBurning Steppes · 85.5, 68.9
Helendis Riverhorn at Morgan's Vigil. Kill Halycon in her lair.
- Level 59, from 55
Kibler at Flame Crest. Use his cage on a Bloodaxe Worg Pup in the spire and bring back the Caged Worg Pup for a Worg Carrier.
You get: Worg Carrier
- Level 59, from 55
Kibler again. Collect 15 Spire Spider Eggs in the Skitterweb Tunnels for a Smolderweb Carrier.
You get: Smolderweb Carrier
- Level 60, from 55
- Quest giver
- Ragged JohnBurning Steppes · 65.0, 23.6
- Turn in
- Ragged JohnBurning Steppes · 65.0, 23.6
Ragged John at Flame Crest. Let Mother Smolderweb poison you with Mother's Milk and get back to John while it is still on you.
- Level 60, from 55
Warosh in Hordemar City. Read Warosh's Scroll, summon Urok Doomhowl and bring back Warosh's Mojo.
- Level 59, from 55
Bijou in the spire. Find her belongings on the bottom floor of Hordemar City.
- Level 59, from 55
Follow-up: Bijou's Belongings
Message to Maxwell- Quest giver
- Bijouinside the dungeon
- Turn in
- Marshal MaxwellBurning Steppes · 84.6, 68.8
Take Bijou's information to Marshal Maxwell at Morgan's Vigil.
- Level 58, from 40
- Quest giver
- Prospector IronbootTanaris · 66.8, 24.0
- Turn in
- Prospector IronbootTanaris · 66.8, 24.0
Prospector Ironboot in Tanaris, after The Lost Tablets of Mosh'aru. The Fifth Tablet lies in the Skitterweb Tunnels, the Sixth in Tazz'Alaor.
- Level 60, from 55
- Quest giver
- Human Remainsinside the dungeon
- Turn in
- Malyfous DarkhammerWinterspring · 61.0, 38.6
Starts at the Human Remains inside the spire. Bring the gauntlets to Malyfous Darkhammer in Winterspring.
- Level 60, from 58
Bodley next to the Spire portal (about 32.3, 25.8), after Components of Importance. Summon Mor Grayhoof with the Brazier of Beckoning in Tazz'Alaor and kill him.
- Level 60, from 58
Bodley's second amulet quest. Summon and kill Mor Grayhoof again for the right piece.
Horde15
Pick up before you go
- 1Kargath in the Badlands: Warlord Goretooth (Warlord's Command), Galamav the Marksman (The Pack Mistress) and Lexlort (Operative Bijou).
- 2Flame Crest in Burning Steppes: Kibler (Kibler's Exotic Pets, En-Ay-Es-Tee-Why) and Ragged John (Mother's Milk).
- 3Tanaris: Prospector Ironboot (The Final Tablets, after The Lost Tablets of Mosh'aru).
- 4Next to the Spire portal: Bodley (the two Valthalak amulet quests of Dungeon Set 2).
- Level 60, from 57
Vaelan near the start of the spire. Bring the Gemstones of Spirestone, Smolderthorn and Bloodaxe from Omokk, Voone and Wyrmthalak plus an Unadorned Seal of Ascension, which drops inside the spire.
- Level 60, from 57
Follow-up: Seal of Ascension
Seal of AscensionVaelan's second step. Take the Unforged Seal of Ascension to Emberstrife in the Wyrmbog of Dustwallow Marsh (about 56.5, 87.7), beat him down and use the Orb of Draconic Energy on him. The reward is the Seal of Ascension.
- Level 60, from 55
- Quest giver
- Warlord GoretoothBadlands · 4.9, 47.5
- Turn in
- Warlord GoretoothBadlands · 4.9, 47.5
Warlord Goretooth in Kargath. Kill Omokk, Voone and Wyrmthalak and bring the Important Blackrock Documents. It leads to Eitrigg's Wisdom and For The Horde! in UBRS.
- Level 59, from 55
- Quest giver
- Galamav the MarksmanBadlands · 5.8, 47.5
- Turn in
- Galamav the MarksmanBadlands · 5.8, 47.5
Galamav the Marksman in Kargath. Kill Halycon in her lair.
- Level 59, from 55
Kibler at Flame Crest. Use his cage on a Bloodaxe Worg Pup in the spire and bring back the Caged Worg Pup for a Worg Carrier.
You get: Worg Carrier
- Level 59, from 55
Kibler again. Collect 15 Spire Spider Eggs in the Skitterweb Tunnels for a Smolderweb Carrier.
You get: Smolderweb Carrier
- Level 60, from 55
- Quest giver
- Ragged JohnBurning Steppes · 65.0, 23.6
- Turn in
- Ragged JohnBurning Steppes · 65.0, 23.6
Ragged John at Flame Crest. Let Mother Smolderweb poison you with Mother's Milk and get back to John while it is still on you.
- Level 60, from 55
Warosh in Hordemar City. Read Warosh's Scroll, summon Urok Doomhowl and bring back Warosh's Mojo.
- Level 59, from 55
Lexlort in Kargath sends you to find Bijou in the spire.
- Level 59, from 55
Follow-up: Operative Bijou
Bijou's BelongingsBijou wants her belongings back from the bottom floor of Hordemar City.
- Level 59, from 55
Follow-up: Bijou's Belongings
Bijou's Reconnaissance ReportTake Bijou's Reconnaissance Report back to Lexlort in Kargath.
- Level 58, from 40
- Quest giver
- Prospector IronbootTanaris · 66.8, 24.0
- Turn in
- Prospector IronbootTanaris · 66.8, 24.0
Prospector Ironboot in Tanaris, after The Lost Tablets of Mosh'aru. The Fifth Tablet lies in the Skitterweb Tunnels, the Sixth in Tazz'Alaor.
- Level 60, from 55
- Quest giver
- Human Remainsinside the dungeon
- Turn in
- Malyfous DarkhammerWinterspring · 61.0, 38.6
Starts at the Human Remains inside the spire. Bring the gauntlets to Malyfous Darkhammer in Winterspring.
- Level 60, from 58
Bodley next to the Spire portal (about 32.3, 25.8), after Components of Importance. Summon Mor Grayhoof with the Brazier of Beckoning in Tazz'Alaor and kill him.
- Level 60, from 58
Bodley's second amulet quest. Summon and kill Mor Grayhoof again for the right piece.
Loot
Loot table
Every boss drop and every quest reward of the dungeon. Hover an item for its stats.
Forever lists 13 boss drops here so far, and six of them are Dungeon Set 1 pieces: Boots of Elements, Shadowcraft Gloves, Beaststalker's Gloves, Wildheart Boots, Wildheart Spaulders and Beaststalker's Mantle. Hunters look at Vosh'gajin's Blackcrow, blacksmiths at Plans: Annihilator from Zigris, Plans: Arcanite Reaper from Bannok Grimaxe and Urok's Top Half of Advanced Armorsmithing: Volume III. The three gemstones are quest items for the Seal of Ascension.
| Item | Slot | Source | Req. |
|---|---|---|---|
| Gemstone of Spirestone | Other | Highlord Omokk | – |
| Boots of Elements | Feet · Mail | Highlord Omokk | 54 |
| Blackcrow | Ranged | Shadow Hunter Vosh'gajin | 54 |
| Shadowcraft Gloves | Hands · Leather | Shadow Hunter Vosh'gajin | 54 |
| Gemstone of Smolderthorn | Other | War Master Voone | – |
| Beaststalker's Gloves | Hands · Mail | War Master Voone | 54 |
| Wildheart Boots | Feet · Leather | Mother Smolderweb | 54 |
 Top Half of Advanced Armorsmithing: Volume III Top Half of Advanced Armorsmithing: Volume III | Other | Urok Doomhowl | 50 |
| Plans: Annihilator | Blueprint | Quartermaster Zigris | – |
| Wildheart Spaulders | Shoulder · Leather | Gizrul the Slavener | 55 |
| Gemstone of Bloodaxe | Other | Overlord Wyrmthalak | – |
| Beaststalker's Mantle | Shoulder · Mail | Overlord Wyrmthalak | 55 |
| Plans: Arcanite Reaper | Blueprint | Bannok Grimaxe | – |
Beta drop chances come from a handful of kills and are left out until the sample is bigger.
 Which class? Our tier lists


Collect
Achievements, Tameable beasts and Sets from Lower Blackrock Spire
Sets8
 Battlegear of ValorEarned in Lower Blackrock Spire
 Beaststalker ArmorEarned in Lower Blackrock Spire
 Dreadmist RaimentEarned in Lower Blackrock Spire
 Magister's RegaliaEarned in Lower Blackrock Spire
 Shadowcraft ArmorEarned in Lower Blackrock Spire
 The ElementsEarned in Lower Blackrock Spire
 Vestments of the DevoutEarned in Lower Blackrock Spire
 Wildheart RaimentEarned in Lower Blackrock Spire
Achievement1
 Master SpelunkerEarned in Lower Blackrock Spire, Needs Overlord Wyrmthalak
Tameable beasts4
 Bloodaxe WorgTameable in Lower Blackrock Spire
- Bloodaxe Worg PupTameable in Lower Blackrock Spire
- Scarshield WorgTameable in Lower Blackrock Spire
 Spire SpiderlingTameable in Lower Blackrock Spire
Before you go
Before you go
- Start the Seal of Ascension on the first runIf your group wants UBRS later, everyone talks to Vaelan at the start and loots their own gemstone from Omokk, Voone and Wyrmthalak.
- Bring crowd controlOgre magi, troll witch doctors and Scarshield casters come in mixed packs. Polymorph, Sap and Freezing Trap on the casters make Hordemar City and Tazz'Alaor much easier.
- Bring a decurse and a disease cureCurse of Blood from Vosh'gajin, Gizrul's Infected Bite and Curse of the Firebrand all hurt more when they stay on.
- Plan the Urok summonSomeone needs Warosh's quest and Omokk's Head. Do it after Omokk, with the area around the tribute pile cleared.
- Kill the Scarshield Warlocks first, their portals can bring a Burning Felguard.
- Walk around the spider eggs in the Skitterweb Tunnels unless you are collecting them for Kibler.
- Stay inside Halycon's Lair after she dies, Gizrul comes to you.
FAQ
Questions players ask
What level is Lower Blackrock Spire in WoW Forever?
The spire lets you in from level 50, the Group Finder lists LBRS at 53, and the bosses are level 57–60. We recommend 55–60 for a comfortable run.
Where is Lower Blackrock Spire?
At the very top of Blackrock Mountain, the volcano between Searing Gorge and Burning Steppes. The portal is at about 33.0, 25.2 on the Burning Steppes map, and Upper Blackrock Spire uses the same one. Enter the mountain and follow the chains up.
What quests are there for Lower Blackrock Spire?
Twenty: 5 for the Alliance, 5 for the Horde and 10 for both. The big ones are the Seal of Ascension, Maxwell's Mission and Warlord's Command, Bijou's chain, Urok Doomhowl, Mother's Milk and Kibler's two pet quests.
How do you start the Seal of Ascension in LBRS?
Talk to Vaelan near the start of the spire. Collect the Gemstone of Spirestone from Omokk, the Gemstone of Smolderthorn from Voone and the Gemstone of Bloodaxe from Wyrmthalak plus an Unadorned Seal of Ascension. The second step takes you to Emberstrife in Dustwallow Marsh, and the finished seal is the key to Upper Blackrock Spire.
How do you summon Urok Doomhowl?
Take Warosh's quest in Hordemar City, kill Highlord Omokk for his head and put it on a Roughshod Pike at Urok's Tribute Pile. In Classic waves of ogres come first, then Urok himself.
How many bosses are in Lower Blackrock Spire?
Nine encounters: Highlord Omokk, Shadow Hunter Vosh'gajin, War Master Voone, Mother Smolderweb, Urok Doomhowl, Quartermaster Zigris, Halycon, Gizrul the Slavener and Overlord Wyrmthalak. Seven rares can show up on top, and Dungeon Set 2 players can summon Mor Grayhoof.
Is Lower Blackrock Spire open in the WoW Forever beta?
No. The beta is capped at 30 since October 1, and Blizzard's list of open dungeons stops at Uldaman. When Blackrock Mountain opens, this guide adds what the first runs show.
How long does a full Lower Blackrock Spire clear take?
Nobody has timed a Forever run yet. We plan 75 to 105 minutes for a full clear with the quests.
Sources
Sources
- Blizzard: WoW Forever beta development notes, October 1Confirmed
- Warcraft Wiki · Classic referenceClassic
- Run time and difficulty are editorial estimates by mmonster.
mmonster boost
Short on time? Run Lower Blackrock Spire with mmonster
Our boosters organize the group and run the dungeon with you. Run styles, play methods and the current price are on the service page.
Keep going