


Sunken Temple Dungeon Guide
Sunken Temple, also called the Temple of Atal'Hakkar or ST, is the troll temple sunk under the Pool of Tears in the Swamp of Sorrows, a Classic dungeon for levels 50–60 with eight boss encounters and a full clear of about 70–100 minutes. Here are the way down to the portal for both factions, the statue order, every quest with its giver, all bosses with their Classic tactics and the loot that exists in WoW Forever.
- Level
- 50–60
- Bosses
- 11
- Full clear
- 70–100min
- Difficulty
- 8/10
Swamp of Sorrows · Eastern KingdomsEntrance 70.2, 52.3Show on the mapRun it with mmonster
The bosses




Overview
Inside Sunken Temple
The Atal'ai trolls built this temple to call their blood god Hakkar into the world, and Ysera sank it into the swamp to stop them. The trolls kept going down there, and the green dragons she sent to guard them fell to the Nightmare. The instance is one round temple on several floors around a central pit: the Hall of Serpents and the Pit of Refuse at the bottom, the Hall of the Cursed with six alcoves on top, and in the middle the Pit of Sacrifice with the Lair of the Chosen, the Sanctum of the Fallen God and the Chamber of the Dreamer. Before the portal you climb into the ruin in the lake and walk down through the outer temple, which is not part of the instance.
Eight boss encounters wait inside: Atal'alarion, the Avatar of Hakkar, Jammal'an the Prophet, the four drakes Dreamscythe, Weaver, Hazzas and Morphaz, and the Shade of Eranikus at the end. On top of those the six Atal'ai Defenders Gasher, Hukku, Loro, Mijan, Zolo and Zul'Lor guard the alcoves and hold Jammal'an's forcefield, Ogom the Wretched fights at Jammal'an's side and the Spawn of Hakkar patrols the lower ring as an optional elite. Atal'alarion and the Avatar are optional events. Sunken Temple also counts for the Master Spelunker achievement.
In WoW Forever the Group Finder lists it at level 45 for a group of five, and the mobs are level 45–55 as in Classic. Nobody has run it in Forever yet, so every tactic on this page is the Classic one. The three puzzles of the temple, the statue order for Atal'alarion, the six Defenders that open Jammal'an's forcefield and the Eternal Flames of the Avatar, are described as they work in Classic. Nobody has tested them in Forever yet.
Level 50–60 is the range the dungeon is tuned for, not a minimum entry level. This is the Forever level range as it stands today. It can still shift before launch.
Beta status
Sunken Temple in the WoW Forever beta
Not open in the beta yetConfirmedChecked October 4, 2026
Sunken Temple is not open in the WoW Forever beta. The level cap has been 30 since October 1, and Blizzard's list of open dungeons from that day does not include it. The beta reaches it later, and Blizzard has not given a date. We add beta tactics, drops and issues within a day or two of it opening.
Forever vs Classic
What changed in Sunken Temple for WoW Forever
What is different from the Classic version you may know. Everything else works as it did in Classic.
Every blue boss item got reworkedBeta data
All ten blue boss items left in the temple changed. Headspike from Atal'alarion gains Defense, and the Slitherscale Boots of the Spawn of Hakkar gain Defense but lose some Spirit. The Avatar's Might of Hakkar trades Spirit for hit chance, and the Spire of Hakkar hits softer in melee but gets much more spell power and a life drain on harmful spells. The Kilt of the Atal'ai Prophet swaps its Strength for healing and spell damage. Fist of the Damned from Ogom turns from green to blue, hits harder, adds Defense and steals more life. The drakes' Smoldering Claw throws a stronger fireball and has a new icon, while the Nightfall Drape and the Dawnspire Cord swap their Spirit for spell power. The Horns of Eranikus lose a point of Spirit and gain healing and spell damage.
26 Classic boss items are goneBeta data
The Forever item data has no entry for 26 Classic boss items of the temple, among them both epics: Embrace of the Wind Serpent from the Avatar of Hakkar and Dragon's Call from the Shade of Eranikus. The six rares the Atal'ai Defenders shared are missing too, the Atal'ai Spaulders, Breastplate, Gloves, Leggings, Boots and Girdle, so the Defenders drop no gear for now. Atal'alarion, the Avatar, Jammal'an, the four drakes and Eranikus keep only the items in the loot table below. This can still change before the dungeon opens.
Ten quests lost their Classic rewardsBeta data
Jammal'an the Prophet no longer offers the Rainstrider Leggings or the Helm of Exile, The Essence of Eranikus no longer gives the Chained Essence of Eranikus trinket, and eight of the nine class quests lost their Classic choices: Voodoo Feathers, Forging the Mightstone, The Green Drake, The Azure Key, Blood of Morphaz, Da Voodoo, Destroy Morphaz and A Better Ingredient. Their Forever rewards are not in the game data yet, so the quest list shows them without rewards. The warlock quest Trolls of a Feather keeps Soul Harvester, Abyss Shard and Robes of Servitude. The God Hakkar keeps its three choices with new stats: the Avenguard Helm gains Agility, the Gemburst Circlet swaps Agility for spell damage and the Lifeforce Dirk gets a new effect. The Guardian Talisman from the two faction quests is no longer unique, adds Stamina and now has a use effect that makes enemies notice you later.
No quest for Alliance shamans and Horde paladinsBeta data
WoW Forever lets dwarves play shamans on the Alliance side and undead and tauren play paladins on the Horde side. Their Sunken Temple class quests did not follow: Da Voodoo stays a Horde shaman quest and Forging the Mightstone an Alliance paladin quest for humans and dwarves, and there is no second version of either.
Spell tooltips with new numbersBeta data
Many spells here show new numbers in their Forever tooltips, among them Atal'alarion's Sweeping Slam, the Acid Breath of the drakes and Eranikus, the Frostbolt Volley of the Hakkari Frostwings and the Fevered Plague of the Mummified Atal'ai. Most of them look scaled up for level 50 mobs, while the Shadow Bolt of the Atal'ai priests and the Corruption of the Hakkari Bloodkeepers got weaker on paper. Plan with the Classic fights until a run shows how hard they really hit.
Group Finder at level 45Beta data
The Group Finder lists Sunken Temple at level 45 for a group of five and suggests levels 50–60. In Classic the dungeon tool listed it from 44 and the portal let you in from 35. Which level the Forever portal asks for, nobody has tested yet.
Less bonus XP from dungeon questsConfirmed
Since October 1 dungeon quests give half of their bonus experience on top of the normal quest reward. Nobody has posted the new XP of the Sunken Temple quests yet.
Location
Where is Sunken Temple? Entrance and how to get there
Sunken Temple sits under the Pool of Tears, the lake in the east of the Swamp of Sorrows. The way in is at the top of the ruin in the middle of the lake, at about 70.2, 52.3. Swim over and climb the stairs on its south side. Inside, the halls of the outer temple lead down and north-east to the instance portal, which lies deep underground at about 77.3, 35.9 on the zone map. The outer temple is not part of the instance, and the tablets for the Alliance quest lie in its halls.
Now you can move the map.
No spawn points on the map for this one.
- 1Fly to Nethergarde Keep in the Blasted Lands. Without that flight path, fly to Darkshire in Duskwood and ride east through Deadwind Pass into the swamp.
- 2From Nethergarde Keep ride north on the path into the Swamp of Sorrows. The Fallen Hero of the Horde stands on it at about 34.2, 65.7.
- 3Follow the swamp east and give Stonard, a Horde town, a wide berth until you reach the Pool of Tears.
- 4Swim to the ruin in the middle of the lake, climb in at about 70.2, 52.3 and follow the halls of the outer temple down to the portal.
- 1Fly to Stonard in the Swamp of Sorrows, the flight master stands at about 46.1, 54.7. Fel'zerul, who gives the Horde quest, is in Stonard too.
- 2Ride east out of Stonard to the Pool of Tears.
- 3Swim to the ruin in the middle of the lake and climb in at about 70.2, 52.3.
- 4Follow the halls of the outer temple down and north-east to the portal at about 77.3, 35.9.
- Entrance portalMap coordinates, Swamp of Sorrows
70.2, 52.3 - GraveyardMap coordinates, Swamp of Sorrows
50.2, 62.2
Copies the /way command for TomTom.
Group Finder
The Group Finder lists Sunken Temple at level 45 for five players. There is no meeting stone, so gather on the ruin or let a warlock summon the group there, then walk down through the outer temple together.
After a wipe
The closest Spirit Healer stands south of Stonard at about 50.2, 62.2, a short ride west of the lake. Nobody has reported yet which graveyard a wipe inside uses, or whether a ghost can reach the underground portal any faster than through the ruin.
Map and route
The route through the dungeon
10 areas, one path. Tap a stop to see what waits there.
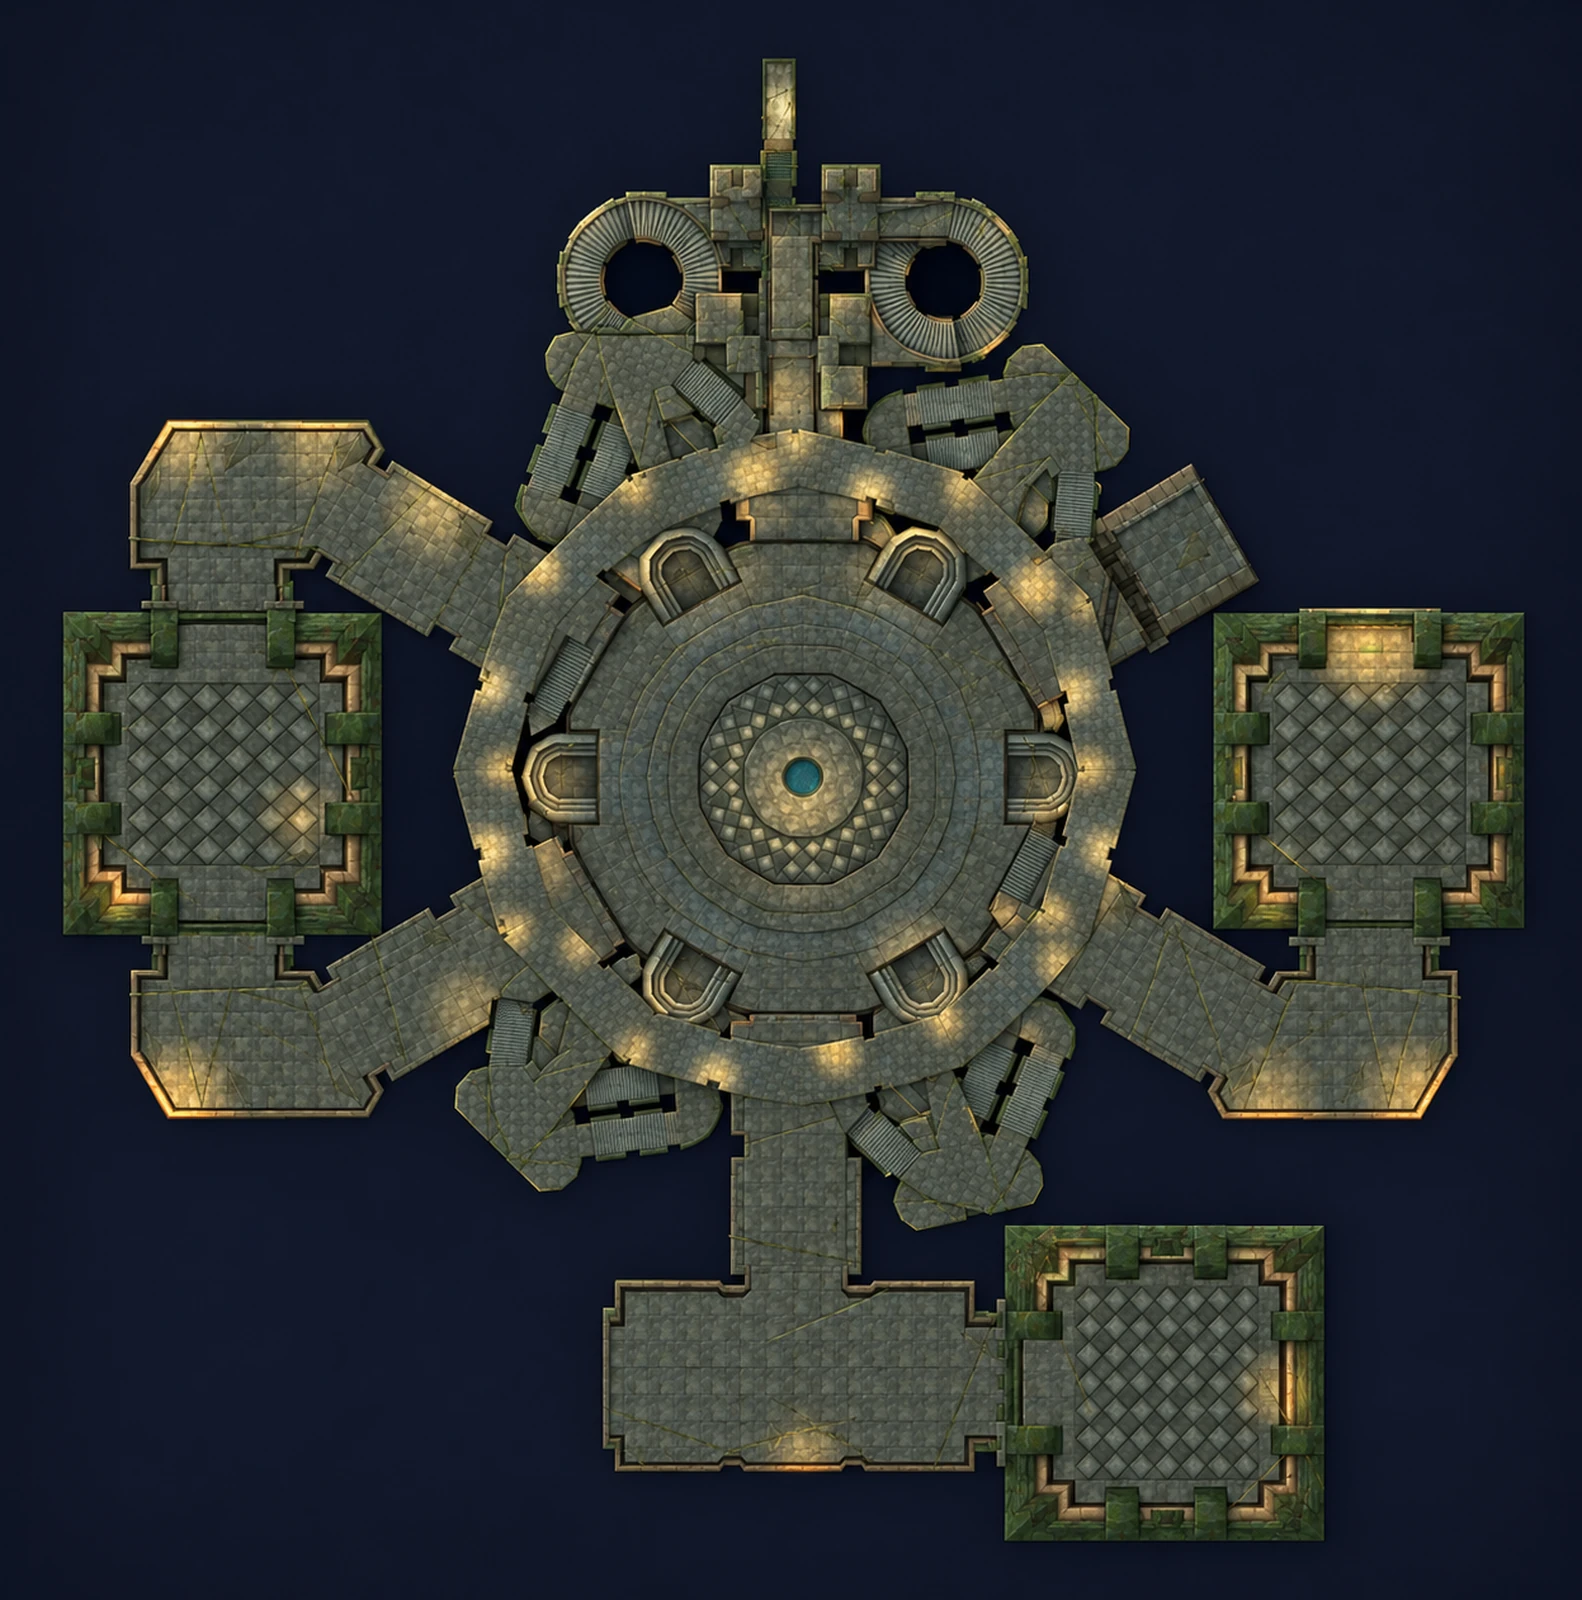
Area 1 of 10
Outer temple
The ruin in the Pool of Tears and the halls below it, outside the instance. Climb in at the top, then follow the halls down and north-east to the portal. Atal'ai trolls guard these halls too, and the Alliance collects the tablets for Brohann Caskbelly here.
Area 2 of 10
Entrance stairs
The portal room. Two spiral stairs lead on from here, one down to the lower ring and the basement, one up to the Hall of the Cursed. Most Classic groups do the optional basement first and come back here for the upper ring.
Area 3 of 10
Hall of Serpents
The lower ring around the Pit of Refuse, with the six Atal'ai Statues on balconies over the pit. Murk Worms, Deep Lurkers and Slime Maggots live here, and the Spawn of Hakkar patrols the ring. Clear the whole ring before anyone touches a statue.
Area 4 of 10
The Pit of Refuse
The flooded bottom of the temple, right under the hole in the Pit of Sacrifice. Saturated Oozes and more worms wait here, the Altar of Hakkar for Into the Depths stands at the bottom, and Atal'alarion and the Idol of Hakkar appear once the statues are done. The whole basement is optional.
 Saturated OozeElite
Area 5 of 10
Hall of the Cursed
The upper ring with the Atal'ai packs: Witch Doctors, Warriors, Unliving Atal'ai, Corpse Eaters and Atal'ai Slaves. Stairs marked by stone masks lead down to six alcoves over the Pit of Sacrifice, with one Atal'ai Defender in each. Kill all six to drop Jammal'an's forcefield.
 Atal'ai Witch DoctorElite
Area 6 of 10
The Pit of Sacrifice
The middle level around the big hole in the floor, full of Nightmare dragonkin and whelps. Groups drop down from the last alcove. Stay away from the hole, a fall puts you back in the Pit of Refuse. Dreamscythe and Weaver show up here after Jammal'an dies.
 Nightmare WyrmkinElite
Area 7 of 10
Lair of the Chosen
The room of pews east of the pit, behind the forcefield. Atal'ai Deathwalkers, High Priests, Priests and Mummified Atal'ai fill it, and Jammal'an the Prophet waits at the far end with Ogom the Wretched. Pull slowly, the priests heal and run for help.
 Atal'ai DeathwalkerElite
Area 8 of 10
Sanctum of the Fallen God
The western room with the four Eternal Flames, where the Avatar of Hakkar ritual takes place. Hakkari Frostwings guard the halls on the way. Come here only if someone carries the Egg of Hakkar or Yeh'kinya's Scroll.
 Hakkari FrostwingElite
Area 9 of 10
Southern hall
The hall in front of the Chamber of the Dreamer. In Classic Hazzas and Morphaz appear here once Dreamscythe and Weaver are dead, with a few dragonkin around them.
BetaSpot from beta reports, it can still change
Area 10 of 10
Chamber of the Dreamer
The last room, with the Shade of Eranikus and the Essence Font for The Essence of Eranikus. At level 60 Malfurion Stormrage appears here for Eranikus, Tyrant of the Dream.
Boss here
Encounters
Boss roster
Main bosses11

1Boss 1 of 11
Balcony Minibosses: Gasher, Hukku, Loro, Mijan, Zolo, Zul'Lor
13 abilities
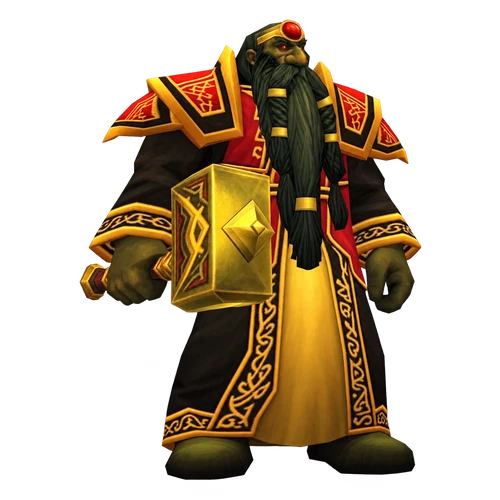
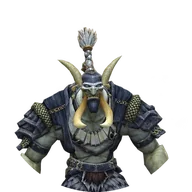
The six Atal'ai Defenders Gasher, Hukku, Loro, Mijan, Zolo and Zul'Lor are undead troll elites, each in its own alcove around the Pit of Sacrifice. They are six small fights, not one encounter, and together they hold Jammal'an's forcefield. They also drop the Voodoo Feathers for the warrior, paladin, shaman and warlock quests.
Abilities
- Curse of Blood · Increases the Physical damage taken by an enemy for 10 min.
- Improved Blocking · Increases the caster's chance to block by 85% for 6 sec.
- Shield Slam · Inflicts damage to an enemy, stunning it for 2 sec.
- Thorns Aura · Causes Nature damage to any creature that strikes a nearby party member. Players may only have one aura on them per paladin at any one time. The aura lasts 1 min.
- Renew · Heals an ally for damage every 3 sec. for 20 sec.
- Healing Ward · Summons a ward that lasts 30 sec. and periodically heals allies in an area around it.
- Healing Wave · Calls upon Nature magic to heal an ally.
- Chain Lightning · Strikes an enemy with a lightning bolt that arcs to another nearby enemy. The spell affects up to 3 targets, inflicting greater Nature damage to each successive target.
- Atal'ai Skeleton Totem · Casts an Atal'ai Totem, which lasts 1 min. and periodically summons an Atal'ai Skeleton. Each Skeleton lasts 30 sec.
- Cleave · Inflicts normal damage to an enemy and its nearest ally.
- Frailty · Reduces all attributes of nearby enemies for 1 min.
- Shadow Bolt · Hurls a bolt of dark magic at an enemy, inflicting Shadow damage.
- Strike · Strikes at an enemy, inflicting increased melee damage.
Tactics
- In Classic you walk the Hall of the Cursed and take the stairs marked by stone masks down to each alcove. Every Defender stands with a small pack, so clear the pack before you pull the troll.
- Hukku brings a Voidwalker, a Succubus and an Imp and casts Curse of Blood. Keep the Succubus off the healer, she Seduces.
- Mijan heals with Healing Wave and drops a Healing Ward, Zolo plants an Atal'ai Skeleton Totem that keeps calling skeletons. Kill the ward and the totem at once.
- Loro stuns with Shield Slam, Zul'Lor Cleaves and lowers the attributes of everyone near him with Frailty.
- In Classic Jammal'an yells that his shield is gone when the sixth Defender dies, and the forcefield of the Lair of the Chosen drops.
Tank
Pull each pack away from the alcove edge and turn the troll away from the group.
Healer
Stay out of Frailty range and keep a decurse ready for Curse of Blood.
Damage
Kill wards, totems and Hukku's pets the moment they appear.
Watch out for: Mijan's Healing Ward left standing.
Adds
- Hukku's Voidwalker ×1
- Hukku's Succubus ×1 · Seduction: Seduces the target, preventing all actions for up to 15 sec. Any damage caused will remove the effect. Only works against Humanoids. · Lash of Pain: An instant attack that lashes the target, causing [Unholy Power: 47.3 / 43] Shadow damage.
- Hukku's Imp ×1 · Firebolt: Deals [Unholy Power: (35.5282 * 1.1) to (39.4718 * 1.1) / 36 to 39] Fire damage to a target. · Fire Shield: Surrounds the target in a shield of fire. Every strike against the target causes Fire damage to the attacker. Lasts 3 min. Your pet cannot cast Fire Shield on itself.
 Amber Voodoo Feather
 Blue Voodoo Feather
 Green Voodoo Feather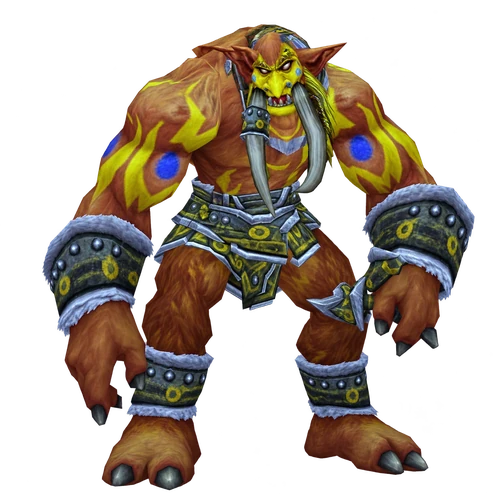
Atal'alarion, the Guardian of the Idol, is a dire troll at the bottom of the Pit of Refuse. He is optional and only shows up after the statue order, and druids need his Putrid Vine for A Better Ingredient.
Abilities
- Sweeping Slam · Inflicts normal damage to enemies in a cone in front of the caster, knocking them back.
- Ground Tremor · Stuns nearby enemies, rendering them unable to move or attack for 2 sec.
Tactics
- Clear the Hall of Serpents first, then put one player on each statue balcony.
- In Classic you use the six Atal'ai Statues in this order: south, north, south-west, south-east, north-west, north-east. A statue used in the right order turns green, a wrong one curses the player who used it. Once all six glow, Atal'alarion spawns in the water at the bottom.
- Sweeping Slam hits everyone in a cone in front of him and throws them high into the air, and the fall hurts. Only the tank stands in front, with the back to a wall.
- Ground Tremor stuns everyone near him for 2 seconds. Ranged and the healer keep their distance.
Tank
Back to a wall so Sweeping Slam cannot throw you far, and taunt at once if he turns to someone else.
Healer
Stand at max range and heal players who land from Sweeping Slam.
Damage
Hit him from the sides or from behind.
Watch out for: Sweeping Slam throwing the healer into the air.
Notable loot
 Headspike · Two-Hand
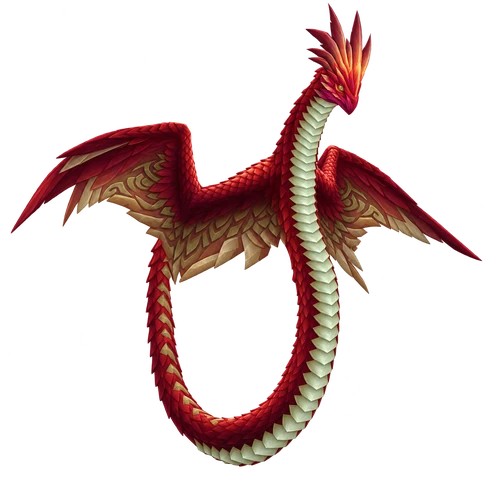
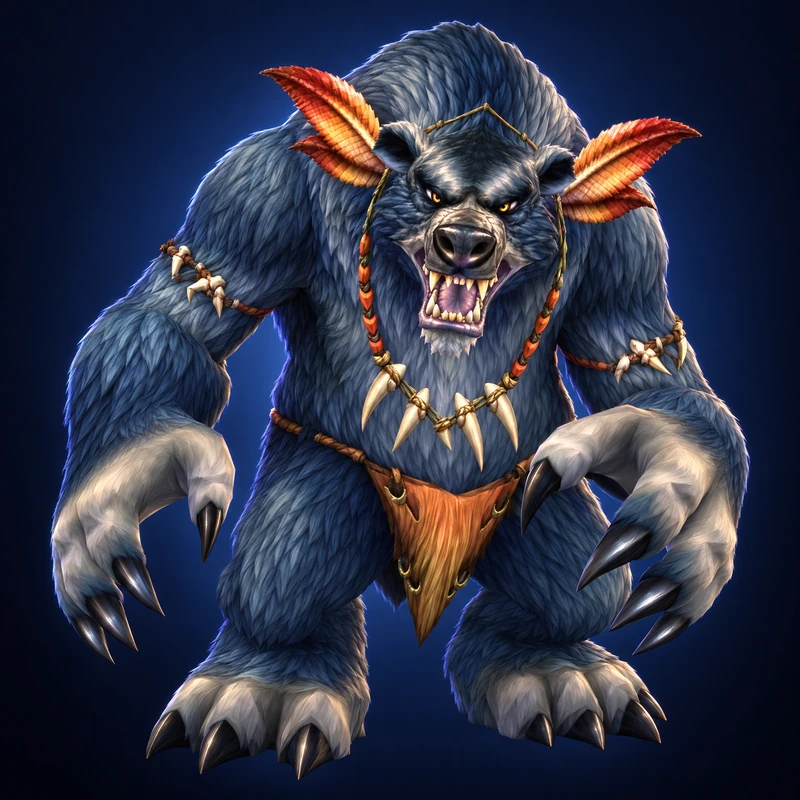
The Spawn of Hakkar is an optional elite wind serpent, not a boss encounter. It patrols the Hall of Serpents and drops the Slitherscale Boots.
Abilities
- Acid of Hakkar · Inflicts Nature damage to an enemy every 2 sec. for 1 min.
Tactics
- Pull it alone when its patrol comes by, so it never joins a worm pack.
- Acid of Hakkar deals Nature damage every 2 seconds for a full minute. Keep healing its target after the kill.
Healer
Heal the acid target steadily, the damage keeps coming for a minute.
Notable loot
 Slitherscale Boots · Feet
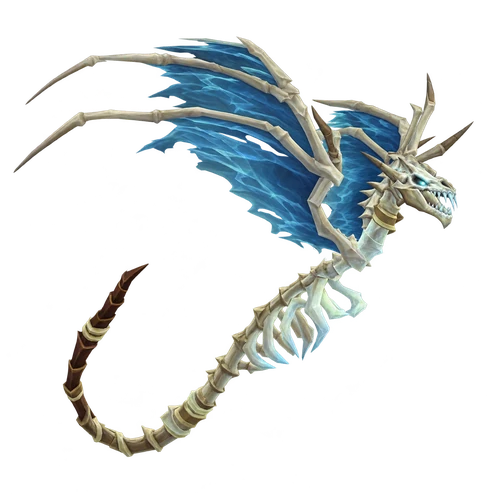
The Avatar of Hakkar is the optional event boss of the Sanctum of the Fallen God. He only comes when someone starts the ritual with the Egg of Hakkar from The God Hakkar, or with Yeh'kinya's Scroll once that quest is done.
Abilities
- Cause Insanity · Drives an enemy target temporarily insane, speeding its attacks by 50% and its movement by 80%, as well as causing it to attack its own allies for 6 sec.
- Curse of Tongues · Forces nearby enemies to speak in Demonic, reducing their casting speed by 50% for 15 sec. Only one curse per warlock can be active on any one target.
- Lash · Stuns an enemy for 2 sec. and has a chance to disarm.
Tactics
- In Classic the egg or the scroll starts the ritual in the middle of the room. Hakkari Minions wander around it, so stay along the walls and leave them alone.
- Hakkari Bloodkeepers come one at a time. Each drops Hakkari Blood, and one blood puts out one of the four Eternal Flames. Let one player loot all the blood, Free-for-All loot helps here.
- Nightmare Suppressors walk in and cast on the altar. Pick them up and kill them as they come.
- In Classic the Avatar spawns when the last flame goes out. If the whole group stands at a wall before that, you drop combat first and start the boss fresh.
- Cause Insanity makes a player attack the group for 6 seconds, so stun or CC them. Curse of Tongues slows casting by 50% for 15 seconds, decurse it. Lash stuns the tank and can disarm.
Tank
Pick up the Avatar at once and expect short Lash stuns.
Healer
Decurse Curse of Tongues on yourself first.
Damage
CC the insane player, then back on the boss.
Watch out for: A player under Cause Insanity loose on the healer.
Adds
- Hakkari Bloodkeeper ×4 · Corruption: Corrupts the target, causing Shadow damage over 18 sec. · Shadow Bolt: Hurls a bolt of dark magic at an enemy, inflicting Shadow damage.
- Hakkari Minion
- Nightmare Suppressor
Notable loot
 Might of Hakkar · Main Hand
 Spire of Hakkar · Two-Hand
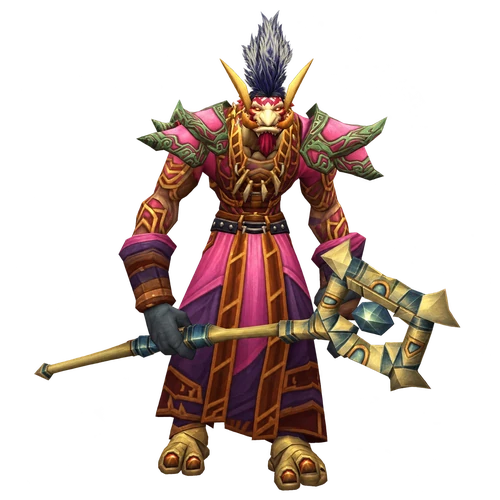
Jammal'an the Prophet, leader of the Atal'ai, waits behind a forcefield at the end of the Lair of the Chosen with Ogom the Wretched at his side. His head is the goal of Jammal'an the Prophet.
Abilities
- Hex of Jammal'an
- Earthgrab Totem · Summons an Earthgrab Totem that lasts 30 sec. and periodically immobilizes nearby enemies.
- Flamestrike · Calls down a pillar of flame, burning all enemies in a selected area and inflicting additional damage every 2 sec. for 8 sec.
- Healing Wave · Calls upon Nature magic to heal an ally.
Tactics
- In Classic the forcefield drops only after all six Atal'ai Defenders are dead. Clear the Deathwalker packs of the Lair before the pull.
- Hex of Jammal'an turns a player into a hostile berserker that attacks the group. Spread out and CC or kite the berserker until the hex ends.
- Interrupt Healing Wave, he heals himself and Ogom with it.
- Kill the Earthgrab Totem and step out of Flamestrike, the roots hold you in the fire.
- Classic guides disagree on the kill order. One plan pulls Ogom away and kills him fast because he has far less health, the other burns Jammal'an first to stop his heals. Agree on one before the pull.
Tank
Drag Jammal'an out of Flamestrike while an off-tank or a ranged player takes Ogom.
Healer
Keep a heal ready for whoever the berserker chases.
Damage
Interrupt Healing Wave and kill the totem, then go back to your kill target.
Watch out for: A Healing Wave nobody interrupts.
Adds
- Ogom the Wretched ×1 · Shadow Bolt: Hurls a bolt of dark magic at an enemy, inflicting Shadow damage. · Shadow Word: Pain: Utters a word of darkness, inflicting Shadow damage to an enemy every 3 sec. for 18 sec. · Curse of Weakness: Reduces the Physical damage dealt by an enemy for 2 min. Only one curse per warlock can be active on any one target.
Notable loot
 Kilt of the Atal'ai Prophet · Legs
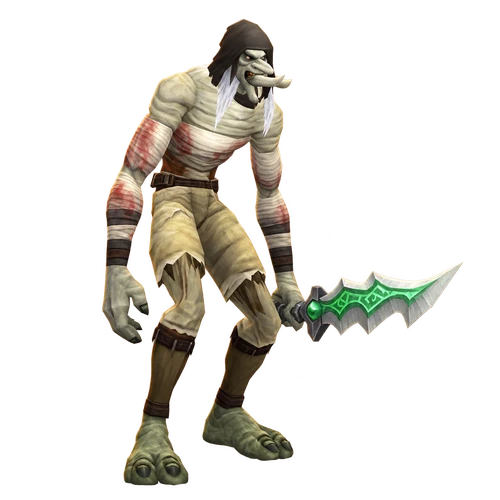
Ogom the Wretched is the undead troll who fights next to Jammal'an. He has no encounter of his own and dies as part of the Jammal'an fight. He drops Fist of the Damned.
Abilities
- Shadow Bolt · Hurls a bolt of dark magic at an enemy, inflicting Shadow damage.
- Shadow Word: Pain · Utters a word of darkness, inflicting Shadow damage to an enemy every 3 sec. for 18 sec.
- Curse of Weakness · Reduces the Physical damage dealt by an enemy for 2 min. Only one curse per warlock can be active on any one target.
Tactics
- Shadow Bolt and Shadow Word: Pain hurt more than Jammal'an's melee, so an off-tank or a ranged player keeps him busy away from the group.
- Curse of Weakness lowers physical damage for 2 minutes. Decurse the tank and the melee.
Tank
Take Ogom off to the side if you have an off-tank.
Healer
Watch the Shadow Word: Pain targets.
Notable loot
 Fist of the Damned · One-Hand
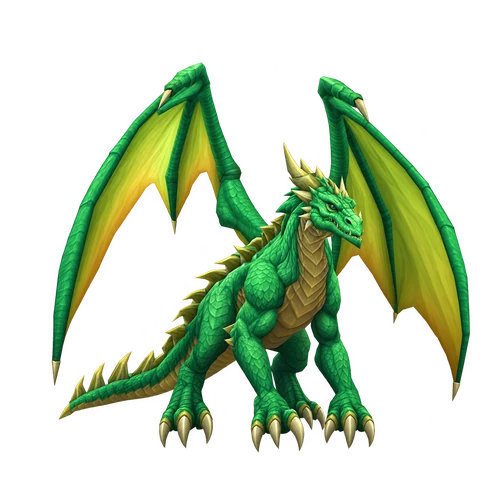
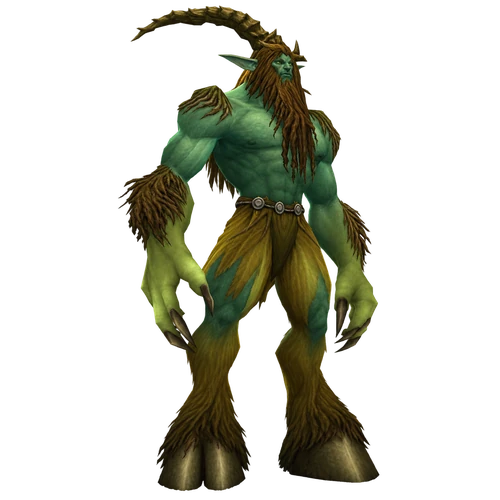
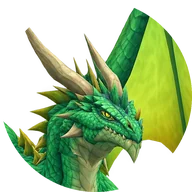
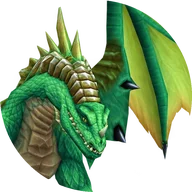
Dreamscythe is one of the two green drakes that appear in the Pit of Sacrifice after Jammal'an dies, fought together with Weaver.
Abilities
- Wing Flap · Strikes enemies in a cone in front of the caster, knocking them back.
- Acid Breath · Inflicts Nature damage and an additional damage every 5 sec. to enemies in a cone in front of the caster. Lasts 45 sec.
Tactics
- Pull the drakes away from the hole in the middle and from other dragonkin, and kill one at a time.
- Acid Breath burns everyone in a cone in front of him and keeps ticking for 45 seconds. Only the tank stands in front.
- Wing Flap knocks back everyone in front, so the tank keeps the back to a wall.
Tank
Back to a wall, drake facing away from the group.
Healer
Heal through the Acid Breath ticks on the tank.
Damage
Stand at his sides or behind him.
Watch out for: Fighting right next to the hole in the floor.
Notable loot
 Smoldering Claw · Two-Hand
 Nightfall Drape · Back
 Dawnspire Cord · Waist
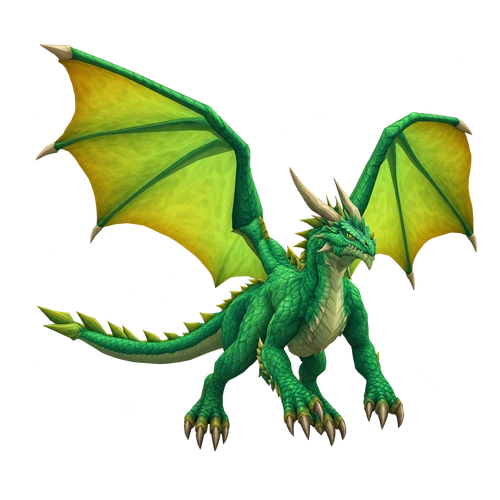
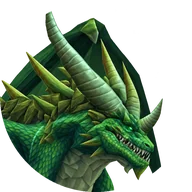
Weaver is the second green drake of the Pit of Sacrifice, there with Dreamscythe after Jammal'an. Same abilities, same loot table.
Abilities
- Wing Flap · Strikes enemies in a cone in front of the caster, knocking them back.
- Acid Breath · Inflicts Nature damage and an additional damage every 5 sec. to enemies in a cone in front of the caster. Lasts 45 sec.
Tactics
- Same fight as Dreamscythe: tank against a wall, drake turned away, well away from the hole.
- If both come at once, an off-tank holds Weaver while the group kills Dreamscythe.
Notable loot
- Smoldering Claw · Two-Hand
- Nightfall Drape · Back
- Dawnspire Cord · Waist
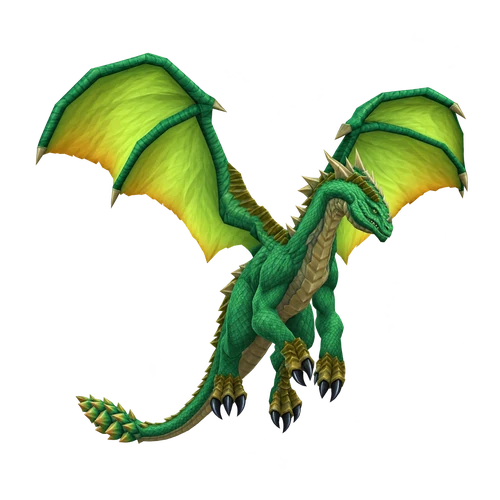
Hazzas appears with Morphaz in the hall outside the Chamber of the Dreamer once Weaver and Dreamscythe are dead.
Abilities
- Wing Flap · Strikes enemies in a cone in front of the caster, knocking them back.
- Acid Breath · Inflicts Nature damage and an additional damage every 5 sec. to enemies in a cone in front of the caster. Lasts 45 sec.
Tactics
- The same drake fight: Wing Flap and Acid Breath in front, tank against a wall.
- Clear the dragonkin in the hall first and pull Hazzas and Morphaz one at a time if you can.
Tank
Split the two drakes and keep both turned away.
Notable loot
- Smoldering Claw · Two-Hand
- Nightfall Drape · Back
- Dawnspire Cord · Waist
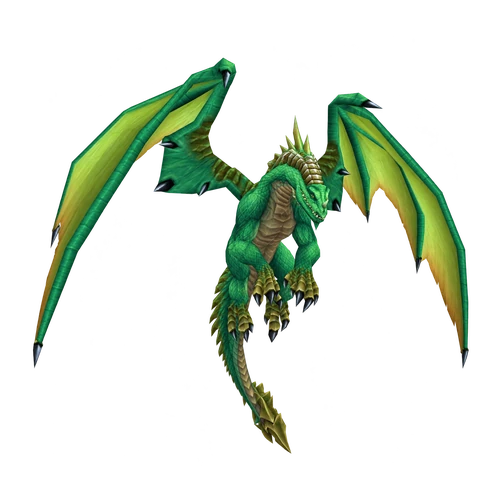
Morphaz is the drake next to Hazzas and the one the class quests care about. He drops the Tooth of Morphaz for hunters, the Azure Key for rogues, the Blood of Morphaz for priests and the Arcane Shard for mages.
Abilities
- Wing Flap · Strikes enemies in a cone in front of the caster, knocking them back.
- Acid Breath · Inflicts Nature damage and an additional damage every 5 sec. to enemies in a cone in front of the caster. Lasts 45 sec.
Tactics
- The same drake fight as Hazzas. Kill one, then the other.
- Check who needs a quest item before anyone walks away from the corpse.
Notable loot
- Smoldering Claw · Two-Hand
- Nightfall Drape · Back
- Dawnspire Cord · Waist
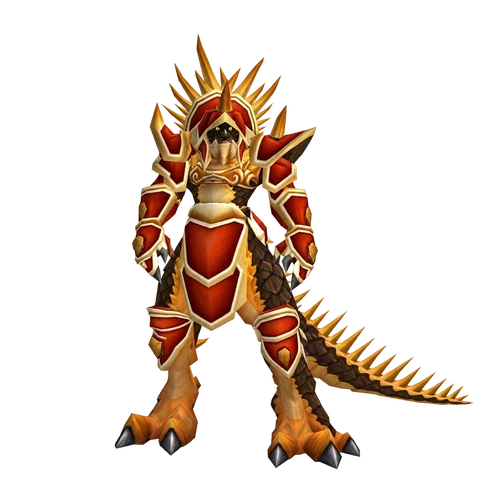
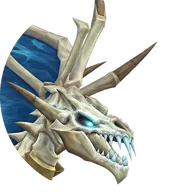
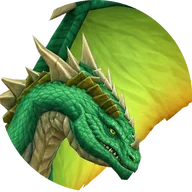
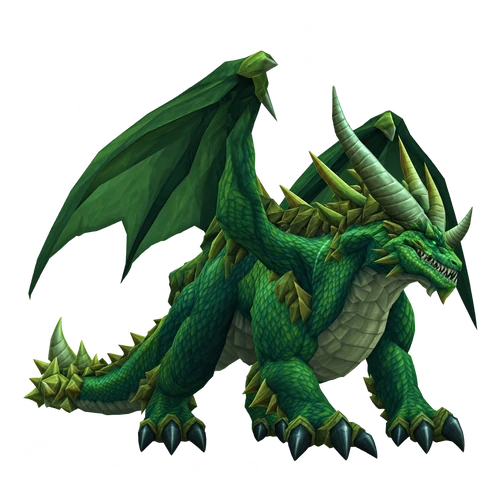
The Shade of Eranikus, a level 55 green dragon in the Chamber of the Dreamer, is the last boss of Sunken Temple. He drops the Essence of Eranikus for every group member, which starts The Essence of Eranikus.
Abilities
- Deep Slumber · Lulls an enemy into a deep sleep for 15 sec., rendering it unable to act, but also making it invulnerable.
- War Stomp · Inflicts normal damage to nearby enemies, knocking them back and stunning them for 5 sec.
- Acid Breath · Inflicts Nature damage and an additional damage every 5 sec. to enemies in a cone in front of the caster. Lasts 45 sec.
- Thrash · Gives the caster 2 extra attacks.
Tactics
- In Classic he calls every dragonkin still alive in the temple to his side, so clear the middle level and kill all four drakes first.
- Deep Slumber puts the player with the most threat to sleep for 15 seconds and makes them immune. A second tank or a pet takes over, and threat drops like Fade help control who gets hit.
- War Stomp knocks back and stuns everyone near him for 5 seconds. Ranged and the healer stay out of melee range.
- Acid Breath hits a cone in front and Thrash gives him two extra swings. Melee stand at his side, never in front.
- It is a long fight, so healers watch their mana.
Tank
Keep him facing away and expect Thrash spikes.
Healer
Stay out of War Stomp range and pace your mana.
Damage
Watch your threat while the tank sleeps.
Watch out for: Leftover dragonkin running in when he is pulled.
Notable loot
 Horns of Eranikus · Head
Trash
Dangerous trash and diseases
Most wipes here start before a boss. These are the packs and effects to respect.
Oozes, worms and lurkers in the basement
The basement is full of elite beasts. Murk Worms put a Slowing Poison on you, Saturated Oozes split off Oozelings and Deep Lurkers Trample everyone around them. The non-elite Slime Maggots like to join a fight close by. Cure the poison, gather the Oozelings for AoE and pull small. These mobs drop the Atal'ai Haze for the Un'Goro quests.
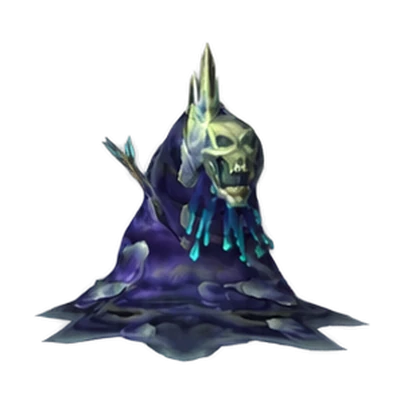
Atal'ai on the upper ring
Packs of a Witch Doctor with Warriors, Unliving Atal'ai or Corpse Eaters. The Witch Doctor turns a player into a frog with Hex, casts Chain Lightning and heals with Healing Wave, so kill or CC him first. Unliving Atal'ai spread Wandering Plague, a disease that jumps to players standing close, and use Enrage. Warriors open bleeds with Rend.
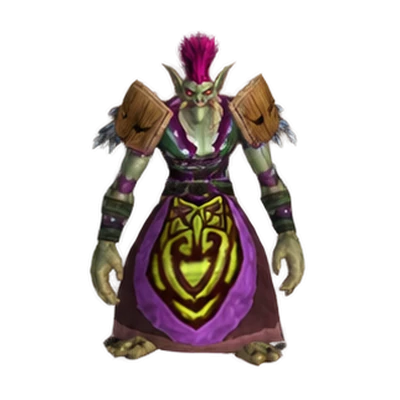
Deathwalkers in the Lair of the Chosen
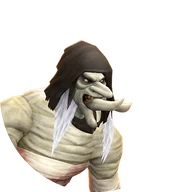
Atal'ai Deathwalkers Fear a player and leave an Atal'ai Deathwalker's Spirit when they die. In Classic the spirit chases one player and hits hard until it fades after about half a minute, so kite it. High Priests heal, shield themselves and call skeletons, and Mummified Atal'ai cast Fevered Plague, a long disease. Pull into a corner so nobody runs feared into the next pack, interrupt the priests and cure the plague.
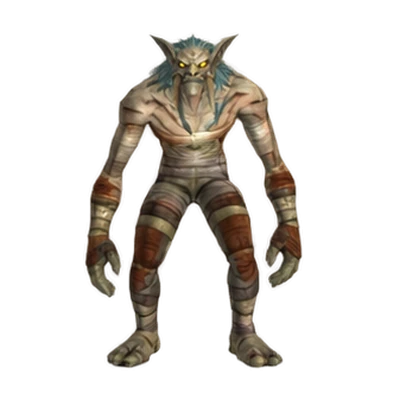
Nightmare dragonkin
Green dragonkin of the middle level. Nightmare Wyrmkin Sleep a player for up to 20 seconds and spit acid, Nightmare Wanderers use Pierce Armor to cut the tank's armor by 75% for 20 seconds, and Nightmare Scalebanes raise their block chance. Dispel the Sleep and kill the Wyrmkin first. Clear them all on your way, they matter again at Eranikus.
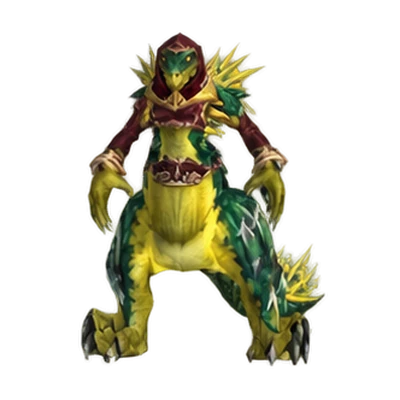
Hakkari Frostwings
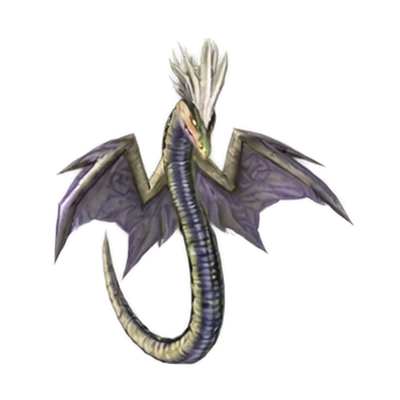
Wind serpents in the halls around the Sanctum of the Fallen God. Frostwings cast Frostbolt Volley, which hits and slows the whole group, and root everyone close with Frost Nova. Hakkari Sappers Mana Burn your casters. Melee stay close, kill the Sappers early and heal through the volleys.
Quests
Sunken Temple quests
Twenty-two quests lead into Sunken Temple. Marvon Rivetseeker in Tanaris has The Stone Circle, Into the Depths and Secret of the Circle, Yeh'kinya gives The God Hakkar, the Atal'ai Exile in the Hinterlands Jammal'an the Prophet, and Eranikus himself drops the start of The Essence of Eranikus. Each faction has its own quest from Brohann Caskbelly or Fel'zerul and an Un'Goro quest for the Atal'ai Haze, and nine classes have a class quest here.
Known issue: Every quest needs level 38 or more. The beta cap is 30 since October 1, and the Sunken Temple quests need level 38 and up, so no giver offers them on the beta yet.
Alliance18
Pick up before you go
- 1Stormwind: Brohann Caskbelly (Into The Temple of Atal'Hakkar, after its chain).
- 2Feralas: Angelas Moonbreeze at Feathermoon Stronghold (The Sunken Temple) and Gregan Brewspewer (Haze of Evil).
- 3Tanaris: Marvon Rivetseeker (The Stone Circle, then Into the Depths and Secret of the Circle) and Yeh'kinya (The God Hakkar, end of a long chain).
- 4The Hinterlands: the Atal'ai Exile (Jammal'an the Prophet).
- 5Class quests for warriors, paladins, hunters, rogues, priests, mages, warlocks and druids: see their givers in the quest list.
- Level 50, from 38
- Quest giver
- Brohann CaskbellyStormwind City · 64.4, 20.9
- Turn in
- Brohann CaskbellyStormwind City · 64.4, 20.9
Brohann Caskbelly in Stormwind, the end of a longer chain. Collect ten Atal'ai Tablets in the halls of the outer temple, before the portal.
You get: Guardian Talisman
Known issue
- Level 51, from 46
- Quest giver
- Angelas MoonbreezeFeralas · 31.8, 45.5
- Turn in
- Marvon RivetseekerTanaris · 52.6, 45.8
Angelas Moonbreeze at Feathermoon Stronghold in Feralas sends you to Marvon Rivetseeker in Tanaris.
Known issue
- Level 51, from 46
Follow-up: The Sunken Temple
The Stone Circle- Quest giver
- Marvon RivetseekerTanaris · 52.6, 45.8
- Turn in
- Marvon RivetseekerTanaris · 52.6, 45.8
Marvon wants the Stone Circle from the chest by his workshop in Ratchet.
Known issue
- Level 51, from 46
Follow-up: The Stone Circle
Into the Depths- Quest giver
- Marvon RivetseekerTanaris · 52.6, 45.8
- Turn in
- Altar of Hakkarinside the dungeon
Take the Stone Circle down to the Altar of Hakkar in the basement of the temple.
Known issue
- Level 51, from 46
Follow-up: The Stone Circle
Secret of the Circle- Quest giver
- Marvon RivetseekerTanaris · 52.6, 45.8
- Turn in
- Idol of Hakkarinside the dungeon
Use the six Atal'ai Statues in the right order, then loot the Idol of Hakkar in the Pit of Refuse.
You get: Hakkari Urn
Known issue
- Level 53, from 38
- Quest giver
- Atal'ai ExileThe Hinterlands · 33.6, 75.2
- Turn in
- Atal'ai ExileThe Hinterlands · 33.6, 75.2
The Atal'ai Exile in the Hinterlands wants the head of Jammal'an the Prophet from the Lair of the Chosen.
Known issue
- Level 53, from 40
Yeh'kinya in Tanaris, the end of the Screecher Spirits chain. Start the ritual with the Egg of Hakkar, kill the Avatar of Hakkar and fill the egg with his essence.
Known issue
- Level 55, from 48
- Starts from
 Essence of Eranikus
- Turn in
- Essence Fontinside the dungeon
Starts from the Essence of Eranikus, which the Shade of Eranikus drops for every group member. Place it in the Essence Font in the same room.
Known issue
- Level 52, from 47
- Quest giver
- Gregan BrewspewerFeralas · 45.0, 25.5
- Turn in
- MuiginUn'Goro Crater · 43.0, 9.5
Gregan Brewspewer in Feralas, part of Muigin's Un'Goro chain. Bring five Atal'ai Haze from the oozes, worms and lurkers of the basement to Muigin.
Known issue
- Level 52, from 50
- Quest giver
- Fallen Hero of the HordeSwamp of Sorrows · 34.2, 65.7
- Turn in
- Fallen Hero of the HordeSwamp of Sorrows · 34.2, 65.7
Warriors: the Fallen Hero of the Horde on the path to the Blasted Lands wants two of each Voodoo Feather from the six Atal'ai Defenders.
Known issue
- Level 52, from 50
- Quest giver
- Commander Ashlam ValorfistWestern Plaguelands · 42.8, 84.0
- Turn in
- Commander Ashlam ValorfistWestern Plaguelands · 42.8, 84.0
Alliance paladins, humans and dwarves only: Commander Ashlam Valorfist at Chillwind Camp wants the six Voodoo Feathers.
Known issue
- Level 52, from 50
Hunters: Ogtinc in Azshara wants the Tooth of Morphaz.
Known issue
- Level 52, from 50
- Quest giver
- Archmage XylemAzshara · 29.5, 40.4
- Turn in
- Lord Jorach RavenholdtAlterac Mountains · 86.0, 79.0
Rogues: Archmage Xylem in Azshara sends you for the Azure Key on Morphaz. Turn it in to Lord Jorach Ravenholdt in the Alterac Mountains.
Known issue
- Level 52, from 50
- Quest giver
- OgtincAzshara · 42.4, 42.6
- Turn in
- Greta MosshoofFelwood · 51.2, 82.2
Priests: Ogtinc in Azshara sends you for the Blood of Morphaz. Turn it in to Greta Mosshoof in Felwood.
Known issue
- Level 52, from 50
- Quest giver
- Archmage XylemAzshara · 29.5, 40.4
- Turn in
- Archmage XylemAzshara · 29.5, 40.4
Mages: Archmage Xylem in Azshara wants the Arcane Shard from Morphaz.
Known issue
- Level 52, from 50
Warlocks: Impsy in Felwood wants the six Voodoo Feathers. The only class quest here that still lists its rewards.
Known issue
- Level 52, from 50
- Quest giver
- Torwa PathfinderUn'Goro Crater · 71.5, 76.0
- Turn in
- Torwa PathfinderUn'Goro Crater · 71.5, 76.0
Druids: Torwa Pathfinder in Un'Goro Crater wants the Putrid Vine from Atal'alarion.
Known issue
- Level 60, from 60
- Quest giver
- Malfurion Stormrageinside the dungeon
- Turn in
- Forest WispTeldrassil · 37.5, 47.9
Level 60, after The Charge of the Dragonflights: Malfurion Stormrage appears in the Chamber of the Dreamer and sends you to a Forest Wisp in Teldrassil.
Horde18
Pick up before you go
- 1Stonard: Fel'zerul (The Temple of Atal'Hakkar, after the Pool of Tears chain).
- 2Feralas: Witch Doctor Uzer'i at Camp Mojache (The Sunken Temple).
- 3Ratchet: Liv Rizzlefix (Zapper Fuel).
- 4Tanaris: Marvon Rivetseeker (The Stone Circle, then Into the Depths and Secret of the Circle) and Yeh'kinya (The God Hakkar, end of a long chain).
- 5The Hinterlands: the Atal'ai Exile (Jammal'an the Prophet).
- 6Class quests for warriors, hunters, rogues, priests, shamans, mages, warlocks and druids: see their givers in the quest list.
- Level 50, from 38
Fel'zerul in Stonard, after Pool of Tears, The Atal'ai Exile and Return to Fel'Zerul. Bring him 20 Fetishes of Hakkar from the Atal'ai trolls inside.
You get: Guardian Talisman
Known issue
- Level 51, from 46
- Quest giver
- Witch Doctor Uzer'iFeralas · 74.4, 43.4
- Turn in
- Marvon RivetseekerTanaris · 52.6, 45.8
Witch Doctor Uzer'i at Camp Mojache in Feralas sends you to Marvon Rivetseeker in Tanaris.
Known issue
- Level 51, from 46
Follow-up: The Sunken Temple
The Stone Circle- Quest giver
- Marvon RivetseekerTanaris · 52.6, 45.8
- Turn in
- Marvon RivetseekerTanaris · 52.6, 45.8
Marvon wants the Stone Circle from the chest by his workshop in Ratchet.
Known issue
- Level 51, from 46
Follow-up: The Stone Circle
Into the Depths- Quest giver
- Marvon RivetseekerTanaris · 52.6, 45.8
- Turn in
- Altar of Hakkarinside the dungeon
Take the Stone Circle down to the Altar of Hakkar in the basement of the temple.
Known issue
- Level 51, from 46
Follow-up: The Stone Circle
Secret of the Circle- Quest giver
- Marvon RivetseekerTanaris · 52.6, 45.8
- Turn in
- Idol of Hakkarinside the dungeon
Use the six Atal'ai Statues in the right order, then loot the Idol of Hakkar in the Pit of Refuse.
You get: Hakkari Urn
Known issue
- Level 53, from 38
- Quest giver
- Atal'ai ExileThe Hinterlands · 33.6, 75.2
- Turn in
- Atal'ai ExileThe Hinterlands · 33.6, 75.2
The Atal'ai Exile in the Hinterlands wants the head of Jammal'an the Prophet from the Lair of the Chosen.
Known issue
- Level 53, from 40
Yeh'kinya in Tanaris, the end of the Screecher Spirits chain. Start the ritual with the Egg of Hakkar, kill the Avatar of Hakkar and fill the egg with his essence.
Known issue
- Level 55, from 48
- Starts from
- Essence of Eranikus
- Turn in
- Essence Fontinside the dungeon
Starts from the Essence of Eranikus, which the Shade of Eranikus drops for every group member. Place it in the Essence Font in the same room.
Known issue
- Level 52, from 47
- Quest giver
- Liv RizzlefixThe Barrens · 62.4, 38.6
- Turn in
- LarionUn'Goro Crater · 45.5, 8.5
Liv Rizzlefix in Ratchet hands you the Unloaded Zapper. Fill it with five Atal'ai Haze from the basement and take it to Larion in Un'Goro Crater.
Known issue
- Level 52, from 50
- Quest giver
- Fallen Hero of the HordeSwamp of Sorrows · 34.2, 65.7
- Turn in
- Fallen Hero of the HordeSwamp of Sorrows · 34.2, 65.7
Warriors: the Fallen Hero of the Horde on the path to the Blasted Lands wants two of each Voodoo Feather from the six Atal'ai Defenders.
Known issue
- Level 52, from 50
Hunters: Ogtinc in Azshara wants the Tooth of Morphaz.
Known issue
- Level 52, from 50
- Quest giver
- Archmage XylemAzshara · 29.5, 40.4
- Turn in
- Lord Jorach RavenholdtAlterac Mountains · 86.0, 79.0
Rogues: Archmage Xylem in Azshara sends you for the Azure Key on Morphaz. Turn it in to Lord Jorach Ravenholdt in the Alterac Mountains.
Known issue
- Level 52, from 50
- Quest giver
- OgtincAzshara · 42.4, 42.6
- Turn in
- Greta MosshoofFelwood · 51.2, 82.2
Priests: Ogtinc in Azshara sends you for the Blood of Morphaz. Turn it in to Greta Mosshoof in Felwood.
Known issue
- Level 52, from 50
- Quest giver
- Bath'rah the WindwatcherAlterac Mountains · 80.3, 64.7
- Turn in
- Bath'rah the WindwatcherAlterac Mountains · 80.3, 64.7
Horde shamans: Bath'rah the Windwatcher in the Alterac Mountains wants the six Voodoo Feathers.
Known issue
- Level 52, from 50
- Quest giver
- Archmage XylemAzshara · 29.5, 40.4
- Turn in
- Archmage XylemAzshara · 29.5, 40.4
Mages: Archmage Xylem in Azshara wants the Arcane Shard from Morphaz.
Known issue
- Level 52, from 50
Warlocks: Impsy in Felwood wants the six Voodoo Feathers. The only class quest here that still lists its rewards.
Known issue
- Level 52, from 50
- Quest giver
- Torwa PathfinderUn'Goro Crater · 71.5, 76.0
- Turn in
- Torwa PathfinderUn'Goro Crater · 71.5, 76.0
Druids: Torwa Pathfinder in Un'Goro Crater wants the Putrid Vine from Atal'alarion.
Known issue
- Level 60, from 60
- Quest giver
- Malfurion Stormrageinside the dungeon
- Turn in
- Forest WispTeldrassil · 37.5, 47.9
Level 60, after The Charge of the Dragonflights: Malfurion Stormrage appears in the Chamber of the Dreamer and sends you to a Forest Wisp in Teldrassil.
Loot
Loot table
Every boss drop and every quest reward of the dungeon. Hover an item for its stats.
The Forever loot here is ten blue boss items. Casters look at the Spire of Hakkar, the Kilt of the Atal'ai Prophet and the Nightfall Drape and Dawnspire Cord that all four drakes share, shamans at the Horns of Eranikus. Melee find Headspike, the Smoldering Claw and the Might of Hakkar, tanks Fist of the Damned and, for druids, the Slitherscale Boots. The God Hakkar adds a helm, a dagger and a circlet, and warlocks get their own choice from Trolls of a Feather.
| Item | Slot | Source | Req. |
|---|---|---|---|
| Headspike | Two-Hand | Atal'alarion | 46 |
| Slitherscale Boots | Feet · Leather | Spawn of Hakkar | 47 |
| Might of Hakkar | Main Hand | Avatar of Hakkar | 49 |
| Spire of Hakkar | Two-Hand | Avatar of Hakkar | 49 |
| Kilt of the Atal'ai Prophet | Legs · Cloth | Jammal'an the Prophet | 50 |
| Fist of the Damned | One-Hand | Ogom the Wretched | 49 |
| Smoldering Claw | Two-Hand | Dreamscythe +3 | 49 |
| Nightfall Drape | Back | Dreamscythe +3 | 48 |
| Dawnspire Cord | Waist · Cloth | Dreamscythe +3 | 48 |
| Horns of Eranikus | Head · Mail | Shade of Eranikus | 51 |
 Guardian Talisman Guardian Talisman | Trinket | Into The Temple of Atal'Hakkar | 38 |
 Avenguard Helm Avenguard Helm | Head · Mail | The God Hakkar | 40 |
 Lifeforce Dirk Lifeforce Dirk | One-Hand | The God Hakkar | 40 |
 Gemburst Circlet Gemburst Circlet | Head · Cloth | The God Hakkar | 40 |
 Soul Harvester Soul Harvester | Two-Hand | Trolls of a Feather | – |
 Abyss Shard Abyss Shard | Trinket | Trolls of a Feather | – |
 Robes of Servitude Robes of Servitude | Chest · Cloth | Trolls of a Feather | – |
Beta drop chances come from a handful of kills and are left out until the sample is bigger.
 Which class? Our tier lists


Collect
Achievements, Pet families and Classes from Sunken Temple
Achievement1
 Master SpelunkerEarned in Sunken Temple, Needs Shade of Eranikus
Tameable beasts2
 Hakkari FrostwingTameable in Sunken Temple
- Hakkari SapperTameable in Sunken Temple
Pet family1
- Wind SerpentMembers Spawn of Hakkar
Pet abilities2
 DiveLearned from Spawn of HakkarClassic
 Lightning BreathLearned from Spawn of HakkarClassic
Class1
 HunterUses Spawn of Hakkar
Before you go
Before you go
- Do the Tanaris chain firstMarvon Rivetseeker in Tanaris gives Into the Depths and Secret of the Circle once you bring him the Stone Circle from Ratchet. Both are done in the basement, so grab them before the run.
- Bring the egg or skip the AvatarThe Avatar of Hakkar only comes if someone carries the Egg of Hakkar from The God Hakkar or Yeh'kinya's Scroll. The chain starts with Screecher Spirits and sends you across Feralas, Zul'Farrak and the Hinterlands, so start it early.
- Bring a decurse and a disease cureCurses from Hukku, Ogom and the Avatar, Wandering Plague and Fevered Plague from the trolls and the Slowing Poison of the worms come up all run long. Every cleanse saves the healer mana.
- Plan your crowd controlWitch Doctors, Warriors and the High Priests are humanoids for Polymorph and Sap, the Defenders, Deathwalkers and Unliving Atal'ai are undead for Shackle Undead, and the Atal'ai Slaves are demons for Banish. Keep one CC free for the Hex of Jammal'an.
- Assign the six statue balconies before anyone clicks, one player per statue, and call the order out loud.
- Stay away from the hole in the Pit of Sacrifice. A fall drops you into the Pit of Refuse at the bottom.
- Four class quests need an item from Morphaz and four need the Voodoo Feathers of the Defenders, so ask who needs what before the run.
FAQ
Questions players ask
What level is Sunken Temple in WoW Forever, and from what level can you enter?
We plan it for levels 50–60, the range the Group Finder suggests too. The Group Finder lists it at level 45, and the mobs are level 45–55. In Classic the portal let you in from level 35, and nobody has tested yet which level the Forever portal asks for. The beta cap is still 30.
Where is the Sunken Temple entrance?
In the Pool of Tears in the east of the Swamp of Sorrows. Swim to the ruin in the middle of the lake, climb in at about 70.2, 52.3 and walk down through the outer temple. The portal is underground at about 77.3, 35.9 on the zone map. The Horde flies to Stonard, the Alliance to Nethergarde Keep.
What is the statue order in Sunken Temple?
In Classic: south, north, south-west, south-east, north-west, north-east. The six Atal'ai Statues stand on balconies of the Hall of Serpents around the Pit of Refuse. A right statue turns green, a wrong one curses the player who used it. After the sixth, Atal'alarion appears at the bottom and the Idol of Hakkar for Secret of the Circle can be looted.
What quests are there for Sunken Temple?
Twenty-two. Both factions get The Stone Circle, Into the Depths and Secret of the Circle from Marvon Rivetseeker in Tanaris, The God Hakkar from Yeh'kinya, Jammal'an the Prophet from the Atal'ai Exile and The Essence of Eranikus from Eranikus himself. The Alliance adds Into The Temple of Atal'Hakkar and Haze of Evil, the Horde The Temple of Atal'Hakkar and Zapper Fuel. Nine classes have a class quest, and level 60 characters get Eranikus, Tyrant of the Dream.
How do you summon the Avatar of Hakkar?
You need the Egg of Hakkar from The God Hakkar, the end of a chain that starts with Screecher Spirits from Yeh'kinya in Tanaris, or Yeh'kinya's Scroll once that quest is done. In Classic you use it in the Sanctum of the Fallen God, kill the Hakkari Bloodkeepers as they come and put out the four Eternal Flames with their Hakkari Blood. The Avatar spawns when the last flame goes out.
Who is the last boss of Sunken Temple?
The Shade of Eranikus in the Chamber of the Dreamer, a level 55 green dragon. In Classic he calls every dragonkin still alive to his side, puts his top threat target to sleep with Deep Slumber and stuns everyone near him with War Stomp.
Do you need to kill Jammal'an before Eranikus?
In Classic, yes. Dreamscythe and Weaver only appear after Jammal'an dies, Hazzas and Morphaz only after those two, and the last pair stands in the hall in front of Eranikus. Jammal'an himself waits behind a forcefield that drops when all six Atal'ai Defenders are dead.
How long does a full Sunken Temple clear take?
Our estimate from Classic is 70–100 minutes for a full clear with the statue event, the Avatar and the quests. Nobody has timed a Forever run yet. A run that skips the basement and the Sanctum is a good deal shorter.
Is Sunken Temple a raid in WoW Forever?
No. In WoW Forever it is a dungeon for a group of five in the Group Finder. The raid version of the temple was part of Season of Discovery, not of WoW Forever.
Is Sunken Temple the same as the Sunken City?
No. Sunken Temple is the Temple of Atal'Hakkar in the Swamp of Sorrows. "Sunken City" in WoW Forever most likely means The Drowned City, a new Forever dungeon.
Sources
Sources
- Blizzard: WoW Forever beta development notes, October 1Confirmed
- Wowhead · Forever beta databaseBeta data
- Warcraft Wiki · Classic referenceClassic
- Run time and difficulty are editorial estimates by mmonster.
mmonster boost
Short on time? Run Sunken Temple with mmonster
Our boosters organize the group and run the dungeon with you. Run styles, play methods and the current price are on the service page.
Keep going